Seated Shoulder Flexor Depressor Retractor Stretch: Form, Benefits, Tips & FAQ
Learn how to perform the Seated Shoulder Flexor Depressor Retractor Stretch with proper form. Improve chest and front-shoulder mobility, support better posture, and reduce tightness with this simple seated stretch.
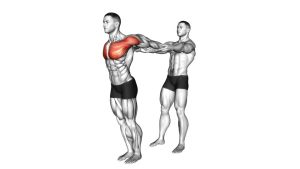
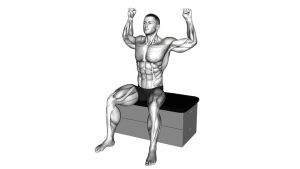
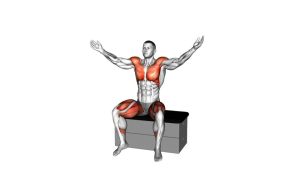
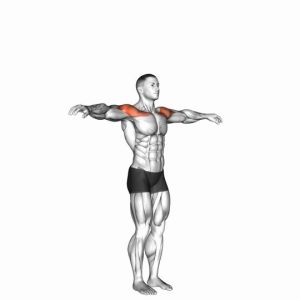
Seated Shoulder Flexor Depressor Retractor Stretch
This stretch is especially useful for people who spend long hours sitting, typing, driving, or training pressing movements. It helps counter rounded-shoulder posture by combining shoulder extension, scapular depression, and scapular retraction in one controlled position. You should feel a broad stretch through the front of the shoulders and chest, along with a gentle postural engagement between the shoulder blades.
Quick Overview
| Body Part | Shoulders |
|---|---|
| Primary Muscle | Anterior deltoid |
| Secondary Muscle | Pectoralis major, lower trapezius, rhomboids, biceps long head (light stretch) |
| Equipment | None |
| Difficulty | Beginner |
Sets & Reps (By Goal)
- General mobility: 2–3 sets × 20–30 second holds
- Posture reset: 2–4 sets × 20–40 second holds with slow breathing
- Warm-up before upper-body training: 1–2 sets × 15–25 second holds
- After pressing workouts: 2–3 sets × 30–45 second holds
- Desk-break recovery: 1–2 easy holds throughout the day
Progression rule: Increase hold time gradually before trying to push deeper into the stretch. Better posture and cleaner positioning matter more than extra range.
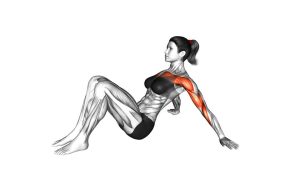
Setup / Starting Position
- Sit on the floor with your legs extended comfortably in front of you.
- Place both hands behind your hips on the floor, slightly wider than shoulder width if needed for comfort.
- Straighten your elbows and press the palms down into the ground.
- Lift your chest and gently lengthen your spine instead of slouching forward.
- Draw the shoulders down and back so the shoulder blades stay depressed and retracted.
- Keep your neck neutral and your gaze forward rather than jutting the head out.
Tip: If wrist discomfort limits your position, turn the fingers slightly outward and adjust hand spacing until the shoulders can stay open without strain.
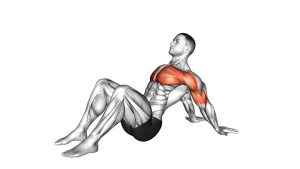
Execution (Step-by-Step)
- Set the base: Sit tall with the palms anchored behind you and the arms long.
- Open the front body: Gently push through your hands to lift the chest and create shoulder extension.
- Depress the shoulders: Actively pull the shoulders away from the ears instead of shrugging upward.
- Retract the shoulder blades: Squeeze them slightly toward each other to reinforce chest opening.
- Hold the stretch: Breathe slowly and maintain the position for the planned time without bouncing.
- Release with control: Ease out of the stretch slowly and reset before the next hold.
Pro Tips & Common Mistakes
- Keep the chest proud: A lifted chest improves the stretch and prevents collapsing into the shoulders.
- Do not shrug: The shoulders should stay down, not rise toward the ears.
- Use straight but not hyperextended elbows: Long arms help the position, but joint locking is unnecessary.
- Adjust hand angle as needed: Slightly turning the fingers outward can reduce wrist stress.
- Do not force range: A mild-to-moderate stretch held well is more effective than pushing into pain.
- Avoid excessive lower-back arching: Open the chest from the shoulders and upper torso, not by overextending the lumbar spine.
- Breathe normally: Calm breathing helps the muscles relax and improves stretch quality.
FAQ
Where should I feel this stretch?
You should feel it mainly in the front of the shoulders and across the chest. Some people also notice a gentle opening through the upper arms and front shoulder line.
Is this exercise good for rounded shoulders?
Yes, it can help. This stretch opens the tissues that often become tight with rounded posture while also teaching shoulder blades to stay down and back.
Should I do it before or after a workout?
It can work in both places. Use shorter holds before training as a mobility primer, and slightly longer holds after workouts to relax tight front-shoulder and chest tissues.
What if my wrists hurt in this position?
Adjust the hand placement, turn the fingers outward slightly, or reduce how far behind the body the hands are placed. The stretch should target the shoulders, not overload the wrists.
Who should be cautious with this stretch?
Anyone with a current shoulder injury, anterior shoulder instability, or sharp pinching pain should be careful and avoid forcing the position. Modify the range or seek professional guidance if needed.
Recommended Equipment (Optional)
- Yoga Mat — adds comfort when performing floor-based mobility and stretching drills
- Yoga Blocks — useful for hand support if floor range feels too aggressive
- Stretching Strap — helpful for adding upper-body mobility work alongside this stretch
- Posture Corrector — a light reminder tool for posture awareness outside training sessions
- Foam Roller — useful for pairing chest and upper-back mobility work with your stretching routine
Tip: Accessories should support better positioning and comfort, not replace consistent mobility practice and proper exercise form.