Bodyweight Overhead Squat: Proper Form, Muscles & Tips
Learn the Bodyweight Overhead Squat with step-by-step form, muscles worked, sets by goal, mobility tips, common mistakes, FAQs, and helpful gear.
Bodyweight Overhead Squat
The Bodyweight Overhead Squat is useful for developing controlled lower-body movement and improving awareness of whole-body alignment. Because the arms remain overhead, the exercise also challenges shoulder positioning, trunk stability, and coordination between the upper and lower body.
Additionally, the movement can reveal limitations in ankle dorsiflexion, hip mobility, or overhead shoulder range. Therefore, it is often included in movement preparation, mobility routines, and athletic warm-ups. However, it should not be treated as a medical diagnostic test.
Although no external weights are required, this variation may feel more demanding than a regular air squat. Beginners should first develop comfortable squat mechanics and overhead arm control before attempting deeper repetitions.
Quick Overview
| Body Part | Legs |
|---|---|
| Primary Muscle | Quadriceps and gluteus maximus |
| Secondary Muscle | Adductors, hamstrings, calves, gluteus medius, abdominal stabilizers, spinal erectors, deltoids, trapezius, and serratus anterior |
| Equipment | None — bodyweight only |
| Difficulty | Intermediate, depending on squat mechanics, overhead shoulder mobility, and balance control |
Sets & Reps (By Goal)
- Strength and movement control: 3–4 sets × 6–10 reps, using a deliberate lowering phase and 60–90 seconds of rest.
- Muscular endurance: 2–3 sets × 15–20 reps, maintaining consistent overhead positioning and resting 45–75 seconds between sets.
- Muscle development: 3–4 sets × 10–15 reps with a controlled tempo. However, bodyweight resistance may become insufficient for continued hypertrophy as strength improves.
- Mobility and stability: 2–3 sets × 5–8 slow reps, optionally pausing for 2–3 seconds at a comfortable squat depth.
- Warm-up and movement preparation: 1–2 sets × 6–10 controlled reps at an easy effort. Focus on coordination rather than fatigue.
Progression rule: First, develop a stable foot position and consistent overhead arm control. Next, increase repetitions or extend the lowering phase. Afterward, improve squat depth gradually if your mobility allows. However, never sacrifice joint comfort or balance to achieve deeper repetitions.
For general movement practice, begin with a manageable volume and allow enough recovery to maintain good technique. Furthermore, stop each set when the arms drop, the heels repeatedly lift, or the squat becomes unstable.
Setup / Starting Position
- Choose a clear training area: Stand on a firm, level surface with enough room to squat and extend both arms overhead. Remove nearby obstacles before beginning.
- Establish your stance: Position your feet approximately shoulder-width apart. Turn the toes slightly outward if this allows more comfortable hip and knee movement.
- Distribute your weight: Keep pressure balanced across the heel, the base of the big toe, and the base of the little toe. As a result, your feet provide a stable foundation.
- Raise both arms overhead: Extend your elbows and lift your arms above your head. Keep your hands comfortably separated and maintain a natural shoulder position.
- Engage your core: Gently brace your abdominal muscles while keeping your ribs aligned over your pelvis. Avoid excessively arching the lower back to compensate for limited shoulder mobility.
- Set your head and chest: Keep your gaze forward and your neck relaxed. Meanwhile, allow the upper back to support the overhead reach without excessive spinal extension.
- Prepare to descend: Take a comfortable breath and establish balance. Then begin bending the knees and hips together, keeping both arms elevated.
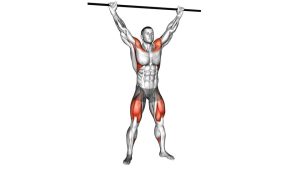
Setup tip: If holding your arms overhead feels uncomfortable, reduce the reach or practice a standard bodyweight squat first. Additionally, a comfortable shoulder-width grip with a lightweight mobility stick may help you learn the overhead position, although the demonstrated variation uses no equipment.
Execution (Step-by-Step)
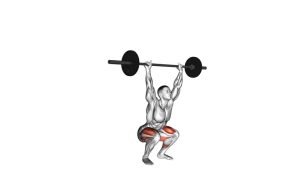
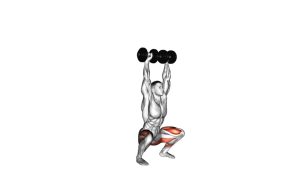
- Establish the overhead position: Begin standing upright with both feet planted. Extend the arms overhead while maintaining comfortable shoulder alignment and a gently braced trunk.
- Initiate the squat: Bend your knees and hips together, allowing the pelvis to move downward between the legs. Meanwhile, maintain balanced pressure through both feet.
- Lower with control: Continue descending at a comfortable pace. Allow the knees to move naturally forward and outward, generally following the direction of your toes.
- Maintain overhead alignment: Keep both arms extended and elevated throughout the descent. However, avoid forcing them backward or excessively arching your lower back to maintain their position.
- Reach your comfortable depth: Lower until your thighs approach parallel to the floor, or stop earlier if mobility limits your position. Keep your feet stable and avoid collapsing the torso.
- Control the bottom position: Briefly stabilize your body without bouncing. Additionally, maintain abdominal tension and allow the knees to remain aligned with the feet.
- Drive upward: Push evenly through your feet while extending the hips and knees together. Keep the movement smooth rather than jerking the torso upward.
- Return to standing: Continue rising until your hips and knees reach a comfortable, upright position. Meanwhile, maintain both arms overhead without shrugging excessively.
- Reset for the next repetition: Reestablish balanced foot pressure, relax unnecessary tension, and repeat. Throughout the set, prioritize consistent technique instead of rushing.
Breathing cue: Inhale comfortably before or during the descent. Then exhale as you rise toward standing. Avoid prolonged breath-holding during ordinary bodyweight repetitions.
Pro Tips & Common Mistakes
Pro Tips for Better Overhead Squat Technique
- Keep your feet firmly planted: Distribute pressure across the entire foot. Consequently, you can maintain better balance as the hips and knees bend.
- Maintain comfortable arm extension: Keep your elbows relatively straight and your shoulders active. However, avoid forcing your arms behind your head.
- Brace without excessive stiffness: Engage the abdominal muscles enough to control your torso. At the same time, continue breathing naturally.
- Allow natural knee movement: Let the knees travel forward as needed while generally tracking with the toes. Therefore, do not force your shins to remain vertical.
- Control your squat depth: Descend only as far as you can maintain stable feet and a comfortable spinal position. A deeper squat is not automatically better.
Common Mistakes to Avoid
- Letting the arms fall forward: Limited shoulder mobility or trunk control may cause the arms to drift forward. Therefore, practice comfortable overhead reaching before increasing squat depth.
- Excessively arching the lower back: Overextending the spine can compensate for limited shoulder mobility. Instead, keep the ribs reasonably aligned with the pelvis.
- Allowing uncontrolled knee collapse: Avoid repeated inward knee movement that makes the squat unstable. Instead, maintain coordinated hip, knee, and foot alignment.
- Lifting the heels unintentionally: Restricted ankle mobility or excessive forward weight transfer may cause the heels to rise. Consequently, reduce depth and improve ankle control before progressing.
- Rushing the lowering phase: Dropping quickly into the squat can make balance more difficult. Instead, use a controlled descent and pause briefly when necessary.
- Forcing unnecessary depth: Attempting to squat lower than your available mobility allows may create compensations. Therefore, prioritize a comfortable, repeatable range of motion.
- Ignoring shoulder discomfort: Raising both arms overhead should not produce sharp pain or joint pinching. If discomfort develops, stop and reassess your available shoulder range.
Coaching tip: For better movement quality, practice controlled bodyweight squats alongside gentle ankle, hip, and shoulder mobility exercises. Additionally, record a few repetitions from the side to assess general torso and arm positioning.
FAQ
Muscles Worked and Exercise Technique
What muscles does the Bodyweight Overhead Squat work?
The Bodyweight Overhead Squat primarily works the quadriceps and gluteus maximus. These muscles help extend the knees and hips as you return to standing.
Additionally, the adductors, hamstrings, and calves contribute to movement and stabilization. Meanwhile, the abdominal muscles, spinal erectors, deltoids, trapezius, and serratus anterior help stabilize the torso and overhead arm position.
Why are the arms held overhead during this squat?
Holding the arms overhead increases the demand for shoulder mobility, upper-back control, and trunk stability. Unlike a regular squat, the body must coordinate lower-body movement with a sustained overhead reach.
Consequently, the exercise can help develop movement awareness and full-body coordination. However, maintaining overhead arm position should never require painful shoulder movement or excessive lower-back arching.
How deep should I squat during this exercise?
Squat as deeply as your current mobility and balance comfortably allow. For many people, lowering until the thighs approach parallel provides a useful starting target.
However, depth varies with body proportions, ankle mobility, hip structure, and training experience. Therefore, prioritize stable feet and controlled joint alignment instead of forcing a particular depth.
Why do my heels lift during overhead squats?
Heel lifting may occur because of limited ankle dorsiflexion, balance difficulties, or an unsuitable squat strategy. Additionally, individual body proportions influence how weight shifts during descent.
To improve control, reduce squat depth and practice a comfortable stance. Furthermore, ankle mobility drills may help if restricted ankle movement contributes to the problem.
Training Frequency, Progression, and Safety
Is the Bodyweight Overhead Squat suitable for beginners?
Beginners can practice this variation if they already have comfortable squat mechanics and sufficient overhead shoulder mobility. However, the combined mobility and balance demands make it more challenging than a standard air squat.
Therefore, start with shallow, controlled repetitions. If maintaining overhead alignment feels difficult, practice a regular bodyweight squat first. Gradually increase the overhead reach and depth as your control improves.
How often should I perform Bodyweight Overhead Squats?
For mobility and movement preparation, the exercise may be included several times weekly at a manageable intensity. Begin with approximately 1–3 sets of 5–10 controlled repetitions.
However, training frequency should reflect your overall workload and recovery. If fatigue causes unstable knees, poor balance, or arm-position changes, reduce the volume before continuing.
Can I add weights to the Bodyweight Overhead Squat?
Yes, but adding external resistance changes the exercise into a weighted overhead squat variation. Therefore, master bodyweight mechanics before considering a barbell or other overhead load.
Weighted overhead squats require additional shoulder stability, mobility, and technical skill. Consequently, beginners should receive appropriate coaching before progressing to demanding loaded versions.
What should I do if my knees, back, or shoulders hurt?
Stop the movement if you experience sharp pain, pinching, or unusual joint discomfort. First, avoid forcing a deeper squat or a more extreme overhead position.
Additionally, consider whether a simpler squat variation feels comfortable. If symptoms persist, worsen, or involve numbness or radiating pain, consult a qualified healthcare professional before resuming the exercise.
Recommended Equipment
The Bodyweight Overhead Squat requires no equipment. However, the following optional training accessories can support mobility preparation, stability practice, and general movement development.
- PVC Mobility Stick / Exercise Dowel — useful for practicing shoulder positioning, overhead alignment, and controlled squat mechanics without adding significant resistance
- Non-Slip Exercise Mat — provides a designated exercise surface for home mobility sessions and warm-ups; choose a firm mat that does not shift or compress excessively
- Resistance Bands Set — useful for shoulder warm-ups, upper-back strengthening, and complementary mobility exercises that support overhead positioning
- High-Density Foam Roller — optional accessory for gentle upper-back mobility and general muscle relaxation before or after training
- Non-Slip Squat Wedge Blocks — provide optional heel elevation for modified squat practice when appropriate; they change squat mechanics and are not required for the demonstrated movement
Equipment tip: Start with the unweighted exercise and build reliable technique. Furthermore, choose accessories that address a specific training need rather than purchasing equipment unnecessarily. If any accessory causes discomfort or instability, stop using it and reassess your setup.