Cable Standing Supinated Face Pull: Form, Muscles Worked, Sets, Tips & FAQ
Learn how to do the Cable Standing Supinated Face Pull with Rope for rear delts, upper back, and shoulder health. Includes proper form, muscles worked, sets and reps by goal, mistakes to avoid, FAQs, and recommended equipment.
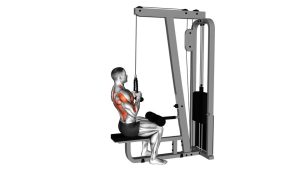
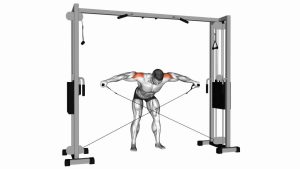
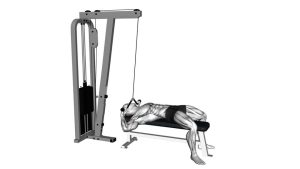
Cable Standing Supinated Face Pull
This variation works best with controlled reps and clean shoulder mechanics. You should feel the exercise mostly in the rear shoulders and upper back, not in the lower back, wrists, or upper traps. Keep the torso steady, avoid leaning back to move the weight, and let the rope split naturally as you pull toward face height.
Quick Overview
| Body Part | Rear Shoulders |
|---|---|
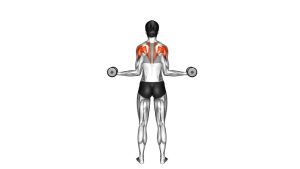
| Primary Muscle | Rear deltoids |
| Secondary Muscle | Rhomboids, middle trapezius, rotator cuff, lower traps, biceps (light assistance) |
| Equipment | Cable machine with rope attachment |
| Difficulty | Beginner to Intermediate |
Sets & Reps (By Goal)
- Muscle growth: 3–4 sets × 10–15 reps with controlled tempo and 45–75 seconds rest
- Shoulder health / posture work: 2–4 sets × 12–20 reps with light-to-moderate load and smooth form
- Upper-back activation before pressing: 2–3 sets × 12–15 reps with light weight and short rest
- Technique practice: 2–3 sets × 8–12 reps focusing on rope separation and scapular control
Progression rule: Add reps before adding load. Increase weight only when you can keep the elbows high, the chest tall, and the rope path clean without leaning back or shrugging.
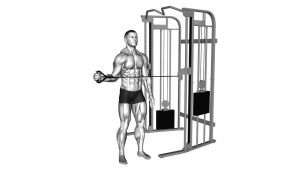
Setup / Starting Position
- Set the cable height: Position the pulley around upper-chest to face height for a natural line of pull.
- Attach the rope: Use a rope handle and take an underhand grip with palms facing up.
- Step back into stance: Stand tall with feet about shoulder-width apart and knees softly bent.
- Brace the torso: Keep the core engaged, ribs stacked, and chest lifted without over-arching the lower back.
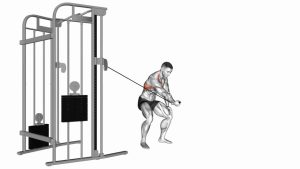
- Start with arms extended: Let the arms reach forward under control while keeping tension on the cable.
Tip: A split stance can help some lifters stay stable and reduce the temptation to swing or lean backward.
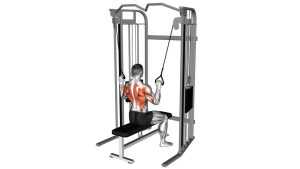
Execution (Step-by-Step)
- Lock in posture: Stand tall with the neck neutral and shoulders relaxed away from the ears.
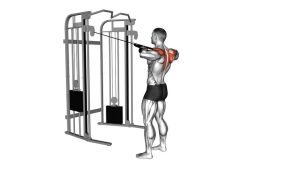
- Begin the pull: Drive the elbows out and back while pulling the rope toward your face.
- Keep the grip supinated: Maintain the underhand hand position as the rope moves toward eye or nose level.
- Separate the rope: At the top, spread the rope ends apart so the hands finish outside the face.
- Squeeze the upper back: Pause briefly as the shoulder blades retract and the rear delts contract hard.
- Lower under control: Extend the arms forward slowly and smoothly without losing posture or letting the weight yank you in.
Pro Tips & Common Mistakes
- Pull to face level: Aim for the nose, eyes, or forehead area rather than the upper chest.
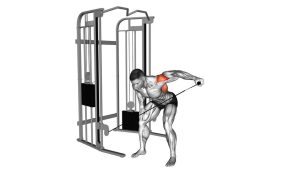
- Lead with the elbows: Think elbows out and back to improve rear-delt recruitment.
- Separate the rope every rep: This helps finish the movement with better external rotation and upper-back tension.
- Don’t go too heavy: Excess load usually causes torso swing, shrugging, or incomplete range.
- Keep the wrists stable: Don’t over-curl or let the wrists fold backward under tension.
- Avoid leaning back: The torso should stay mostly fixed so the shoulders and upper back do the work.
- Control the eccentric: The lowering phase builds stability and keeps the cable from pulling you out of position.
- Don’t turn it into a row: If your elbows stay tucked and the rope lands at chest height, adjust the path upward.
FAQ
What does the supinated grip change in a face pull?
The supinated grip changes the arm position and often makes lifters more aware of external rotation and a higher pull path. It can feel slightly different from a neutral-grip face pull and may help some people get a better rear-delt and upper-back contraction.
Where should I feel this exercise the most?
You should mainly feel it in the rear delts, mid traps, and rhomboids. Some light arm involvement is normal, but it should not feel like a biceps curl or heavy shrug.
Is this exercise good for shoulder health?
Yes, when done with clean technique and appropriate load, it can support shoulder stability, posture, and balanced upper-body training—especially if your program includes a lot of pressing work.
Should I use heavy weight on supinated face pulls?
Usually no. This exercise is most effective with moderate or light-to-moderate resistance and strict form. Going too heavy often reduces rope separation and shifts tension away from the target muscles.
Can beginners do this movement?
Absolutely. Beginners can start with light resistance, focus on pulling high, and learn to control the shoulder blades. It is a great accessory exercise for both performance and posture.
Recommended Equipment
- Rope Cable Attachment — the essential handle for face pulls, triceps work, and multiple cable exercises
- Adjustable Cable Machine / Functional Trainer — allows precise pulley height adjustment for face pulls and full-body cable training
- Resistance Bands Set — a useful alternative for face-pull-style movement patterns when a cable machine is unavailable
- Lifting Straps — optional for lifters whose grip fatigues before the rear delts and upper back
- Gym Mirror — helpful for checking elbow height, rope path, torso angle, and shoulder position
Tip: For this exercise, a good rope attachment and a smooth-adjusting cable station matter more than heavy weight. Better setup usually means better reps.