Kneeling Modified Hindu Push-Up: Form, Benefits, Sets, Tips & FAQ
Learn the Kneeling Modified Hindu Push-Up for chest, shoulders, triceps, and mobility with step-by-step form, sets, tips, FAQs, and gear.
Kneeling Modified Hindu Push-Up
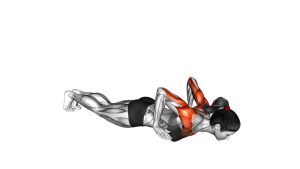
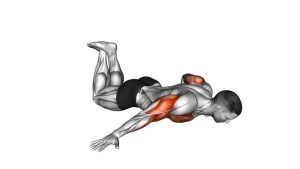
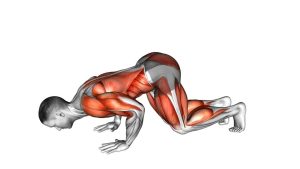
This exercise works best when the movement stays smooth, controlled, and wave-like. First, the hips begin high in a kneeling pike-style position. Then, the chest dives forward and downward between the hands. After that, the torso glides forward as the arms press the chest up into a cobra-like finish. Finally, the hips move back and rise again to reset the starting position.
Unlike a strict push-up, this variation combines pressing strength with shoulder mobility and spinal extension. Therefore, it is especially useful for beginners who want to learn the Hindu push-up pattern before progressing to the full version on the toes.
Quick Overview
| Body Part | Chest |
|---|---|
| Primary Muscle | Pectoralis major |
| Secondary Muscle | Anterior deltoids, triceps, serratus anterior, core stabilizers, spinal extensors |
| Equipment | No equipment required; optional exercise mat for knee and wrist comfort |
| Difficulty | Beginner to intermediate because the knees reduce load, but the movement pattern requires coordination |
Sets & Reps (By Goal)
- Skill practice: 2–3 sets × 4–6 slow reps, resting 45–75 seconds between sets.
- Upper-body endurance: 3–4 sets × 8–12 controlled reps, resting 45–60 seconds between sets.
- Chest and shoulder strength: 3–5 sets × 6–10 reps with a slower lowering phase, resting 60–90 seconds.
- Mobility-focused warm-up: 1–2 sets × 5–8 smooth reps before push-ups, dips, or bodyweight training.
- Beginner conditioning: 2–3 rounds × 30–40 seconds of continuous clean reps, resting as needed.
Progression rule: Add reps only when each repetition stays smooth from start to finish. After that, progress by increasing range, slowing the tempo, or moving toward a full Hindu push-up from the toes.
Setup / Starting Position
- Start on your knees: Place both knees on the floor and keep them grounded throughout the movement.
- Set your hands wide enough: Position your hands slightly wider than shoulder-width so your chest can travel between them comfortably.
- Lift the hips: Push your hips back and upward into a kneeling pike-style position.
- Lengthen the spine: Keep your back long rather than collapsing into the shoulders.
- Set your gaze: Look slightly down at the start, keeping the neck relaxed and aligned with the movement.
- Brace lightly: Engage your core enough to control the forward dive without letting the lower back collapse.
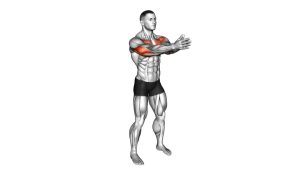
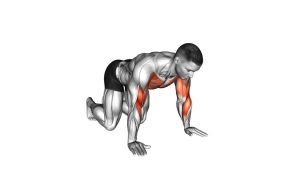
The video shows a clear kneeling setup with elevated hips, straight arms, and hands placed wider than shoulder-width. This position prepares the body for the forward swooping path.
Execution (Step-by-Step)
- Begin in the kneeling pike position: Keep your knees down, hips high, hands planted, and arms extended.
- Bend the elbows: Start lowering your head and chest forward between your hands. Meanwhile, keep the motion curved instead of dropping straight down.
- Dive forward smoothly: Let your chest travel low toward the floor as your shoulders move forward. Your hips should begin to drop as your torso glides ahead.
- Sweep through the bottom: Continue moving forward while the chest stays close to the floor. Do not pause or collapse.
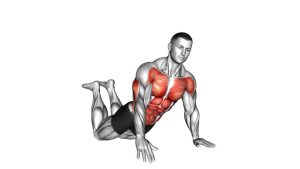
- Press into extension: Push through your hands and extend your arms as your chest rises. At the same time, allow the hips to come closer to the floor.
- Finish tall through the chest: Reach a cobra-like top position with the chest lifted and the shoulders drawn away from the ears.
- Reverse the path: Shift your body backward, bend the elbows slightly if needed, and guide the chest back under control.
- Return to the start: Push the hips upward again, straighten the arms, and reset in the kneeling pike position before the next rep.
Pro Tips & Common Mistakes
Pro Tips
- Think “scoop forward”: The chest should travel forward and down before pressing upward.
- Keep the knees grounded: This keeps the exercise modified and helps reduce pressure on the shoulders.
- Use a smooth tempo: Move continuously instead of rushing into the bottom position.
- Press the floor away: At the top, push through the hands so the shoulders do not collapse toward the ears.
- Control the return: The backward phase matters because it builds coordination and shoulder control.
Common Mistakes
- Dropping straight down: This turns the exercise into a standard kneeling push-up and removes the Hindu push-up pattern.
- Rushing the sweep: Moving too fast can reduce control and increase stress on the wrists or shoulders.
- Overarching the lower back: Lift the chest, but avoid forcing the spine into an uncomfortable backbend.
- Shrugging the shoulders: Keep the shoulders away from the ears, especially during the cobra-like finish.
- Letting the elbows flare too hard: A moderate elbow angle is fine, but excessive flaring may irritate the shoulders.
- Skipping the reset: Return to the high-hip kneeling position before starting the next repetition.
FAQ
What muscles does the Kneeling Modified Hindu Push-Up work?
It mainly works the chest, especially the pectoralis major. In addition, it trains the anterior shoulders, triceps, serratus anterior, core stabilizers, and spinal extensors because the body moves through a flowing press and extension pattern.
Is the Kneeling Modified Hindu Push-Up good for beginners?
Yes. The knees reduce the load compared to a full Hindu push-up. However, beginners should move slowly because the exercise still requires coordination, shoulder control, and comfortable spinal extension.
How is this different from a regular kneeling push-up?
A regular kneeling push-up moves mostly straight down and up. In contrast, the Kneeling Modified Hindu Push-Up moves through a curved path: hips high, chest forward and low, chest lifted, then hips back to the start.
Should my hips touch the floor?
No. The hips may move close to the floor during the upward extension, but they do not need to slam down or rest on the ground. Keep the motion active and controlled.
Why do my wrists feel pressure during this exercise?
Wrist pressure can happen because the body shifts forward over the hands. To reduce discomfort, warm up the wrists, spread the fingers, press evenly through the palm, and use push-up handles if needed.
Can I use this exercise before upper-body workouts?
Yes. It works well as a warm-up because it combines chest activation, shoulder motion, and controlled spinal movement. Use low reps and keep the effort easy before heavier training.
Recommended Equipment (Optional)
- Thick Exercise Mat — adds comfort under the knees during kneeling push-up variations.
- Push-Up Handles — may reduce wrist extension and improve hand comfort.
- Yoga Knee Pad — provides extra cushioning if your knees feel pressure on hard floors.
- Wrist Wraps — offers light support for users who need extra wrist stability.
- Foam Roller — useful for warming up the upper back, chest, and shoulders before bodyweight training.
Tip: Equipment is optional. However, a soft mat or knee pad can make this kneeling variation more comfortable and easier to practice consistently.