Resistance Band Shoulder Stretch Behind the Back: Form, Benefits, Tips & FAQ
Learn how to perform the Resistance Band Shoulder Stretch Behind the Back for better shoulder mobility, chest flexibility, and overhead movement. Includes form tips, sets by goal, common mistakes, FAQs, and recommended equipment.
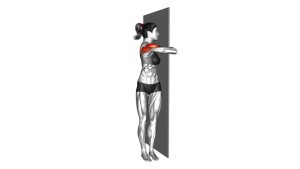
Resistance Band Shoulder Stretch Behind the Back
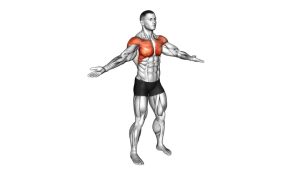
This stretch works best with gentle tension and steady breathing. You should feel a manageable stretch through the front deltoid, pectorals, and surrounding shoulder tissues without sharp pain, joint pinching, numbness, or aggressive pulling. The band is meant to assist the position, not yank the shoulder into a range you cannot control.
Quick Overview
| Body Part | Shoulders |
|---|---|
| Primary Muscle | Anterior deltoid and shoulder capsule mobility structures |
| Secondary Muscle | Pectoralis major, biceps long head, rotator cuff, upper-back stabilizers |
| Equipment | Resistance band |
| Difficulty | Beginner |
Sets & Reps (By Goal)
- Warm-up before upper-body training: 1–2 sets × 6–10 reps per side with a 2–3 second stretch at the peak
- Mobility improvement: 2–4 sets × 8–12 reps per side with slow, controlled movement
- Post-workout flexibility: 2–3 sets × 20–30 second holds per side
- Rehab-style light mobility: 1–3 sets × 5–8 gentle reps per side using very light band tension
Progression rule: Improve control and comfort first, then gradually increase hold time, range, or band tension. Never progress by forcing painful shoulder positions.
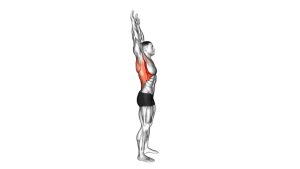
Setup / Starting Position
- Choose your posture: Sit or stand tall with the spine neutral and chest open.
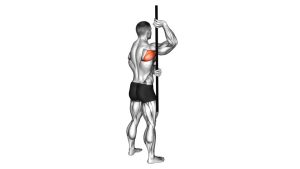
- Grab the band: Hold one end of the resistance band overhead with one hand and the other end behind the lower back with the opposite hand.
- Set the shoulders: Keep the shoulders down and away from the ears without shrugging.
- Brace lightly: Keep the ribs stacked over the hips so you do not arch the lower back to fake extra range.
- Start with light tension: Use enough band tension to feel supported, not yanked.
Tip: Use a lighter band or wider grip spacing if your shoulders are tight or you feel restricted.
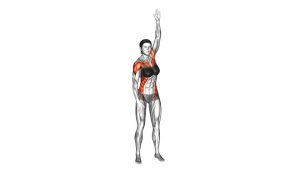
Execution (Step-by-Step)
- Establish the position: Hold the band securely with one arm overhead and the other behind the back.
- Apply gentle tension: Slowly pull upward with the top hand to guide the lower hand slightly higher behind the back.
- Feel the stretch: Let the shoulder and chest open gradually without twisting or leaning.
- Pause briefly: Hold the end position for 2–3 seconds or longer if using it as a static stretch.
- Return smoothly: Ease out of the stretch with control and repeat on the same side before switching.
Pro Tips & Common Mistakes
- Use light tension first: More resistance does not automatically make the stretch better.
- Stay tall: Avoid leaning, twisting, or flaring the ribs to create fake mobility.
- Do not yank the band: Jerking into the stretch can irritate the shoulder joint.
- Keep the neck relaxed: Avoid shrugging the shoulders or clenching the jaw.
- Work both sides: Many people are noticeably tighter on one side, so compare and adjust carefully.
- Pair it well: This stretch fits nicely after pressing workouts, chest training, or long desk hours.
FAQ
Where should I feel this stretch?
Most people feel it through the front of the shoulder, the chest, and sometimes the upper arm. It should feel like a stretch, not a pinch inside the joint.
Is this a strength exercise or a mobility drill?
It is primarily a mobility and flexibility drill. The goal is to improve shoulder range and comfort, not to build heavy strength.
Can beginners do this exercise?
Yes, as long as the band tension is light and the range stays pain-free. Beginners should move slowly and avoid forcing the lower hand too high behind the back.
Should I hold the stretch or move through reps?
Both options work. Controlled reps are great for warm-ups, while longer holds are useful after training or during dedicated mobility work.
Who should be careful with this stretch?
Anyone with a recent shoulder injury, instability history, rotator cuff irritation, or painful impingement symptoms should use extra caution and avoid pushing into discomfort.
Recommended Equipment (Optional)
- Shoulder Resistance Bands / Light Mobility Bands — ideal for adjustable stretching, mobility drills, and gentle shoulder activation
- Stretching Strap with Loops — useful for assisted range-of-motion work when you want more control than a standard band
- Shoulder Rehab Pulley System — helpful for light rehab-style shoulder mobility and assisted overhead movement
- Non-Slip Yoga or Exercise Mat — useful if you perform your mobility routine seated, kneeling, or on the floor
- Peanut Massage Ball / Mobility Ball — a helpful recovery tool for the upper back, chest, and surrounding shoulder tension
Tip: Choose tools that make the stretch easier to control. For mobility work, smooth tension and comfort matter more than heavy resistance.