Lever Seated Neutral-Grip Reverse Fly: Form, Muscles Worked, Sets & FAQ
Learn how to perform the Lever Seated Neutral-Grip Reverse Fly with proper form to target the rear delts, upper back, and posture muscles. Includes setup, execution, sets by goal, common mistakes, FAQs, and recommended equipment.
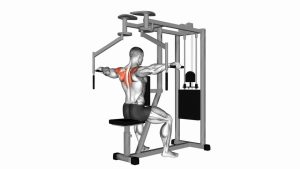
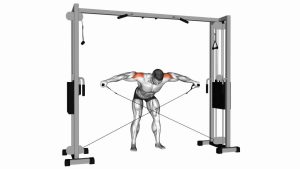
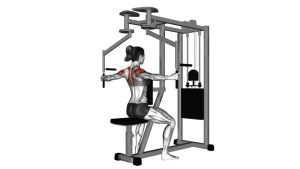
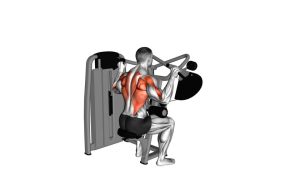
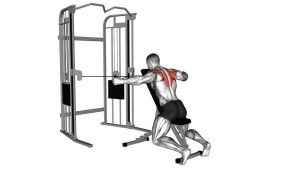
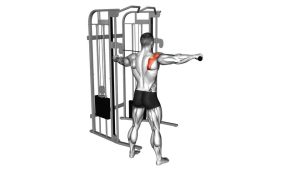
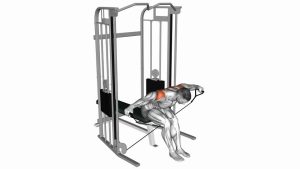
Lever Seated Neutral-Grip Reverse Fly
This exercise works best when the torso stays stable and the movement comes from the shoulders and upper back. Because the machine provides a guided path, it is excellent for isolating the rear delts without needing as much balance or coordination as dumbbell reverse fly variations. Focus on a smooth range of motion, a brief squeeze at the back, and a controlled return to keep tension on the target muscles.
Quick Overview
| Body Part | Rear Shoulders |
|---|---|
| Primary Muscle | Rear deltoids (posterior delts) |
| Secondary Muscle | Rhomboids, middle trapezius, rotator cuff stabilizers |
| Equipment | Reverse fly machine / pec deck machine with neutral-grip handles |
| Difficulty | Beginner to Intermediate |
Sets & Reps (By Goal)
- Muscle growth: 3–4 sets × 10–15 reps with 45–75 seconds of rest
- Shoulder balance / accessory work: 2–4 sets × 12–20 reps with controlled tempo
- Strength-focused machine work: 3–4 sets × 8–10 reps with strict form
- Posture / activation warm-up: 2–3 sets × 15–20 reps using light weight
Progression rule: Add reps first while keeping the chest planted and the shoulders relaxed. Increase the weight only when you can control both the squeeze and the return phase without momentum.
Setup / Starting Position
- Adjust the seat: Set the seat height so the handles line up around mid-chest to shoulder level.
- Plant your body: Sit tall with your feet flat on the floor and your chest firmly against the pad.
- Take a neutral grip: Hold the handles with palms facing inward and a soft bend in the elbows.
- Brace lightly: Keep your core engaged and neck neutral without jutting the head forward.
- Start under control: Begin with the arms slightly in front of the body and the shoulders set down and back.
Tip: Proper seat height matters. If the handles are too high or too low, the rear delts will be harder to target cleanly.
Execution (Step-by-Step)
- Initiate the pull: Drive the movement by opening your arms outward and backward in a wide arc.
- Lead with the elbows: Think about moving the elbows out and back instead of pulling with the hands.
- Squeeze at the back: Bring the handles back until your arms are out to the sides and your shoulder blades squeeze together naturally.
- Pause briefly: Hold the contraction for a moment without shrugging your shoulders toward your ears.
- Return slowly: Lower the weight back to the starting position under full control and keep tension on the rear delts.
Pro Tips & Common Mistakes
- Use a controlled tempo: A steady pull and slow return increase rear delt tension.
- Do not shrug: Keep the shoulders down so the traps do not take over.
- Keep the chest on the pad: Lifting off the support usually means you are using momentum.
- Lead with the elbows: This helps shift the focus to the rear delts and upper back.
- Do not lock the elbows: A slight bend keeps the movement joint-friendly and natural.
- Avoid excessive range: Open the arms fully, but do not force the shoulders past a comfortable position.
- Stay strict on lighter weight: Better control usually produces better rear delt activation than going too heavy.
FAQ
What muscles does the Lever Seated Neutral-Grip Reverse Fly work?
The main target is the rear deltoid. It also trains the rhomboids, middle trapezius, and smaller shoulder stabilizers that help support posture and upper-back control.
Is this better than dumbbell reverse flyes?
It depends on the goal. The machine version is easier to control and isolate, which makes it excellent for strict rear delt training. Dumbbells require more stability and coordination, but both can be effective.
Should I use heavy weight on this exercise?
Usually, moderate weight with strict control works best. Going too heavy often turns the exercise into a momentum-based movement and reduces tension on the rear delts.
Where should I feel this movement?
You should mostly feel it in the rear shoulders and across the upper back. A light squeeze between the shoulder blades is normal, but the traps should not dominate the movement.
Can beginners use the reverse fly machine?
Yes. Because the machine guides the movement path and provides chest support, it is a beginner-friendly way to learn rear delt training with good control.
Recommended Equipment (Optional)
- Weightlifting Grips — helpful for improving handle comfort and grip security during machine pulling work
- Gym Lifting Gloves — can reduce palm pressure and improve comfort on machine handles
- Resistance Bands Set — useful for extra rear delt warm-ups, pull-aparts, and posture drills outside the machine
- Foam Roller — helpful for upper-back mobility work before shoulder training sessions
- Adjustable Weight Bench — useful for chest-supported rear delt accessory exercises if you also train with dumbbells
Tip: Pair this machine exercise with rowing movements or face pulls for more complete upper-back and posture development.