Oblique V-Up on Floor: Form, Muscles Worked, Sets, Tips & FAQ
Learn the Oblique V-Up on Floor to target your obliques, abs, and hip flexors with clear form cues, sets, mistakes, FAQs, and gear tips.
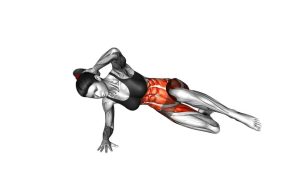
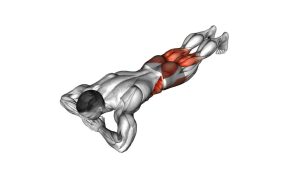
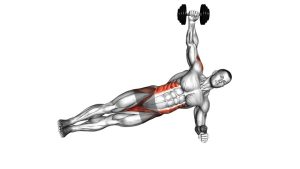
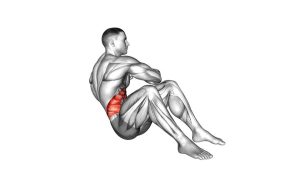
Oblique V-Up on Floor
This exercise works best when the motion is smooth, compact, and controlled. Because the body is supported on one side, your obliques must lift the torso while the lower abs and hip flexors help raise the legs. In addition, the bottom arm helps with balance, but it should not push aggressively into the floor.
Quick Overview
| Body Part | Core |
|---|---|
| Primary Muscle | Obliques |
| Secondary Muscle | Rectus abdominis, hip flexors, deep core stabilizers |
| Equipment | None; exercise mat optional |
| Difficulty | Intermediate because it requires side-core strength, coordination, and balance |
Sets & Reps (By Goal)
- Core activation: 2 sets × 6–8 reps per side with slow control
- Oblique strength: 3–4 sets × 8–12 reps per side with 45–75 seconds rest
- Muscle endurance: 2–3 sets × 12–15 reps per side using a clean tempo
- Beginner progression: 2–3 sets × 5–8 reps per side with a smaller leg lift
Progression rule: Add reps first, then increase lift height. However, do not progress if your legs swing, your neck pulls forward, or your lower back takes over.
Setup / Starting Position
- Lie on your side: Stack your legs and keep them extended in a straight line.
- Place the top hand behind the head: Keep the elbow open without pulling hard on the neck.
- Use the bottom arm for support: Rest it on the floor to help balance your body.
- Brace your core: Lightly tighten your abs before moving so your torso stays organized.
- Keep your body long: Avoid folding forward before the rep begins.
Tip: If balance feels difficult, place the bottom hand slightly farther forward. As a result, you can control the lift without rolling backward.
Execution (Step-by-Step)
- Start from a long side-lying position: Keep the legs straight, stacked, and close together.
- Brace gently: Exhale slightly and prepare the side of your waist to lift.
- Lift both ends together: Raise your upper torso and straight legs toward each other.
- Create a side “V” shape: Bring the rib cage and legs closer without twisting the torso.
- Pause briefly at the top: Squeeze the obliques for a short moment while staying balanced.
- Lower slowly: Return the torso and legs to the floor with control.
- Reset before the next rep: Keep your body aligned, then repeat for the target reps.
Pro Tips & Common Mistakes
Pro Tips
- Move from the side waist: Think about shortening the space between your ribs and hip.
- Keep the legs straight: Long legs make the exercise harder, so only lift as high as you can control.
- Exhale during the lift: This helps your abs brace and keeps the movement compact.
- Use a slow descent: Lowering with control builds more useful core tension.
- Train both sides evenly: Start with the weaker side, then match the same reps on the stronger side.
Common Mistakes
- Pulling the head: The hand should support the head, not yank the neck forward.
- Swinging the legs: Momentum reduces oblique tension and makes the rep less effective.
- Rolling backward: Keep the torso stacked instead of turning the exercise into a twisting motion.
- Rushing the bottom position: Reset your alignment before starting the next rep.
- Using too much range: A smaller clean rep is better than a high, uncontrolled lift.
FAQ
What muscles does the Oblique V-Up on Floor work?
The main target is the obliques. In addition, the rectus abdominis, hip flexors, and deep core stabilizers help lift the legs and control the torso.
Is the Oblique V-Up on Floor a beginner exercise?
It is usually better for intermediate trainees because the straight-leg lift requires coordination and core strength. However, beginners can use a smaller range or bend the knees slightly if needed.
Should I twist during this exercise?
No. Based on the movement pattern, this exercise is mainly a side-bending motion. Therefore, keep the torso stacked and avoid rotating backward or forward.
Why do I feel my hip flexors during Oblique V-Ups?
Some hip flexor activity is normal because the legs lift from the floor. However, your obliques should still feel like the main working area. If the hips dominate, reduce the height of the leg raise.
How can I make the Oblique V-Up easier?
Use a smaller range of motion, keep the bottom arm more supportive, or bend the knees slightly. Then, once control improves, return to straighter legs and a higher lift.
How can I make it harder?
Slow down the lowering phase, pause longer at the top, or add light ankle weights only after your form is stable. Still, control should remain the priority.
Recommended Equipment (Optional)
- Thick Exercise Mat — adds comfort for the hip, ribs, and side body during floor reps
- Adjustable Ankle Weights — useful for advanced progression once bodyweight reps are controlled
- Core Sliders — helpful for additional core variations and oblique-focused floor training
- Resistance Bands Set — great for pairing with anti-rotation and core stability drills
- Foam Roller — useful for warm-ups, recovery, and general mobility work
Tip: Equipment is optional for this exercise. First, master the bodyweight version with clean control before adding load or advanced variations.