Rotate Push-Up: Form, Muscles Worked, Benefits, Sets & Tips
Learn the Rotate Push-Up to build chest strength, core control, shoulder stability, and oblique power with safe form, sets, tips, FAQs, and gear.
Rotate Push-Up
The Rotate Push-Up is more than a chest exercise. It is a full-body control drill that teaches you to press from the floor, stabilize through one arm, rotate the trunk, and return to plank without losing alignment. Because the body must resist sagging, twisting, and shoulder collapse, this exercise is especially useful for athletes, calisthenics training, core strength, and advanced home workouts.
Although the movement looks simple, quality matters more than speed. First, perform a strong push-up. Then, rotate only after the arms are extended and the body is stable. This sequence helps protect the shoulders and keeps the core working correctly.
Quick Overview
| Body Part | Chest |
|---|---|
| Primary Muscle | Pectoralis major |
| Secondary Muscle | Obliques, triceps, anterior deltoids, serratus anterior, rectus abdominis, glutes, and shoulder stabilizers |
| Equipment | No equipment required; optional exercise mat or push-up handles |
| Difficulty | Intermediate |
Sets & Reps (By Goal)
- Technique practice: 2–3 sets × 4–6 reps per side with slow rotation and full control.
- Muscular endurance: 3–4 sets × 8–12 total reps with steady breathing and clean plank alignment.
- Core stability: 3 sets × 5–8 reps per side, holding the rotated position for 1–2 seconds.
- Upper-body strength: 4 sets × 6–10 total reps using a controlled push-up tempo.
- Conditioning circuit: 30–45 seconds of alternating reps, only if form stays sharp.
Progression rule: Add reps only when every push-up reaches a strong plank lockout and every rotation stays controlled. If the hips drop, reduce the reps or use an incline variation.
Setup / Starting Position
- Start in a high plank: Place your hands slightly wider than shoulder-width with your shoulders stacked over your wrists.
- Set your feet: Keep the feet hip-width apart for better balance. A wider stance makes the rotation easier.
- Brace your core: Tighten your abs as if preparing for a plank. Also squeeze your glutes lightly to keep the hips from sagging.
- Lengthen your body: Keep a straight line from head to heels. Avoid lifting the hips too high or letting the lower back dip.
- Set your gaze: Look slightly ahead of your hands while keeping the neck neutral.
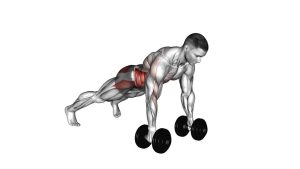
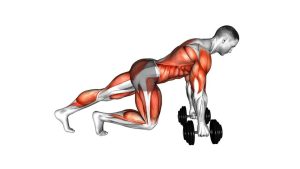
Tip: If your wrists feel uncomfortable, use push-up handles or perform the exercise on dumbbells with a neutral grip.
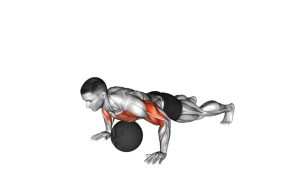
Execution (Step-by-Step)
- Begin from plank: Brace your core, press the floor away, and keep your body long and stable.
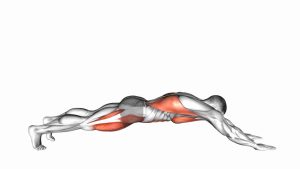
- Lower under control: Bend your elbows and lower your chest toward the floor. Keep the elbows around 30–45 degrees from your torso.
- Reach the bottom position: Stop when your chest is close to the floor or when your elbows reach a comfortable depth.
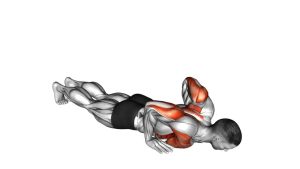
- Press back up: Push through both palms until your elbows are fully extended and your body returns to a strong plank.
- Shift your weight: Move your weight slightly into one supporting hand without letting the shoulder collapse.
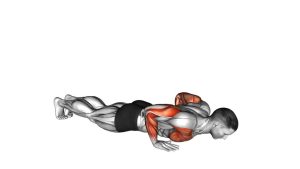
- Rotate the torso: Turn your chest open to the side while pivoting through your feet. Keep the hips lifted and the core tight.
- Reach or stack the top arm: Extend the free arm upward if your balance allows. Otherwise, place the hand on your hip.
- Pause briefly: Hold the rotated position for 1 second while keeping a straight line through the body.
- Return to plank: Bring the top hand back to the floor and square the chest toward the ground.
- Repeat on the other side: Perform the next push-up, then rotate in the opposite direction.
Pro Tips & Common Mistakes
Pro Tips
- Use a wider foot stance: This improves balance and makes the rotation smoother.
- Lock out before rotating: A stable top position protects the shoulder and improves control.
- Rotate through the torso: Open the chest as one unit instead of twisting only through the shoulder.
- Keep the hips lifted: The side-plank phase should feel active through the obliques and glutes.
- Move slowly first: Control builds strength faster than sloppy speed.
Common Mistakes
- Rotating too early: This shifts stress into the shoulder before the arm is stable.
- Letting the hips sag: This reduces core tension and may irritate the lower back.
- Flaring the elbows: Keep the elbows angled slightly back instead of straight out to the sides.
- Collapsing into the wrist: Spread your fingers and press evenly through the palm.
- Rushing the return: Lower the hand back to the floor with control before starting the next rep.
FAQ
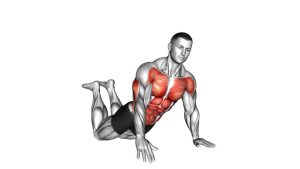
What muscles does the Rotate Push-Up work?
The Rotate Push-Up mainly works the chest, triceps, and front shoulders. In addition, the rotation strongly activates the obliques, deep core, serratus anterior, glutes, and shoulder stabilizers.
Is the Rotate Push-Up good for core strength?
Yes. The exercise challenges the core during both the plank and rotation phases. Because one hand supports the body during the rotation, the obliques must work hard to control the torso and keep the hips from dropping.
Is this exercise beginner-friendly?
It is usually better for intermediate trainees. However, beginners can perform an easier version by doing the push-up from the knees or by using an incline surface such as a bench.
Should I alternate sides every rep?
Alternating sides is the most common method because it trains balanced rotation. However, you can also complete all reps on one side first if you want extra oblique focus.
Why do my hips drop during the rotation?
Hip drop usually means the core, glutes, or shoulder stabilizers are losing tension. Widen your feet, slow the movement down, and hold a strong side-plank position before adding more reps.
Recommended Equipment
- Exercise Mat — adds comfort and grip for push-ups, planks, and floor-based core training.
- Push-Up Handles — reduce wrist extension and may improve pressing comfort.
- Hex Dumbbells — can be used as stable handles for a neutral-grip push-up variation.
- Resistance Bands Set — useful for warm-ups, shoulder activation, rows, and posture support work.
- Wrist Wraps — provide extra wrist support during pressing exercises if needed.
Tip: Equipment is optional. For most people, a quality mat and controlled bodyweight technique are enough to train the Rotate Push-Up effectively.