Single-Leg Deadlift with Knee Lift: Form & Muscles Worked
Learn the Single-Leg Deadlift with Knee Lift for stronger glutes, hamstrings, and balance. Get step-by-step form, sets, common mistakes, tips, and FAQs.
Single-Leg Deadlift with Knee Lift
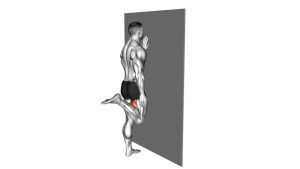
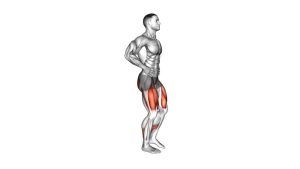
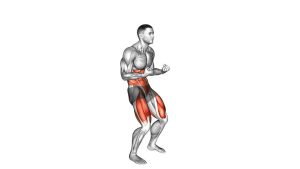
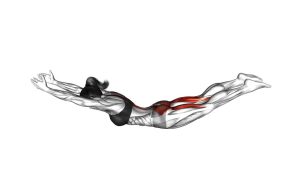
The Single-Leg Deadlift with Knee Lift challenges your ability to control your body weight while balancing on one leg. Unlike a conventional deadlift, this variation places greater emphasis on unilateral stability and coordination. In addition, the knee-drive finish introduces a dynamic balance challenge. As you hinge forward, the supporting leg’s glutes and hamstrings control the lowering phase. Then, these muscles help extend the hip as you return to standing. Meanwhile, your abdominal muscles and lateral hip stabilizers work to limit unwanted rotation. Consequently, the movement provides a useful combination of posterior-chain training and single-leg control.
Quick Overview
| Body Part | Legs |
|---|---|
| Primary Muscle | Gluteus maximus and hamstrings (supporting leg) |
| Secondary Muscle | Quadriceps, hip flexors, gluteus medius, gluteus minimus, calves, spinal erectors, and core stabilizers |
| Equipment | None (bodyweight); optional stable support for balance assistance |
| Difficulty | Intermediate — requires controlled hip hinging, unilateral balance, and coordinated knee lifting |
Sets & Reps (By Goal)
Recommended Training Volume
- Strength and control: 3–4 sets × 6–10 reps per leg. Use a controlled lowering phase and rest 60–90 seconds between sets.
- Muscle development: 3–4 sets × 8–12 reps per leg. Focus on maintaining tension through the glutes and hamstrings rather than rushing.
- Muscular endurance: 2–3 sets × 12–15 reps per leg. Maintain consistent technique as fatigue increases.
- Balance and coordination: 2–3 sets × 6–10 reps per leg. Pause briefly during the knee lift while keeping your torso upright.
- Dynamic warm-up: 1–2 sets × 6–8 controlled reps per leg. Use a comfortable range and avoid fatigue.
Tempo and Progression
Start with approximately two to three seconds during the lowering phase. Then, rise smoothly and briefly stabilize the knee-drive position. For better balance, complete every repetition on one leg before switching sides. However, if continuous repetitions become unstable, reset your stance between repetitions.
Progression rule: First, improve movement quality and single-leg balance. Next, increase repetitions or slightly extend the lowering phase. Once your technique remains consistent, consider holding a light kettlebell or dumbbell. Additional resistance is optional because the bodyweight variation already provides a meaningful stability challenge.
Setup / Starting Position
Establish a Stable Starting Position
- Choose a clear training area: Stand on a firm, level surface with enough space behind you to extend one leg safely. Avoid slippery flooring or thick, unstable mats.
- Stand upright: Position your feet approximately hip-width apart. Keep your shoulders relaxed, chest naturally open, and head aligned with your spine.
- Shift weight onto one leg: Transfer your weight gradually onto your supporting foot. Maintain balanced pressure through the heel, big-toe base, and little-toe base.
- Soften the supporting knee: Keep a small, comfortable knee bend. This position helps you hinge through the hip without locking the knee.
- Prepare your moving leg: Lift the opposite foot slightly from the floor. Keep the hip relaxed and prepare to extend this leg backward during the hinge.
- Brace your midsection: Gently engage your abdominal muscles. Meanwhile, keep your ribs stacked over your pelvis without holding your breath.
- Position your arms: Allow your arms to move naturally for balance. Alternatively, use a nearby wall or stable support when learning the movement.
Check Your Body Alignment
Before starting, imagine a straight line connecting your head, shoulders, and pelvis. Your supporting knee should point in approximately the same direction as your toes. Additionally, keep your hips facing forward rather than rotating toward the raised leg. This alignment prepares you for a controlled single-leg hip hinge.
Setup tip: Begin with the side that feels less coordinated. Then, use the same number of quality repetitions on your opposite side.
Execution (Step-by-Step)
Perform the Hip Hinge and Knee Drive
- Initiate the hip hinge: Push your supporting hip backward while gradually leaning your torso forward. Keep your spine neutral and avoid bending primarily through the waist.
- Extend the free leg backward: As your torso lowers, raise the opposite leg behind your body. Aim to keep the hips relatively level instead of opening the pelvis outward.
- Lower into the deadlift position: Continue hinging until you reach a comfortable depth with good spinal control. Ideally, your torso and raised leg approach a long, nearly horizontal line. However, a shallower hinge is appropriate when flexibility or balance limits your range.
- Maintain the supporting leg position: Keep your planted foot stable and your supporting knee softly bent. Meanwhile, engage your core to prevent excessive trunk rotation or side bending.
- Drive through the supporting foot: Press into the floor while extending the supporting hip. As a result, your torso rises smoothly toward an upright standing position.
- Bring the moving leg forward: As you stand tall, swing your extended rear leg forward. Bend its knee naturally while maintaining control through your standing hip.
- Lift the knee: Continue raising the free knee toward approximately hip height. At the top, stand upright without leaning backward or excessively arching your lower back.
- Stabilize the top position: Pause briefly while maintaining balance on the supporting leg. Keep your pelvis controlled and allow the arms to counterbalance naturally.
- Return to the hip hinge: Lower the raised knee and begin pushing your hips backward again. Simultaneously, extend the moving leg behind your body as your torso leans forward.
- Repeat with control: Continue the same movement pattern without rushing or touching down unnecessarily. After completing your repetitions, switch supporting legs and repeat the sequence.
Breathing and Movement Control
Inhale naturally as you hinge backward and lower your torso. Then, exhale during the upward phase as your supporting hip extends. Keep breathing comfortably during the knee-drive balance position. Furthermore, prioritize smooth transitions instead of using momentum to lift the knee.
Pro Tips & Common Mistakes
Professional Technique Tips
- Prioritize hip movement: Push your hips backward rather than simply reaching your upper body toward the floor. Consequently, the movement emphasizes the intended posterior-chain muscles.
- Maintain a neutral spine: Keep your head aligned with your torso. Avoid lifting your chin excessively or rounding your lower back.
- Control the supporting knee: Maintain a soft knee bend throughout the hip-hinge phase. Additionally, prevent the knee from collapsing toward the body’s midline.
- Keep your hips level: Avoid rotating your pelvis outward as the rear leg extends. Instead, imagine both hip bones pointing toward the floor.
- Use the arms for balance: Natural arm movement can help stabilize the body during the knee drive. However, avoid throwing your arms aggressively to create momentum.
- Control the knee lift: Raise the free knee only as high as your balance and hip mobility allow. Therefore, focus on stability rather than forcing maximum knee height.
Common Mistakes to Avoid
- Rounding the lower back: Excessive spinal flexion changes the movement mechanics and may increase unwanted strain. Instead, shorten the hinge until you can maintain a neutral position.
- Turning the movement into a squat: Bending the supporting knee excessively shifts emphasis away from the hip hinge. Keep the knee softly bent while allowing the hips to travel backward.
- Opening the hips: Rotating the pelvis toward the raised leg reduces control. As a correction, move more slowly and maintain a square hip position.
- Rushing the transition: Swinging the leg forward too quickly may cause wobbling or unwanted trunk movement. Instead, extend the supporting hip before completing the knee drive.
- Leaning backward at the top: Excessive lumbar extension can replace the intended upright balance position. Finish tall with your ribs stacked naturally above your pelvis.
- Reaching beyond your mobility: Attempting to touch the floor can compromise spinal alignment. Therefore, lower only as far as your flexibility and control permit.
Improve Balance Before Increasing Difficulty
For better results, practice a shallow single-leg hinge before adding a full knee drive. Next, gradually increase the hinge depth while keeping your supporting foot stable. Once the movement feels coordinated, introduce a short pause at the top. Finally, consider additional resistance only when both legs demonstrate consistent control.
FAQ
Muscles Worked and Exercise Benefits
What muscles does the Single-Leg Deadlift with Knee Lift work?
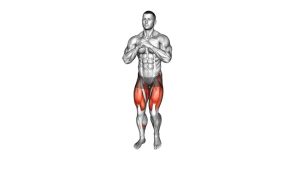
The exercise primarily works the gluteus maximus and hamstrings of the supporting leg. These muscles control the hip hinge and help extend the hip during the rise. In addition, the quadriceps stabilize the supporting knee, while the hip flexors lift the moving leg. The gluteus medius, calves, spinal erectors, and abdominal muscles also contribute to balance and postural control.
Is this exercise effective for strengthening the glutes?
Yes. The single-leg hip hinge challenges the gluteus maximus through a controlled lowering and lifting movement. Furthermore, balancing on one leg requires the lateral hip muscles to help stabilize the pelvis. However, progressive resistance exercises may be needed for continued muscle growth once the bodyweight version becomes easy.
Difficulty and Proper Technique
Is the Single-Leg Deadlift with Knee Lift suitable for beginners?
Beginners can learn the movement, although the complete variation requires reasonable balance and hip-hinge coordination. Therefore, start with a supported single-leg deadlift or a shorter range of motion. Once the hinge feels controlled, add the standing knee drive. Using a wall for light balance assistance can also make the learning process more manageable.
How low should I go during the single-leg deadlift?
Lower your torso only as far as you can maintain a neutral spine and stable pelvic alignment. For some people, this means reaching approximately horizontal. However, others may need a shallower range because of flexibility or balance limitations. As your control improves, you can gradually explore a deeper hinge without forcing the movement.
Balance and Common Training Problems
Why do I lose balance during the knee lift?
Balance problems may result from rushing the transition, shifting weight toward the toes, or rotating the pelvis. Additionally, limited ankle control and hip stability can make the top position more challenging. To improve, slow the movement, keep your supporting foot grounded, and briefly pause after standing upright. If necessary, practice near a wall until your balance becomes more reliable.
Should my supporting knee remain completely straight?
No. Maintain a slight bend in your supporting knee throughout the hip-hinge portion. This position allows the movement to occur comfortably at the hip. In contrast, locking the knee can make the exercise harder to control. Avoid bending excessively, however, because the exercise should remain primarily a hip hinge rather than a squat.
Training Frequency and Progression
How often should I perform this exercise?
Many healthy adults can include this movement in their lower-body training two or three times per week. However, appropriate frequency depends on training experience, total workload, and recovery needs. Beginners may benefit from fewer sets while learning proper technique. Meanwhile, experienced exercisers can use the movement during warm-ups, balance training, or lower-body workouts.
Can I add dumbbells or a kettlebell?
Yes. Once your bodyweight repetitions remain stable, you can introduce a light dumbbell or kettlebell. Start with a manageable load and maintain the same controlled hip-hinge pattern. Furthermore, avoid adding resistance if it causes twisting, excessive spinal movement, or balance loss. Progress gradually, and prioritize technique before increasing weight.
What is the difference between this exercise and a regular single-leg deadlift?
A traditional single-leg Romanian deadlift usually finishes by returning to a balanced standing position. In contrast, the Single-Leg Deadlift with Knee Lift continues into a forward knee drive. This additional phase challenges standing balance, hip-flexor coordination, and control during the transition. Therefore, the variation combines posterior-chain strengthening with a more dynamic movement pattern.
Recommended Equipment
The Single-Leg Deadlift with Knee Lift requires no equipment. However, the following optional training accessories can support movement preparation, balance practice, and gradual progression.
- Non-Slip Exercise Mat — provides a dedicated training surface for warm-ups and mobility exercises; choose a firm, stable surface for the standing movement
- Foam Balance Pad — supports separate balance-training drills and more advanced stability progressions after mastering the exercise on firm ground
- Mini Loop Resistance Bands — useful for complementary glute activation, lateral walks, and hip-stability warm-up exercises
- Light Kettlebell — offers an optional resistance progression once bodyweight hip-hinge technique and unilateral balance are consistent
- Flat-Sole Training Shoes — provide a stable contact surface and help maintain predictable footing during controlled single-leg exercises
Tip: Start with the bodyweight movement on firm, level ground. Additionally, treat balance pads and external weights as optional progressions, not requirements. For best results, choose equipment appropriate for your current ability and prioritize consistent movement quality.