Straight Legs Sit-Up Toe Tap: Form, Sets, Tips & FAQ
Learn the Straight Legs Sit-Up Toe Tap for stronger abs, better core control, and clean toe-reach form with sets, tips, FAQs, and gear.
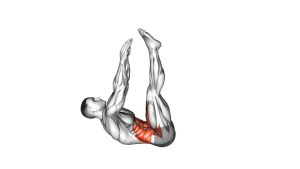
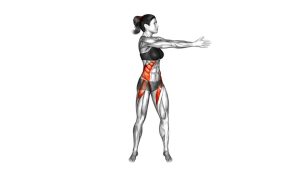
Straight Legs Sit-Up Toe Tap
This exercise works best when the movement is controlled from start to finish. First, keep your legs straight and steady. Then, lift your head, shoulders, and upper back as your arms reach toward your toes. Finally, lower back down with control instead of dropping quickly. As a result, the abs stay active during both the upward and downward phases.
Quick Overview
| Body Part | Abs |
|---|---|
| Primary Muscle | Rectus abdominis |
| Secondary Muscle | Hip flexors, transverse abdominis, obliques, deep core stabilizers |
| Equipment | No equipment required; optional exercise mat |
| Difficulty | Intermediate because the legs stay elevated while the torso performs a full sit-up reach |
Sets & Reps (By Goal)
- Core strength: 3–4 sets × 8–12 reps with controlled tempo
- Muscle endurance: 2–3 sets × 12–20 reps with steady breathing
- Beginner progression: 2–3 sets × 6–10 reps with a smaller sit-up range
- Core finisher: 2 sets × 30–45 seconds, using smooth reps only
Progression rule: Add reps before adding speed. However, if your legs swing or your lower back lifts excessively, keep the reps lower and improve control first.
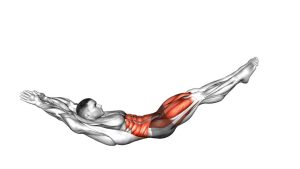
Setup / Starting Position
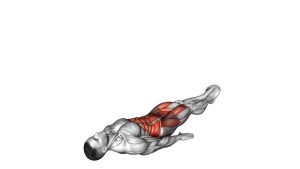
- Lie on your back: Use a flat floor surface and keep your body long from head to hips.
- Raise your legs: Lift both legs upward until they are close to vertical while keeping the knees straight.
- Reach your arms overhead: Start with your arms extended behind or above your head, depending on comfort.
- Brace lightly: Tighten your abs enough to stop your lower back from arching aggressively.
- Keep the legs steady: Before each rep, make sure the feet stay stacked above the hips as much as possible.
Tip: If straight legs feel too demanding, slightly reduce the range or practice a basic toe reach crunch first.
Execution (Step-by-Step)
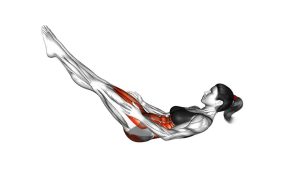
- Start from the floor: Keep your legs straight and raised while your arms begin overhead.
- Lift the upper body: Curl your head, shoulders, and upper back away from the floor.
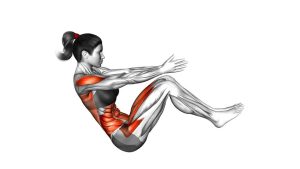
- Reach toward the toes: Bring your hands forward and aim toward your feet without pulling on your neck.
- Tap or reach near the toes: At the top, briefly touch or reach close to the toes while keeping the legs stable.
- Lower with control: Roll the torso back down slowly as the arms return toward the starting position.
- Reset and repeat: Keep the legs vertical before starting the next repetition.
Pro Tips & Common Mistakes
- Move with control: Avoid throwing the arms forward just to create momentum.
- Keep the legs straight: A soft bend may happen for comfort, but the goal is a straight-leg position.
- Reach up, not forward only: Aim toward the toes so the abs create the lift.
- Do not yank the neck: Keep the chin relaxed and let the torso rise through abdominal contraction.
- Avoid fast drops: Lower slowly because the eccentric phase builds control.
- Control the lower back: If the back arches hard, reduce the range or take longer rest.
- Breathe smoothly: Exhale as you sit up and inhale as you return to the floor.
FAQ
What muscles does the Straight Legs Sit-Up Toe Tap work?
It mainly works the rectus abdominis. In addition, the hip flexors and deep core muscles help keep the legs lifted and steady during the sit-up.
Is this exercise the same as a toe touch crunch?
It is similar, but not always identical. A toe touch crunch usually uses a shorter range, while this version includes a stronger sit-up motion where the torso rises higher toward the toes.
Should my legs move during the exercise?
Ideally, your legs should stay straight, vertical, and stable. However, slight movement can happen if you are fatigued. If that happens often, slow down and reduce the number of reps.
Is the Straight Legs Sit-Up Toe Tap good for beginners?
It can be challenging for beginners because the legs stay elevated throughout the movement. Therefore, beginners may start with fewer reps, a smaller range, or a basic toe reach crunch.
Why do I feel my hip flexors working?
The hip flexors help hold the legs up, so some activation is normal. However, if they dominate the movement, focus on bracing your abs and lowering the reps.
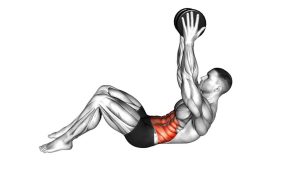
How can I make this exercise harder?
You can slow the lowering phase, pause near the toes, or hold a very light medicine ball. However, only progress when your legs stay stable and your torso lowers with control.
Recommended Equipment (Optional)
- Exercise Mat — adds comfort for the spine, hips, and shoulders during floor-based core work
- Thick Yoga Mat — useful if you need extra cushioning while lowering the back to the floor
- Core Sliders — helpful for adding other controlled core variations to your abs routine
- Light Medicine Ball — optional progression tool for advanced toe-reach sit-up variations
- Adjustable Ankle Weights — advanced option for leg-control progressions, used only with excellent form
Tip: Equipment is optional. For best results, master clean bodyweight control before adding load or harder variations.