Sitting Air Bike on a Chair: Seated Core Exercise for Abs & Obliques
Learn the Sitting Air Bike on a Chair for abs, obliques, and seated core control. Includes setup, form steps, reps, mistakes, FAQs, and gear.
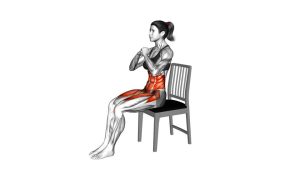
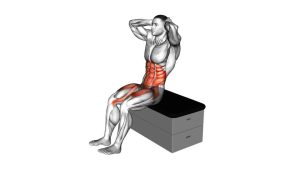
Sitting Air Bike on a Chair
This exercise works best when the motion stays smooth, controlled, and balanced. Instead of rushing the bicycle pattern, focus on drawing one knee toward the torso while the opposite leg extends forward. At the same time, rotate the upper body toward the bent knee without pulling hard on the neck.
Quick Overview
| Body Part | Core |
|---|---|
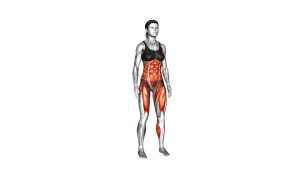
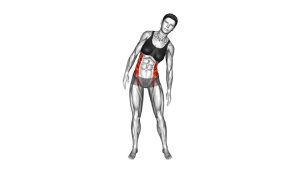
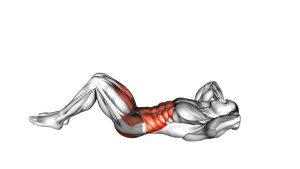
| Primary Muscle | Rectus abdominis |
| Secondary Muscle | Obliques, hip flexors, deep core stabilizers |
| Equipment | Chair |
| Difficulty | Beginner to Intermediate |
Sets & Reps (By Goal)
- Beginner core control: 2–3 sets × 8–12 reps per side with slow, clean movement.
- Core endurance: 3–4 sets × 20–40 seconds with a steady alternating rhythm.
- Oblique focus: 3 sets × 10–15 reps per side, pausing briefly at each rotation.
- Low-impact conditioning: 3–5 rounds × 30 seconds, resting 30–45 seconds between rounds.
Progression rule: First improve control and balance. Then increase time, reps, or tempo only when both feet stay lifted and the torso rotation remains smooth.
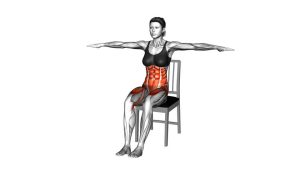
Setup / Starting Position
- Choose a stable chair: Sit near the front half of the seat so your legs can move freely.
- Place your hands behind your head: Keep the elbows open and avoid pulling the head forward.
- Lean back slightly: Maintain a controlled seated angle while keeping the chest lifted.
- Lift both feet: Bend the knees and hover the feet off the floor before starting.
- Brace the core: Tighten the midsection gently so your body does not rock on the chair.
Tip: If balance feels difficult, reduce the range of motion and keep the knee drives smaller until your control improves.
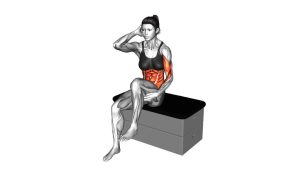
Execution (Step-by-Step)
- Start seated and braced: Keep your feet lifted, knees bent, and hands lightly behind your head.
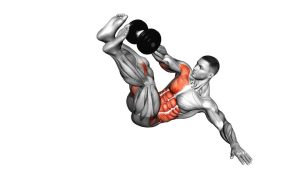
- Drive one knee inward: Bring one knee toward your torso while the opposite leg extends forward.
- Rotate toward the bent knee: Turn your upper body so the opposite elbow moves toward the incoming knee.
- Control the extended leg: Keep the straightening leg hovering instead of dropping it to the floor.
- Switch sides smoothly: Return through the center and repeat the same pattern on the opposite side.
- Continue alternating: Maintain a steady air-bike rhythm without jerking, collapsing, or using momentum.
Pro Tips & Common Mistakes
- Keep the elbows wide: This helps prevent neck pulling and keeps the rotation coming from the torso.
- Move with control: A slower rhythm usually trains the abs better than fast, messy pedaling.
- Do not let the feet touch down: Keep the legs hovering if your goal is continuous core tension.
- Avoid excessive leaning: Lean back only enough to challenge the core without losing chair stability.
- Rotate from the ribs: Do not simply flap the elbows; turn the torso toward the knee.
- Use a smaller range if needed: Smaller knee drives are better than swinging or losing balance.
- Stay tall through the chest: Avoid collapsing the upper back as fatigue builds.
FAQ
What muscles does the Sitting Air Bike on a Chair work?
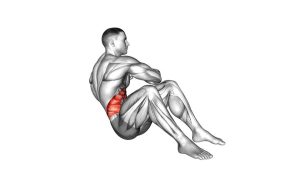
It mainly targets the rectus abdominis, while the twisting motion also trains the obliques. Additionally, the hip flexors assist as the knees drive in and the legs extend.
Is this exercise beginner-friendly?
Yes, it can be beginner-friendly because it is done on a chair. However, keeping both feet lifted makes it more challenging. Therefore, beginners should start with a smaller range of motion and slower reps.
Should my feet touch the floor during the movement?
In the visible version of the exercise, the feet stay lifted throughout the reps. If that is too difficult, you can briefly tap one foot down as a regression, then return to the full hovering version later.
Is the Sitting Air Bike on a Chair good for obliques?
Yes. Because the movement includes alternating torso rotation, it strongly involves the obliques. For better oblique engagement, rotate with control rather than rushing the elbow toward the knee.
What is the most common mistake?
The most common mistake is using momentum. When the legs swing too fast or the elbows pull the head forward, the abs work less effectively and the neck or lower back may feel uncomfortable.
Recommended Equipment
- Sturdy Workout Chair — provides a stable base for seated core exercises.
- Non-Slip Exercise Mat — helps keep the chair more secure during seated movement.
- Adjustable Ankle Weights — optional progression for advanced users who already control the movement well.
- Resistance Bands Set — useful for pairing with seated core and hip-flexor strengthening drills.
- Core Sliders — helpful for related core progressions and controlled abdominal training.
Tip: Equipment is optional. The main requirement is a stable chair and controlled body positioning.