V-Sit Toe Tap: Core Form, Sets, Tips & FAQ
Learn the V-Sit Toe Tap for stronger abs, obliques, and hip control. Includes form steps, sets by goal, common mistakes, FAQs, and gear.
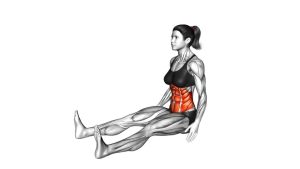
V-Sit Toe Tap
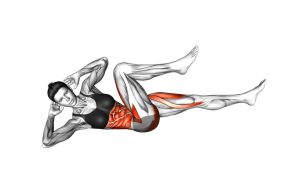
This exercise works best when each rep is smooth and deliberate. First, build a stable V-sit position. Then, lower one leg with control as the opposite hand reaches toward the foot. After that, return to center before switching sides. As a result, the movement challenges your core without relying on momentum.
Quick Overview
| Body Part | Core |
|---|---|
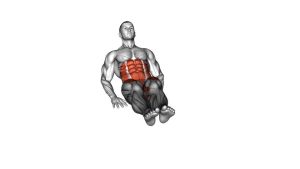
| Primary Muscle | Rectus abdominis and deep core stabilizers |
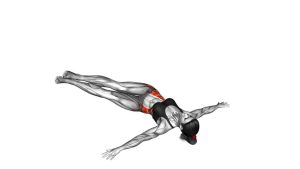
| Secondary Muscle | Obliques, hip flexors, quadriceps, and lower-back stabilizers |
| Equipment | No equipment required; optional exercise mat |
| Difficulty | Intermediate because it requires balance, coordination, and controlled leg movement |
Sets & Reps (By Goal)
- Core control: 2–3 sets × 8–12 taps per side with a slow, steady tempo.
- Muscular endurance: 3–4 sets × 12–20 total taps while keeping the feet light.
- Abs finisher: 2–3 rounds × 30–45 seconds with 45–60 seconds of rest.
- Beginner modification: 2 sets × 6–8 taps per side with knees more bent.
Progression rule: Add reps only when you can keep the V-sit shape stable. Moreover, increase range gradually instead of rushing the tap.
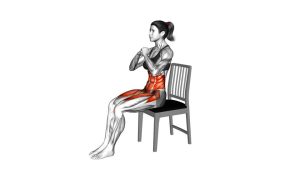
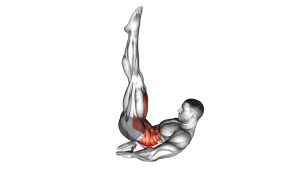
Setup / Starting Position
- Sit on the floor: Start with your knees bent and feet close to the ground.
- Lean back slightly: Keep your chest lifted while your torso angles backward into a balanced position.
- Lift the legs: Raise both feet from the floor and keep the knees slightly bent for control.
- Extend the arms forward: Reach your hands toward your legs without rounding the shoulders aggressively.
- Brace the core: Keep the stomach tight so your lower back does not collapse.
Tip: Use a smaller V-shape at first. Then, as your balance improves, create a longer lever by extending the legs slightly more.
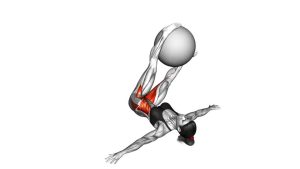
Execution (Step-by-Step)
- Hold the V-sit: Balance on your hips with your torso leaned back and both legs lifted.
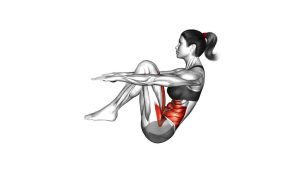
- Lower one leg: Move one foot toward the floor with control instead of dropping it quickly.
- Reach across: Bring the opposite hand toward the lowering foot for a light tap or near tap.
- Rotate slightly: Allow a small torso turn, but keep the core braced and the chest lifted.
- Return to center: Lift the leg back up and bring the hand forward again.
- Switch sides: Repeat the same pattern on the opposite side while maintaining the V-position.
Pro Tips & Common Mistakes
- Keep the chest lifted: Avoid collapsing backward or rounding the upper body too much.
- Control each tap: A slow tap trains the abs better than a fast, swinging motion.
- Do not hold your breath: Exhale during the reach, then inhale as you return to center.
- Avoid neck tension: Keep the head in line with the torso instead of jutting the chin forward.
- Keep both legs active: The non-tapping leg should stay lifted and steady.
- Reduce range if needed: If your lower back feels stressed, bend the knees more and make the tap smaller.
FAQ
What muscles does the V-Sit Toe Tap work?
The V-Sit Toe Tap mainly works the abs and deep core stabilizers. Additionally, the alternating reach trains the obliques, while the lifted-leg position involves the hip flexors.
Is the V-Sit Toe Tap good for beginners?
It can be challenging for complete beginners because balance is required. However, you can modify it by bending the knees more, keeping the taps smaller, or briefly touching one heel down for support.
Should my feet touch the floor?
The foot may lightly tap or come close to the floor. Nevertheless, the goal is control, not impact. Therefore, avoid resting the foot fully between reps.
Why do I feel this in my hip flexors?
Some hip flexor effort is expected because the legs stay elevated. However, if the hip flexors dominate, bend the knees more and focus on bracing the abs before each tap.
How do I make the V-Sit Toe Tap harder?
You can extend the legs more, slow the tempo, increase total reps, or hold the V-sit longer between taps. Even so, only progress when your lower back stays controlled.
Recommended Equipment (Optional)
- Thick Exercise Mat — adds comfort under the hips and lower back during seated core work
- Non-Slip Yoga Mat — helps keep your seated position stable during alternating taps
- Core Sliders — useful for other controlled abs and stability exercises
- Adjustable Ankle Weights — optional progression tool for advanced users only
- Small Pilates Ball — can support modified core drills and controlled abdominal practice
Tip: Start with only a mat. Then, add optional tools later if your form stays smooth and your lower back remains comfortable.