Weighted Standing Hand Squeeze: Form, Grip Benefits, Sets & FAQ
Learn how to do the Weighted Standing Hand Squeeze for stronger forearms and crushing grip strength. Includes proper form, setup, sets by goal, common mistakes, FAQs, and recommended equipment.
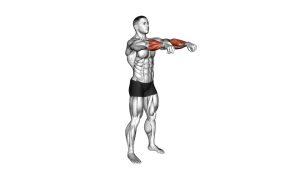
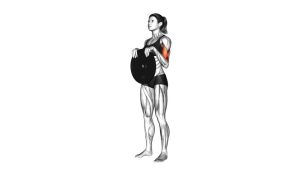
Weighted Standing Hand Squeeze
This exercise looks simple, but the training effect comes from sustained tension. Your forearm flexors, finger flexors, and wrist stabilizers work together to prevent the weight from slipping. The goal is not to move the load around, but to hold it securely with consistent pressure. Done correctly, the Weighted Standing Hand Squeeze can improve grip endurance for lifters, athletes, climbers, and anyone who wants stronger hands and forearms.
Quick Overview
| Body Part | Forearms |
|---|---|
| Primary Muscle | Forearm flexors / finger flexors |
| Secondary Muscle | Wrist stabilizers, brachioradialis, hand muscles |
| Equipment | Weight plate, grip block, or other squeezable weighted implement |
| Difficulty | Beginner to Intermediate |
Sets & Reps (By Goal)
- Grip endurance: 2–4 sets × 20–45 second holds per hand
- Grip strength: 3–5 sets × 10–20 second heavy holds per hand
- General forearm development: 2–4 sets × 15–30 second holds per hand
- Warm-up / activation: 1–2 sets × 10–15 second light holds per hand
- Finisher work: 2–3 sets to near grip fatigue with clean form
Progression rule: First increase hold time, then increase total sets, and only after that move to a heavier plate or more difficult grip variation.
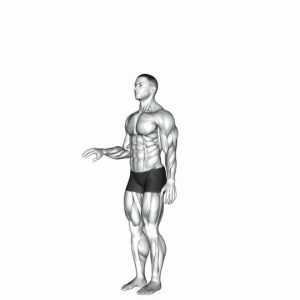
Setup / Starting Position
- Stand tall: Keep your chest up, shoulders relaxed, and spine neutral.
- Hold the weight at your side: Grip the plate securely with one hand and let the arm hang naturally.
- Set the wrist: Keep it neutral—avoid excessive flexion, extension, or side bending.
- Brace lightly: Tighten your midsection just enough to stay stable without leaning.
- Use a controlled load: Choose a weight you can hold without losing hand position or posture.
Tip: If you are new to grip work, start with shorter holds and focus on keeping the wrist stacked and the fingers fully engaged.
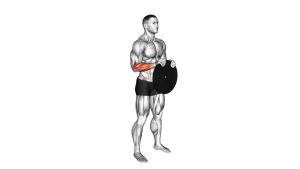
Execution (Step-by-Step)
- Grip the implement hard: Squeeze the plate firmly using your fingers and palm.
- Keep the arm quiet: Do not curl, shrug, swing, or twist the shoulder.
- Maintain a neutral wrist: Hold the line from forearm to hand steady.
- Stay tall as you hold: Keep posture upright and avoid leaning away from the load.
- Hold until target time: Maintain constant tension for the prescribed duration.
- Lower or release with control: Do not let the weight slip suddenly from your hand.
- Switch sides: Repeat the same hold duration and quality on the other hand.
Pro Tips & Common Mistakes
- Squeeze with intent: Passive holding is not enough—actively crush the handle or plate the whole time.
- Keep the wrist stacked: A neutral wrist helps direct tension into the forearms instead of the joints.
- Do not swing the load: Momentum reduces the grip challenge and changes the exercise.
- Avoid shoulder compensation: Shrugging or leaning means your grip is no longer doing the main job.
- Use even timing per hand: Match the duration on both sides to avoid imbalances.
- Progress patiently: Grip work responds well to consistency, not reckless jumps in load.
- Pair it intelligently: This works well after rows, deadlifts, carries, or arm training.
FAQ
What muscles does the Weighted Standing Hand Squeeze work the most?
It primarily targets the forearm flexors and finger flexors, while the wrist stabilizers and smaller hand muscles help keep the load secure.
Is this a dynamic forearm exercise or a static one?
This is mainly a static isometric exercise. The goal is to maintain a strong squeeze against the load rather than move it through a range of motion.
How long should I hold each rep?
Most people do well with 10 to 45 second holds depending on whether the goal is grip strength, endurance, or a finisher-style burn.
Can I use something other than a weight plate?
Yes. You can use grip blocks, pinch blocks, hand grippers, or other implements that let you maintain strong hand tension safely.
Should I train this before or after heavy pulling exercises?
Usually after. Doing intense grip work first may reduce your performance on rows, pull-ups, deadlifts, and other pulling lifts.
Recommended Equipment
- Yes4All Cast Iron Weight Plate — a practical plate option for standing hand squeezes, holds, and other grip-focused drills
- IronMind Captains of Crush Gripper — ideal for direct crush-grip training that complements static squeeze holds
- Fat Gripz Original — thick-handle adapters that make dumbbells and bars harder to hold, increasing forearm demand
- FitBeast Wrist Roller Forearm Trainer — a dedicated forearm and grip endurance tool for additional wrist and hand development
- Yes4All Wrist and Forearm Blaster — a useful accessory for building thicker forearms and stronger supporting grip
Tip: Use the hand squeeze as your main isometric hold, then add grippers, thick grips, or wrist roller work for extra variety and progression.