Reverse Dip: Proper Form, Sets, Tips & FAQ
Learn the Reverse Dip to build triceps, chest, and front shoulder strength using controlled bodyweight reps. Includes form tips, sets by goal, common mistakes, FAQs, and recommended equipment.
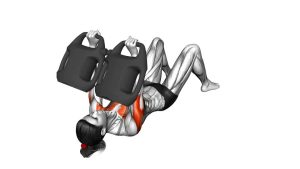
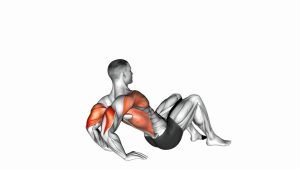
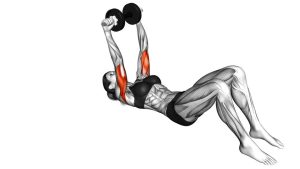
Reverse Dip
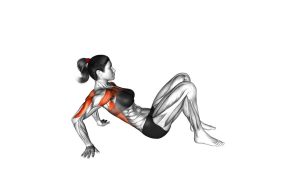
This exercise works well for building upper-arm strength and improving control in bodyweight pressing patterns. You should feel the triceps doing most of the work, with the chest assisting through the deeper portion of the movement. Since the elbows move through a large bend-and-extend range, quality matters more than speed. Controlled reps help you keep tension on the target muscles and reduce unnecessary stress on the shoulders and wrists.
Quick Overview
| Body Part | Triceps |
|---|---|
| Primary Muscle | Triceps brachii |
| Secondary Muscle | Pectoralis major, anterior deltoids, core stabilizers |
| Equipment | Bodyweight only (optional exercise mat) |
| Difficulty | Beginner to Intermediate |
Sets & Reps (By Goal)
- Technique practice: 2–3 sets × 6–8 reps with slow tempo and full control
- Muscle building: 3–4 sets × 8–15 reps with 45–75 sec rest
- Bodyweight endurance: 2–4 sets × 12–20 reps with steady form
- Warm-up activation: 1–2 sets × 8–10 easy reps before upper-body training
Progression rule: First improve control, depth, and rep quality. Then add reps, slow the lowering phase, or use a harder variation only when you can keep the shoulders stable and elbows tracking well.
Setup / Starting Position
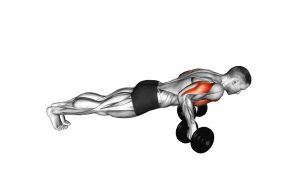
- Start on the floor: Set up in a kneeling bodyweight pressing position with your hands planted firmly under or slightly outside shoulder width.
- Brace your torso: Keep the core engaged and create a straight line from the knees through the hips to the head.
- Set the shoulders: Pull the shoulders down and back lightly so they stay stable during the rep.
- Position the elbows: Keep them angled back rather than flared straight out to the sides.
- Find your bottom range: Lower under control until the chest comes close to the floor without losing posture.
Tip: A soft exercise mat can make the setup more comfortable and help you focus on clean reps instead of joint pressure.
Execution (Step-by-Step)
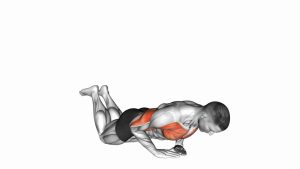
- Begin from the lowered position: Keep the chest close to the ground, elbows bent deeply, and body braced.
- Press through the palms: Extend the elbows to drive the torso upward in one smooth motion.
- Keep alignment: Avoid letting the hips sag or the head push too far forward as you rise.
- Reach the top with control: Finish when the arms are nearly straight and the chest feels lifted.
- Lower slowly: Bend the elbows again and return to the bottom position without dropping.
Pro Tips & Common Mistakes
- Keep tension through the whole rep: Don’t relax at the bottom and “bounce” out of it.
- Use a controlled eccentric: Lowering slowly increases muscle tension and improves joint control.
- Don’t flare the elbows excessively: A slightly tucked elbow path usually feels better on the shoulders.
- Avoid neck jutting: Keep the head in line with the spine instead of reaching forward.
- Lock in your core: A stable torso helps transfer force and keeps the movement cleaner.
- Progress gradually: Increase reps or range only when each rep looks consistent and pain-free.
FAQ
What muscles does the Reverse Dip work most?
The triceps are the main movers, especially during the pressing phase. The chest and front delts assist, while the core helps keep the body stable.
Is the Reverse Dip good for beginners?
Yes, especially the kneeling version shown here. It reduces the total load compared with a full bodyweight variation, making it easier to learn control and pressing mechanics.
Should I go all the way down on every rep?
Only as deep as you can go while keeping the shoulders stable and the movement pain-free. A deep range is useful, but control matters more than forcing extra depth.
How fast should I do the reps?
A controlled tempo works best. Try pressing up with intent, then lowering for about 2–3 seconds to keep tension on the muscles.
What if I feel this more in my shoulders than my triceps?
Check your elbow path, shoulder position, and tempo. Tucking the elbows a little more, bracing the core, and avoiding a rushed descent usually shifts more work back to the triceps.
Recommended Equipment (Optional)
- Exercise Mat — improves comfort for kneeling bodyweight work and floor-based pressing movements
- Push-Up Bars — can improve wrist comfort and provide a more neutral hand position
- Resistance Bands Set — useful for warm-ups, triceps activation, and extra upper-body accessory work
- Wrist Wraps — helpful if you want extra wrist support during pressing sessions
- Parallettes — useful for progressing into harder bodyweight pressing and dip-style variations
Tip: Optional gear should improve comfort or progression, not replace good technique. Clean body positioning and controlled reps matter most.