One-Hand Spring Wrist Curl: Safe Form, Sets, Tips & FAQ
Learn the One-Hand Spring Wrist Curl to strengthen forearm flexors, improve grip control, and build wrist stability with proper setup, step-by-step form, sets, tips, FAQs, and recommended equipment.
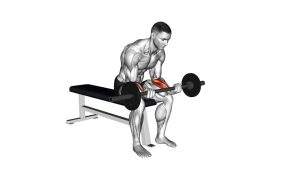
One-Hand Spring Wrist Curl
This exercise works best when it is performed with strict control and a moderate resistance level. Because the spring tool creates tension through the hand, the wrist and fingers must work together to keep the movement stable. You should feel the strongest contraction along the inner forearm, especially as the wrist curls upward into flexion.
The movement may look simple, but the details matter. If the elbow bends, the arm swings, or the shoulder shrugs, the exercise loses its isolation. Keep the motion small, smooth, and repeatable. The best reps are not the fastest reps; they are the reps where the wrist moves cleanly while the rest of the body stays quiet.
Quick Overview
| Body Part | Forearms |
|---|---|
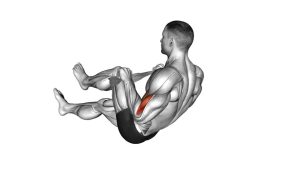
| Primary Muscle | Forearm flexors |
| Secondary Muscle | Finger flexors, grip muscles, wrist stabilizers |
| Equipment | Spring hand grip / spring wrist exerciser |
| Difficulty | Beginner |
Sets & Reps (By Goal)
- Forearm endurance: 2–4 sets × 15–25 reps per hand with light resistance and short rest.
- Forearm muscle growth: 3–4 sets × 10–15 reps per hand with a controlled 2–3 second lowering phase.
- Grip strength support: 3–5 sets × 8–12 reps per hand using firm resistance and clean wrist motion.
- Warm-up / wrist preparation: 1–2 sets × 12–20 easy reps before curls, rows, pull-ups, or grip-heavy work.
Progression rule: Increase reps first, then increase spring resistance. If your elbow moves or the wrist path becomes sloppy, reduce resistance and rebuild control.
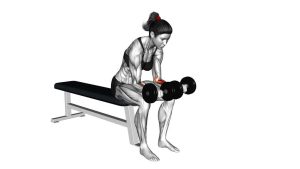
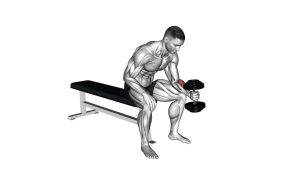
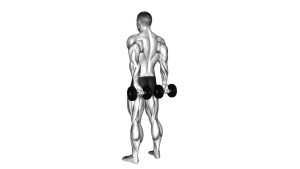
Setup / Starting Position
- Stand upright: Keep your feet stable, chest relaxed, and torso still.
- Hold the spring tool: Grip the handle firmly with one hand without crushing it aggressively.
- Turn the palm upward: Use a palms-up position so the wrist flexors become the main target.
- Fix the elbow: Keep the elbow slightly bent but stable. It should not pump during the movement.
- Relax the shoulder: Avoid shrugging or lifting the upper arm as you curl.
- Start with a gentle stretch: Let the wrist lower slightly before the first rep so the forearm flexors are lengthened.
Tip: If you struggle to isolate the wrist, perform the exercise slower and reduce the range until you can keep the elbow still.
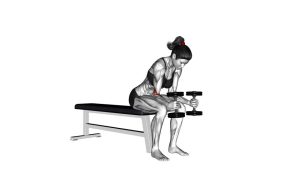
Execution (Step-by-Step)
- Brace your position: Stand tall and keep the working arm still at your side or slightly in front of your body.
- Curl the wrist upward: Flex the wrist by bringing the palm side of the hand closer toward the forearm.
- Squeeze at the top: Pause briefly when you reach full comfortable wrist flexion.
- Keep the elbow fixed: Do not bend the elbow to help the curl. The motion should come from the wrist only.
- Lower slowly: Return to the starting position under control and resist the spring tension on the way down.
- Repeat cleanly: Keep every rep smooth, consistent, and controlled from start to finish.
- Switch sides: Complete the same number of reps on the opposite hand.
Pro Tips & Common Mistakes
- Keep the wrist path clean: Curl upward and lower back down without twisting the hand side to side.
- Use a controlled tempo: Lift in about 1–2 seconds, squeeze briefly, then lower in 2–3 seconds.
- Do not chase heavy resistance: A lighter spring with clean control is better than a heavy spring with swinging.
- Avoid elbow assistance: Bending the elbow turns the movement into an arm curl instead of a wrist curl.
- Keep the shoulder relaxed: Shoulder tension usually means you are forcing the movement.
- Train both hands equally: Start with the weaker hand and match the same reps on the stronger side.
- Respect wrist comfort: A forearm burn is normal, but sharp joint pain is a sign to stop or reduce resistance.
- Control the lowering phase: Do not let the spring snap your wrist down. The eccentric portion builds strength and control.
FAQ
What muscles does the One-Hand Spring Wrist Curl work?
It mainly targets the forearm flexors, the muscles responsible for curling the wrist. It also trains the finger flexors, grip muscles, and wrist stabilizers because you must hold the spring tool firmly while controlling the movement.
Is this exercise good for grip strength?
Yes. Although the main action is wrist flexion, the hand must maintain a strong grip throughout the set. This makes it useful for improving grip endurance and supporting pulling exercises, curls, carries, and other grip-heavy training.
Should I use heavy resistance?
Beginners should start light. Heavy resistance often causes elbow movement, shoulder shrugging, and short reps. Use a resistance level that allows full control, then progress slowly over time.
How often should I perform One-Hand Spring Wrist Curls?
Most people can perform them 2–4 times per week. If you use them as a light warm-up, you may use them more often. If your wrist or elbow feels irritated, reduce the volume and allow more recovery.
Can I do this before upper-body workouts?
Yes, but keep it light if you use it before training. Heavy forearm work before rows, pull-ups, deadlifts, or curls may fatigue your grip and reduce performance on bigger exercises.
Is this better than dumbbell wrist curls?
It is not necessarily better, but it is more portable and convenient. Dumbbell wrist curls are easier to load precisely, while a spring wrist tool is simple, compact, and useful for quick forearm training almost anywhere.
Recommended Equipment
- Spring Wrist Exerciser — ideal for practicing wrist curls with spring-style resistance
- Adjustable Hand Grip Strengthener — useful for grip strength, hand endurance, and progressive resistance
- Forearm Wrist Roller — excellent for forearm endurance and wrist flexion strength
- Light Dumbbell Set — helpful for wrist curls, reverse wrist curls, and forearm accessory training
- Wrist Wraps — optional support for heavier gym sessions and pressing workouts
Tip: Choose tools that allow smooth control. If a product forces your wrist into an uncomfortable angle, use lighter resistance or switch to a different handle design.