Standing Switching Palm Squeezes: Forearm Grip Exercise, Sets, Form & FAQ
Learn how to do Standing Switching Palm Squeezes to improve forearm activation, grip endurance, wrist stability, and hand control with proper form, sets, tips, FAQs, and equipment.
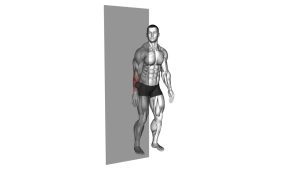
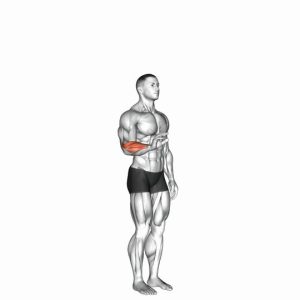
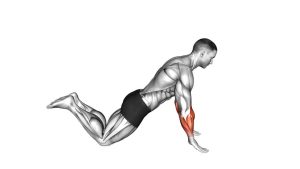
Standing Switching Palm Squeezes
This exercise is not about large movement. It is about creating strong, controlled tension through the hands and forearms while maintaining clean posture. Each squeeze should feel deliberate, firm, and controlled. The arms stay extended, the wrists remain neutral, and the forearms do the work through repeated alternating contractions.
Quick Overview
| Body Part | Forearms |
|---|---|
| Primary Muscle | Forearm flexors, finger flexors, grip muscles |
| Secondary Muscle | Wrist extensors, brachioradialis, shoulder stabilizers |
| Equipment | No equipment required |
| Difficulty | Beginner |
Sets & Reps (By Goal)
- Forearm activation: 2–3 sets × 20–30 alternating squeezes
- Grip endurance: 3–4 sets × 30–60 seconds
- Warm-up before lifting: 1–2 sets × 15–25 controlled squeezes
- Desk break / circulation: 1–2 sets × 20–40 seconds
Progression rule: First increase control and duration. Then increase squeeze intensity. Do not rush the switching rhythm.
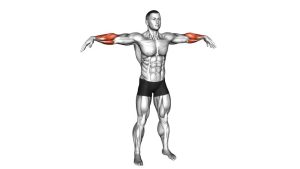
Setup / Starting Position
- Stand tall: Keep your feet about hip-width to shoulder-width apart.
- Extend your arms: Raise both arms straight in front of you around shoulder height.
- Set your wrists: Keep wrists neutral, not bent up, down, or sideways.
- Relax your shoulders: Avoid shrugging or pulling the shoulders toward the ears.
- Prepare your hands: Keep both palms ready to squeeze, with fingers controlled and active.
Execution (Step-by-Step)
- Start with both arms extended: Maintain a tall posture and keep your elbows straight but not locked aggressively.
- Squeeze one palm firmly: Create tension through one hand as if gripping tightly.
- Hold briefly: Pause for a split second while keeping the wrist straight.
- Switch sides: Relax the first hand slightly while squeezing the opposite palm.
- Continue alternating: Move the tension from side to side in a steady rhythm.
- Keep the body still: Do not swing the arms, lean back, or shrug the shoulders.
- Finish controlled: Lower the arms only after completing the set with clean form.
Pro Tips & Common Mistakes
- Keep your wrists neutral: Bending the wrist reduces clean forearm activation and may irritate the joint.
- Do not rush: Fast squeezing often turns into sloppy hand movement instead of controlled tension.
- Keep the elbows stable: Avoid bending and straightening the arms during each squeeze.
- Avoid shoulder tension: If your traps take over, lower the arms slightly and reset posture.
- Use even pressure: Try to make both hands work equally instead of letting one side dominate.
- Breathe normally: Do not hold your breath during the squeezing sequence.
- Control the release: Do not fully collapse the hand after each squeeze; keep light baseline tension.
FAQ
What muscles do Standing Switching Palm Squeezes work?
They mainly work the forearm flexors, finger flexors, and grip muscles. The wrist extensors and brachioradialis help stabilize the forearm while the shoulders hold the arms in position.
Is this exercise good for grip strength?
Yes. It helps build basic grip endurance and hand control, especially when performed with consistent pressure and controlled switching between sides.
Do I need equipment for this exercise?
No. This is a bodyweight-style forearm drill using only hand tension. However, grip tools can be added later if you want more resistance.
Should my arms stay raised the whole time?
Yes, if you can keep good form. Holding the arms forward adds shoulder stability demand, but if your shoulders fatigue too quickly, lower the arms slightly and continue with clean wrist control.
Why do my forearms burn during this exercise?
The burning feeling usually comes from repeated isometric contractions and blood-flow demand in the grip muscles. That is normal as long as it feels muscular and not sharp, numb, or nerve-like.
Recommended Equipment (Optional)
- Hand Grip Strengthener — useful for progressing grip strength after mastering palm squeezes
- Forearm Wrist Roller — excellent for wrist flexor, extensor, and forearm endurance training
- Therapy Putty — great for finger strength, hand control, and gentle grip rehab-style work
- Finger Resistance Bands — balances grip work by training finger extension and hand opening strength
- Stress Ball / Grip Ball — simple tool for controlled squeezing, warm-ups, and grip endurance practice
Tip: Start with light tools first. Forearms respond well to consistency, but too much squeezing volume can irritate the wrist, elbow, or finger tendons.