Floor Crunch: Proper Form, Sets, Benefits, Tips & FAQ
Learn how to do the Floor Crunch with proper form to strengthen your abs, improve core control, and avoid neck strain. Includes setup, execution, sets, mistakes, FAQs, and recommended equipment.
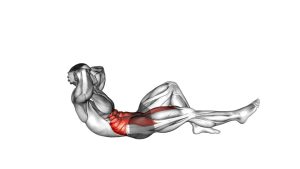
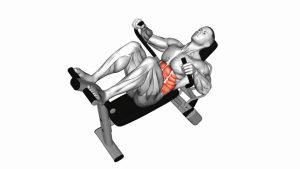
Floor Crunch
The Floor Crunch is one of the most useful beginner ab exercises because it teaches direct abdominal contraction with very little equipment or setup. It can be performed at home, in the gym, or as part of a warm-up before heavier core training. Since the movement is small, the quality of each repetition matters more than how high the torso rises.
A proper crunch should feel like the abdominal muscles are shortening and tightening. Your hips should stay quiet, your feet should remain grounded, and your lower back should not aggressively arch away from the floor. When performed correctly, this exercise builds better control through the waist and improves your ability to brace during other movements.
Quick Overview
| Body Part | Abs |
|---|---|
| Primary Muscle | Rectus abdominis |
| Secondary Muscle | Obliques, transverse abdominis, deep core stabilizers |
| Equipment | No equipment required; optional exercise mat |
| Difficulty | Beginner |
Sets & Reps (By Goal)
- Beginner core activation: 2–3 sets of 10–15 reps with slow control.
- Muscle endurance: 3–4 sets of 15–25 reps with a steady rhythm.
- Ab hypertrophy focus: 3–5 sets of 10–20 reps with a 1–2 second squeeze at the top.
- Warm-up or core primer: 1–2 sets of 8–12 reps before training.
- Home workout finisher: 2–4 rounds of 20–30 controlled reps with short rest.
Progression rule: First improve control, breathing, and peak contraction. After that, increase reps, add a longer top pause, or combine the Floor Crunch with other ab exercises such as reverse crunches, dead bugs, or plank variations.
Setup / Starting Position
- Lie on your back: Place your body flat on the floor or on an exercise mat. Keep your spine comfortable and your hips square.
- Bend your knees: Position your feet flat on the floor about hip-width apart. Your knees should point upward without collapsing inward.
- Set your arms: Place your fingertips lightly near the sides of your head, across your chest, or along your thighs. Do not interlock your hands and pull the neck.
- Relax your shoulders: Keep your upper traps soft. Let the abs create the lift, not the neck or shoulders.
- Brace lightly: Draw the ribs down and gently tighten the abdominal wall before starting the first rep.
- Keep your gaze neutral: Look slightly upward instead of forcing the chin hard into the chest.
A good starting position should feel stable and simple. If your lower back feels uncomfortable, reduce the range or place a mat underneath your body for support.
Execution (Step-by-Step)
- Begin with an exhale: Breathe out gently as you prepare to lift. This helps the ribs move down and allows the abs to contract more strongly.
- Curl the upper spine: Lift your head, neck, and shoulder blades a few inches from the floor. Think about bringing the ribs toward the pelvis.
- Keep the lower body still: Your feet, hips, and lower back should stay controlled. Avoid using momentum from the legs.
- Squeeze at the top: Pause briefly when your abs feel fully contracted. Do not try to sit all the way up.
- Lower with control: Return your shoulders to the floor slowly. Keep tension in the abs instead of dropping down.
- Reset before the next rep: Breathe in, maintain your position, and repeat with the same controlled range.
Pro Tips & Common Mistakes
Pro Tips
- Move slowly: A controlled crunch creates better abdominal tension than fast, momentum-based reps.
- Exhale during the lift: Breathing out helps the ribs move down and improves the ab contraction.
- Use a short range: Lift only until the shoulder blades come off the floor. More height does not always mean better ab work.
- Keep the chin soft: Maintain a small space between the chin and chest. This reduces neck strain.
- Pause at the top: A one-second squeeze can make the exercise more effective without adding equipment.
- Pair with lower-ab work: Combine Floor Crunches with reverse crunches or dead bugs for more complete core training.
Common Mistakes
- Pulling on the neck: This shifts tension away from the abs and may irritate the cervical spine.
- Using momentum: Swinging up quickly reduces muscle tension and makes the movement less effective.
- Sitting up too high: Turning the crunch into a sit-up increases hip flexor involvement.
- Holding the breath: Breath-holding can create unnecessary pressure and reduce rhythm.
- Flattening the movement: Simply lifting the head without curling the ribs does not fully target the abs.
- Rushing the lowering phase: Dropping down removes the eccentric benefit of the exercise.
FAQ
What muscles does the Floor Crunch work?
The Floor Crunch mainly works the rectus abdominis, which is the front abdominal muscle. It also involves the obliques and deep core muscles for stabilization.
Is the Floor Crunch good for beginners?
Yes. The Floor Crunch is beginner-friendly because it uses bodyweight only and has a short range of motion. However, beginners should focus on slow reps and avoid pulling on the neck.
Should my lower back stay on the floor?
Your lower back should remain stable and comfortable. It does not need to be aggressively smashed into the floor, but it should not arch strongly during the movement.
How high should I lift during a Floor Crunch?
Lift only until your shoulder blades come slightly off the floor. The goal is abdominal contraction, not maximum torso height.
Why do I feel crunches in my neck?
Neck tension usually happens when you pull with the hands, tuck the chin too hard, or lift with the head first. Keep your hands light, relax your jaw, and curl from the ribs.
Can Floor Crunches reduce belly fat?
Floor Crunches strengthen the abs, but they do not directly burn fat from one area. For visible abs, combine core training with full-body workouts, nutrition control, and consistent activity.
How often can I do Floor Crunches?
Most people can train them 2–4 times per week. If the volume is light and recovery is good, they can also be used as a short core activation drill more often.
Are Floor Crunches better than sit-ups?
Floor Crunches are often better for direct ab isolation because they use less hip flexor movement. Sit-ups train a larger range, but they can create more hip flexor and lower-back involvement.
Recommended Equipment
- Exercise Mat — provides cushioning for the spine, hips, and shoulders during floor crunches.
- Ab Mat — supports controlled abdominal training and can improve comfort during floor-based core work.
- Non-Slip Workout Mat — helps keep your body stable and prevents sliding during repeated reps.
- Adjustable Ankle Weights — useful for progressing related lower-ab movements, such as reverse crunches and leg raises.
- Resistance Bands Set — helpful for pairing crunches with anti-extension, anti-rotation, and total-core exercises.
Tip: Equipment is optional for the Floor Crunch. Start with bodyweight first, then add tools only when your form, breathing, and control are consistent.