Bulgarian Split Squat: Proper Form, Muscles Worked & Tips
Learn the bodyweight Bulgarian split squat with proper bench setup, controlled form, muscles worked, sets by goal, common mistakes, and FAQs for stronger legs.
Bodyweight Bulgarian Split Squat
The Bulgarian Split Squat, also known as the Rear-Foot-Elevated Split Squat, develops single-leg strength without requiring heavy external resistance. Because the front leg carries most of the training load, this exercise challenges the quadriceps, glutes, and supporting muscles more independently than a conventional bilateral squat.
Additionally, the elevated rear-foot position creates a greater balance demand while allowing substantial hip and knee movement. As a result, the exercise can improve lower-body coordination, muscular endurance, and unilateral strength when performed consistently. It also helps expose differences in strength or control between the left and right legs.
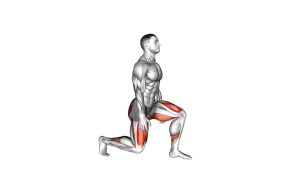
In the demonstrated variation, the athlete keeps the torso relatively upright, with the rear foot supported on a flat bench. Meanwhile, the front knee bends as the body descends vertically. The front leg then extends to return the athlete to the starting position. No dumbbells, barbells, or additional external weights are used.
Quick Overview
| Body Part | Legs |
|---|---|
| Primary Muscle | Quadriceps femoris and gluteus maximus |
| Secondary Muscle | Adductor magnus, hamstrings, gluteus medius, calves, and core stabilizers |
| Equipment | Flat workout bench or stable elevated platform; bodyweight resistance only |
| Difficulty | Intermediate — requires single-leg strength, hip mobility, and balance control |
Sets & Reps (By Goal)
Recommended Training Volume
The ideal number of Bulgarian Split Squat repetitions depends on your strength, balance, and training objective. Therefore, prioritize smooth technique before increasing repetitions or introducing additional resistance.
- Strength development: 3–4 sets × 6–10 reps per leg, resting 90–120 seconds between sets. Focus on controlled lowering and a powerful but steady ascent. If bodyweight becomes easy, gradually progress toward a loaded variation.
- Muscle hypertrophy: 3–4 sets × 8–12 reps per leg, resting 60–90 seconds. Additionally, use a controlled lowering phase to increase muscular tension while maintaining consistent knee and hip movement.
- Muscular endurance: 2–3 sets × 12–20 reps per leg, resting 45–75 seconds. Maintain a comfortable pace and avoid sacrificing balance as fatigue increases.
- Balance and coordination: 2–3 sets × 6–10 reps per leg, resting 60 seconds. Pause briefly near the bottom and concentrate on steady foot pressure.
- Mobility and controlled movement: 2–3 sets × 6–8 slow reps per leg. Use a comfortable range while emphasizing smooth hip and knee flexion. For rehabilitation purposes, follow individualized professional guidance.
Progression and Recovery
Progression rule: First, master consistent repetitions with the rear foot elevated and the front foot firmly planted. Next, increase repetitions or extend the lowering phase to approximately three seconds. Once both legs demonstrate stable technique, consider adding light dumbbells or increasing training volume. However, avoid progressing if knee alignment, balance, or control deteriorates.
Training frequency: For most healthy adults, one to three weekly sessions can fit into a balanced lower-body program, depending on training intensity and recovery. Allow sufficient recovery between challenging sessions, especially when training close to muscular fatigue.
Setup / Starting Position
Bench Position and Stance Preparation
Correct setup is essential because poor foot placement can create unnecessary balance difficulties. Therefore, establish a comfortable split stance before beginning the movement.
- Choose a stable bench: Position a flat workout bench behind your body. Ideally, its height should allow your rear foot to rest comfortably without excessive hip strain. A lower support may be easier while learning.
- Stand in front of the bench: Face away from the bench and place both feet on the floor. Next, establish a comfortable distance that allows your front knee to bend naturally.
- Elevate the rear foot: Extend one leg backward and rest the top of that foot on the bench. Keep the elevated leg relaxed enough to avoid pushing excessively against the support.
- Position the working foot: Place the front foot flat on the floor, approximately hip-width apart laterally from the rear leg. This slightly wider track can improve stability compared with standing on a narrow line.
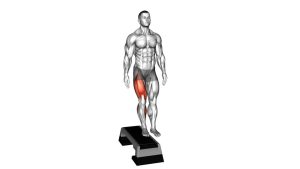
- Align the torso: Lift your chest, maintain a neutral spine, and keep your head facing forward. Meanwhile, allow your arms to hang naturally beside your body, as shown in the demonstration.
- Brace the core: Gently engage your abdominal muscles to support the spine. Keep your pelvis relatively level without excessively arching the lower back.
- Establish front-leg control: Distribute pressure across the heel, midfoot, and forefoot of the working leg. Finally, check that your front knee can follow the direction of your toes comfortably.
Finding the Correct Foot Distance
A stance that is too short may feel cramped at the bottom. Conversely, an excessively long stance may increase rear-hip discomfort or make balance difficult. Adjust your front foot until you can lower vertically while keeping the foot firmly grounded.
Additionally, remember that the rear bench is a support rather than your primary source of lifting force. Most of the effort should come from the front leg during both lowering and rising.
Setup tip: Practice the position without descending initially. Once you can remain balanced and relaxed, begin with shallow repetitions before increasing depth.
Execution (Step-by-Step)
Controlled Descent and Bottom Position
The demonstrated repetition begins in an upright split stance with the rear foot elevated. From there, the athlete descends smoothly while maintaining a stable, relatively vertical torso.
- Establish the starting position: Stand tall with your front foot fully planted and your rear foot supported on the bench. Keep the head neutral, shoulders relaxed, and abdominal muscles gently engaged.
- Initiate the descent: Bend the front knee and hip together, allowing your body to lower between the legs. Meanwhile, the elevated rear knee begins moving toward the floor.
- Maintain front-foot pressure: Keep the heel and forefoot grounded throughout the lowering phase. Avoid rolling excessively onto the toes or allowing the working foot to shift.
- Control the front knee: Allow the knee to travel naturally in the same direction as your toes. Although some forward knee movement is normal, avoid uncontrolled inward collapse.
- Lower toward the bottom position: Continue descending until the front thigh approaches parallel to the floor or your comfortable depth. The rear knee moves closer to the ground without needing to touch it.
- Pause without relaxing: Briefly stabilize at the bottom while keeping tension through the front leg. Avoid bouncing, collapsing forward, or resting your weight on the elevated foot.
Upward Drive and Return
After reaching the lowest controlled position, reverse the movement through the working leg. Consequently, the front knee and hip extend as the torso rises toward the starting position.
- Drive through the front foot: Press evenly through the working foot to begin rising. Focus on extending the front knee and hip without pushing aggressively from the rear leg.
- Maintain torso stability: Keep your chest lifted and prevent excessive side-to-side swaying. Additionally, maintain steady abdominal tension as you move through the hardest portion.
- Return to the upright position: Continue extending the front leg until you reach a tall, balanced stance. Avoid snapping the knee into an aggressive locked position.
- Reset for the next repetition: Briefly regain your balance while keeping the rear foot elevated. Then repeat the movement for the prescribed repetitions before switching legs.
Breathing and Movement Tempo
Inhale during the controlled descent and exhale as you push upward. For example, use approximately two to three seconds when lowering and one to two seconds when rising. However, adjust the tempo if you need additional time to maintain balance.
Pro Tips & Common Mistakes
Pro Tips for Better Bulgarian Split Squat Technique
Small technical adjustments can improve stability and help the intended muscles perform more work. Therefore, focus on consistent movement quality rather than chasing maximum depth immediately.
- Keep the front foot completely grounded: Maintain stable pressure through the entire working foot. Consequently, the quadriceps and glutes can produce force from a more controlled base.
- Use the rear leg mainly for support: Avoid pushing strongly through the elevated foot. Instead, allow the front leg to perform most of the lowering and lifting work.
- Maintain comfortable knee alignment: Guide the front knee in the direction of the toes. Moreover, allow natural knee travel rather than forcing the shin to remain vertical.
- Control the lowering phase: Descend gradually without dropping into the bottom position. As a result, you can maintain muscular tension and improve movement awareness.
- Avoid excessive forward leaning: A modest torso lean can be appropriate for some individuals. However, maintain a neutral spine and avoid collapsing the chest toward the knee.
- Do not force excessive depth: Lower only as far as your mobility and control permit. Additionally, stop before experiencing uncomfortable pressure in the front knee or rear hip.
- Prevent knee collapse: Avoid letting the working knee suddenly move inward during the descent or ascent. Instead, keep the knee moving smoothly in line with the foot.
- Keep the pelvis controlled: Minimize unnecessary hip rotation or side bending. This helps maintain consistent loading through the working leg.
- Choose a suitable bench height: An excessively high support may place unwanted strain on the elevated leg. Therefore, use a lower stable platform when the standard bench position feels uncomfortable.
- Use balance assistance when necessary: Lightly hold a fixed support if you struggle to maintain your stance. Once your balance improves, gradually reduce assistance.
- Train both legs consistently: Complete comparable sets and repetitions on each side. Furthermore, begin with your less coordinated leg when developing balanced movement quality.
- Progress gradually: Master controlled bodyweight repetitions before adding external resistance. Subsequently, light dumbbells may provide an additional strength or hypertrophy challenge.
Common Mistakes That Reduce Exercise Quality
The most frequent errors include rushing the descent, standing too close to the bench, and placing excessive pressure on the rear foot. Likewise, losing front-foot contact can make the exercise less stable.
To correct these issues, slow each repetition and adjust the stance before adding difficulty. Above all, avoid sacrificing comfortable joint movement to achieve a deeper squat. Consistent, controlled repetitions provide a stronger foundation for long-term progression.
FAQ
Muscles, Technique, and Training Questions
What muscles does the Bulgarian Split Squat work?
The Bulgarian Split Squat primarily trains the quadriceps and gluteus maximus of the front leg. Additionally, the adductors and hamstrings contribute to hip control and extension. The gluteus medius, calf muscles, and core stabilizers help maintain balance throughout the repetition. Muscle emphasis can vary with stance length, torso angle, individual anatomy, and range of motion.
Is the Bodyweight Bulgarian Split Squat suitable for beginners?
Although no external weights are required, the Bulgarian Split Squat can be challenging for beginners. The elevated rear foot increases balance and mobility demands compared with a traditional split squat. Therefore, beginners may benefit from practicing regular split squats first. Alternatively, use a lower rear-foot support and a fixed object for balance assistance. Once control improves, gradually progress to the standard bench-supported variation.
Should I feel Bulgarian Split Squats more in my quads or glutes?
Both the quadriceps and glutes contribute significantly to the movement. Generally, a more upright torso and greater knee flexion can increase quadriceps demands. Meanwhile, greater hip flexion and a controlled forward torso inclination may increase glute involvement. However, individual proportions and technique affect the sensation. Rather than forcing a particular muscle emphasis, prioritize stable and comfortable movement.
Why do I lose balance during Bulgarian Split Squats?
Balance problems often result from a narrow stance, unsuitable bench height, excessive movement speed, or insufficient hip stability. Additionally, placing the front foot too close or too far from the bench may create discomfort. To improve control, establish a stable stance and slow the lowering phase. If necessary, lightly hold a fixed support until your balance becomes more reliable.
Can I add dumbbells to the Bulgarian Split Squat?
Yes. Once you can perform controlled bodyweight repetitions on both legs, dumbbells can provide additional resistance for strength and muscle development. However, begin with manageable weights and preserve the same movement pattern. Keep your front foot grounded, maintain comfortable knee tracking, and control the descent. If technique deteriorates, reduce the load before attempting heavier repetitions.
Recommended Equipment
Equipment for Stable Training and Progression
The bodyweight Bulgarian Split Squat requires only a suitable rear-foot support. Nevertheless, a few optional accessories can improve training comfort, balance practice, and progression as your strength develops.
- Flat Workout Bench — provides a stable elevated surface for supporting the rear foot during Bulgarian Split Squats. Choose a sturdy bench with non-slip feet and an appropriate height.
- Adjustable Aerobic Step Platform — offers an alternative rear-foot support with adjustable height. Use only a platform rated for stable exercise support and prevent unwanted movement.
- Non-Slip Exercise Mat — provides a grippy training surface for home workouts. Ensure the mat stays completely flat and does not shift under the working foot.
- Adjustable Hex Dumbbells — allow gradual resistance progression after mastering the bodyweight variation. Start with light weights and increase the load only when balance and technique remain consistent.
- Mini Resistance Loop Bands — useful for optional glute activation exercises and lower-body warm-ups. They can complement Bulgarian Split Squat training without replacing proper technique.
Equipment tip: Prioritize a stable bench and secure front-foot contact before purchasing additional accessories. Furthermore, remember that external resistance is optional. Bodyweight repetitions can remain challenging when performed through a comfortable range with precise control.