Split Lateral Squat with Roll: Form, Muscles & Tips
Learn the Split Lateral Squat with Roll for stronger quads, glutes, and inner thighs. Discover correct form, sets, common mistakes, and equipment tips.
Split Lateral Squat with Roll
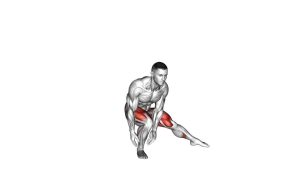
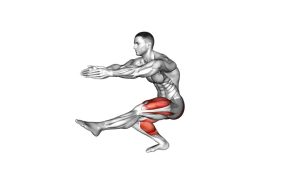
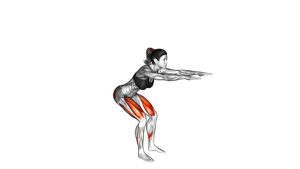
This exercise develops lower-body strength while challenging your ability to control movement in the frontal plane. Unlike a conventional lateral lunge, the moving foot stays supported on a roller rather than stepping outward and landing on the floor.
As the rolling leg extends, the planted leg performs most of the squatting work. Consequently, the quadriceps and glutes help control the descent and drive the return. At the same time, the opposite hip adductors experience a controlled lengthening movement.
Because the roller introduces instability, proper technique matters more than maximum depth. Therefore, begin with a limited range, maintain comfortable balance, and increase the movement gradually. For better control, keep the torso relatively upright and avoid pushing excessive weight into the rolling foot.
Quick Overview
| Body Part | Legs |
|---|---|
| Primary Muscle | Quadriceps, gluteus maximus, and hip adductors |
| Secondary Muscle | Gluteus medius, hamstrings, calves, and core stabilizers |
| Equipment | Short cylindrical foam roller; optional stable support for balance |
| Difficulty | Intermediate, due to unilateral loading, lateral movement, and roller stability demands |
Sets & Reps (By Goal)
- Beginner control: 2–3 sets × 6–8 reps per leg. Use a short rolling distance and rest 60–90 seconds between sets. Initially, prioritize a stable stance and smooth movement.
- Muscle strength: 3–4 sets × 8–10 reps per leg. Lower for approximately 2–3 seconds, then return with control. Additionally, maintain consistent knee alignment throughout each repetition.
- Hypertrophy: 3–4 sets × 10–12 reps per leg. Use a comfortable range and controlled tempo. However, avoid increasing resistance until balance and movement quality are reliable.
- Hip mobility and adductor control: 2–3 sets × 8–12 reps per leg. Gradually extend the rolling leg while keeping the movement pain-free. Meanwhile, avoid bouncing or forcing a deeper position.
- Balance and coordination: 2–3 sets × 6–10 slow reps per leg. Pause briefly near the widest controlled position. Then return smoothly without twisting the hips.
- Muscular endurance: 2–3 sets × 12–15 reps per leg. Use moderate depth and steady pacing. Rest 45–75 seconds while maintaining proper technique rather than chasing fatigue.
Progression rule: First master the movement with a short rolling distance and reliable balance. Next, gradually increase repetitions, squat depth, or movement range. Only consider adding external resistance after both legs demonstrate consistent control. For most athletes, 2–3 weekly sessions with adequate recovery provide a practical starting point.
Setup / Starting Position
- Choose the correct roller: Place a short, firm cylindrical foam roller horizontally on a level floor. Ensure it rolls predictably and does not collapse under light foot pressure.
- Position the supporting foot: Stand upright with one foot firmly planted on the floor. Keep the entire sole grounded and distribute pressure between the heel, big-toe base, and little-toe base.
- Place the opposite foot on the roller: Rest the moving foot comfortably on top of the roller. Position it slightly to the side of your body so the leg can extend outward without crossing.
- Establish your balance: Keep your hands on your hips, as demonstrated in the video. Alternatively, use a secure support if additional stability is necessary during early practice.
- Align your upper body: Maintain a neutral spine, relaxed shoulders, and forward-facing chest. Additionally, brace your abdominal muscles lightly to reduce unnecessary trunk rotation.
- Prepare the supporting knee: Keep a soft bend in the planted leg and align its knee with the toes. Avoid locking the joint or allowing the arch of the foot to collapse.
- Begin in a comfortable stance: Position the roller close enough that your hips remain level. Before starting, confirm that you can move the roller sideways without losing control.
Setup tip: The rolling foot should provide guidance rather than carry most of your body weight. If balancing becomes difficult, shorten the rolling distance and use stable hand support. As control improves, gradually transition to the hands-on-hips position shown in the demonstration.
Execution (Step-by-Step)
- Establish the starting position: Stand upright with your supporting foot planted and the opposite foot resting on the foam roller. Keep your chest lifted, core engaged, and eyes forward.
- Begin rolling outward: Slowly move the roller sideways by extending the supported leg. Simultaneously, start bending the planted knee and shift your hips slightly backward.
- Lower into the lateral squat: Continue bending the supporting knee as the roller travels farther outward. Meanwhile, keep the rolling leg relatively straight without aggressively locking the knee.
- Maintain knee and hip alignment: Guide the planted knee in the same direction as the supporting foot. Additionally, keep your pelvis controlled and avoid rotating your torso toward the extended leg.
- Reach a comfortable bottom position: Descend until you achieve a controlled lateral squat. The extended leg should remain supported by the roller. However, do not force additional distance if your inner thigh becomes uncomfortable.
- Pause briefly: Hold the lowest controlled position for approximately one second. Maintain steady breathing and avoid bouncing, shifting abruptly, or leaning excessively toward the roller.
- Push through the supporting foot: Press firmly into the floor to straighten the planted knee and hip. At the same time, guide the rolling foot inward through a smooth, controlled path.
- Return to the starting position: Bring the roller closer to the supporting leg as your hips rise. Finish upright with your shoulders relaxed and body weight balanced over the planted foot.
- Repeat and switch sides: Complete the prescribed repetitions without rushing. Afterward, change the supporting leg and repeat the movement on the opposite side to encourage balanced lower-body development.
Pro Tips & Common Mistakes
- Keep most of your weight on the planted leg: The supporting quadriceps and glutes should control the squat. Avoid transferring excessive body weight onto the moving roller.
- Control the rolling speed: Move outward slowly rather than allowing the roller to escape sideways. Consequently, your muscles can manage the descent without sudden instability.
- Do not force maximum lateral extension: A wider position is not automatically better. Instead, use a distance that preserves comfortable hip motion and reliable balance.
- Maintain proper knee tracking: The planted knee should generally follow the direction of the toes. If it collapses inward, reduce squat depth and improve foot stability.
- Keep the supporting heel grounded: Avoid rising onto the toes during the lowering phase. Instead, distribute pressure across the supporting foot to maintain a dependable base.
- Avoid excessive forward leaning: A small hip hinge is natural during a squat. However, exaggerated trunk movement can disturb your balance and change the exercise mechanics.
- Keep the rolling knee comfortably extended: The moving leg should lengthen as the roller travels outward. Nevertheless, avoid forcing the knee into an uncomfortable locked position.
- Maintain control of your pelvis: Avoid allowing one hip to rotate or drop suddenly. Additionally, keep your abdominal muscles engaged to support consistent lower-body alignment.
- Do not bounce at the bottom: Sudden movements can increase discomfort in the inner thigh. Instead, pause briefly before initiating a controlled return.
- Use appropriate roller placement: A soft or unstable roller may move unpredictably. Therefore, select a firm cylindrical model and maintain light pressure through the moving foot.
- Train both sides equally: Unilateral exercises can reveal differences in balance, strength, and mobility. For this reason, begin with the less confident side and match its controlled repetitions.
- Progress gradually: Master the bodyweight technique before adding load. Once the movement becomes reliable, increase difficulty cautiously without sacrificing stability.
FAQ
Muscles Worked and Exercise Benefits
What muscles does the Split Lateral Squat with Roll work?
The Split Lateral Squat with Roll primarily works the quadriceps and gluteus maximus of the supporting leg. Meanwhile, the hip adductors contribute to controlling the lateral movement and returning the rolling leg inward.
Additionally, the gluteus medius helps stabilize the pelvis, while the hamstrings and calves assist with lower-body control. The abdominal muscles also help maintain an upright, balanced torso throughout the exercise.
Is the Split Lateral Squat with Roll good for inner-thigh strength?
Yes, this movement can challenge the hip adductor muscles, particularly during the outward rolling phase. As the supported leg extends laterally, the inner-thigh muscles help manage the increasing distance.
During the return, these muscles also contribute to bringing the leg inward. However, effective training does not require an extreme stretch. Instead, maintain a controlled range that allows comfortable movement without sharp groin discomfort.
What makes this different from a regular lateral lunge?
A conventional lateral lunge usually involves stepping sideways and transferring weight toward the stepping leg. In contrast, the Split Lateral Squat with Roll keeps one foot planted while the opposite foot travels outward on a roller.
Consequently, the stationary leg performs most of the squatting action. The roller also introduces additional movement-control demands. Therefore, this variation requires careful coordination between the supporting knee, hips, and moving leg.
Technique, Balance, and Training
Is the Split Lateral Squat with Roll suitable for beginners?
This exercise is generally better suited to intermediate trainees because the roller introduces instability. Nevertheless, beginners may practice a simplified version with a shorter range and secure hand support.
Initially, focus on controlling a regular lateral squat without the roller. Afterward, introduce a small rolling movement while keeping most of your weight over the planted foot. Progress only when your balance remains dependable.
How deep should I squat during this exercise?
Lower only as far as you can maintain proper knee alignment, steady balance, and comfortable hip movement. The demonstrated exercise uses a moderate squat depth rather than an extreme lateral stretch.
Additionally, your supporting heel should remain grounded throughout the movement. If your knee collapses inward or the roller moves unpredictably, reduce the depth. Over time, controlled mobility and strength may allow a larger range.
Why do I lose balance when rolling my leg outward?
Balance problems often occur when the roller moves too quickly or the supporting leg cannot control the increasing lateral distance. Additionally, weak hip stabilization or an excessively narrow starting stance may contribute.
To improve stability, shorten the rolling distance and slow the lowering phase. Keep your planted foot firmly grounded and maintain gentle core tension. If necessary, hold a fixed support until your technique becomes consistent.
Equipment, Progression, and Safety
Can I perform this exercise without a foam roller?
The demonstrated version uses a cylindrical foam roller beneath the moving foot. Therefore, removing the roller changes the exact exercise variation.
However, you can practice a similar movement using a suitable sliding disc on an appropriate surface. Alternatively, a stationary lateral squat provides a simpler starting point. Regardless of the variation, maintain controlled movement and avoid uncontrolled slipping.
Can I add dumbbells to the Split Lateral Squat with Roll?
Yes, external resistance may be introduced after you consistently demonstrate stable bodyweight repetitions. However, adding dumbbells increases the difficulty of balancing over the supporting foot.
For this reason, prioritize movement quality before increasing resistance. Start with a light load and a reduced rolling distance. If balance becomes unreliable, return to the bodyweight version until control improves.
Who should be cautious with this exercise?
People experiencing knee pain, hip pain, groin discomfort, or significant balance difficulties should approach this movement carefully. Additionally, anyone recovering from a lower-body injury should obtain appropriate professional guidance.
Because the roller can shift unexpectedly, this exercise may not be suitable for everyone. Instead, a stable lateral squat variation may provide a more appropriate starting point. Stop immediately if you experience sharp pain or a sudden loss of control.
Recommended Equipment
- Short High-Density Foam Roller — the primary training tool for the rolling-leg movement. Choose a firm cylindrical roller that maintains its shape and moves predictably.
- Non-Slip Exercise Mat — provides a secure surface for the planted foot during suitable home workouts. Keep the roller’s travel path clear to prevent unexpected stopping.
- Resistance Loop Bands Set — useful for complementary glute activation, hip stabilization exercises, and lower-body warm-ups before lateral squat training.
- Stable Portable Balance Barre — offers optional hand support while learning the rolling movement. Use only a secure, non-tipping model placed on a level surface.
- Adjustable Dumbbells Set — an optional resistance progression for experienced trainees who have already mastered the bodyweight movement and balance requirements.
Equipment tip: Prioritize a suitable roller, secure supporting-foot contact, and adequate space before increasing exercise difficulty. Additionally, consider a stable balance support when practicing the movement for the first time. Although extra resistance can increase training demands, controlled bodyweight repetitions should always come first.