Finger Push-Up : Form, Sets & Reps, Tips, Mistakes, FAQ
Learn the Finger Push-Up (Chest Focus) with step-by-step form cues, sets & reps by goal, setup tips, common mistakes, FAQs, and recommended equipment to build fingertip strength safely.
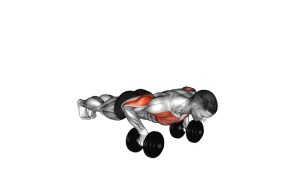
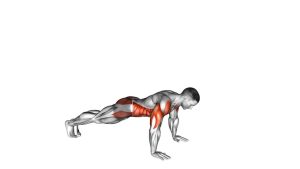
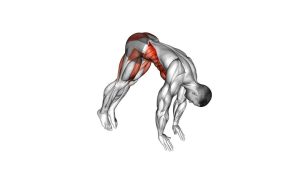
Finger Push-Up
Treat this as a skill + strength drill. The goal is to keep the body in a straight line while distributing pressure evenly across the fingertips. Start with an easier progression (incline or knees) until your fingers and wrists tolerate the load.
Quick Overview
| Body Part | Chest |
|---|---|
| Primary Muscle | Pectoralis major |
| Secondary Muscle | Triceps, anterior deltoids, serratus anterior, forearm & finger flexors (high demand) |
| Equipment | None (optional: mat, push-up bars for progression, wrist supports) |
| Difficulty | Advanced (high hand/finger loading) |
Sets & Reps (By Goal)
- Strength (low reps, strict form): 3–6 sets × 2–6 reps (90–150 sec rest)
- Hypertrophy (if joints tolerate it): 3–5 sets × 6–10 reps (60–120 sec rest)
- Skill / conditioning (submax): 3–6 sets × 3–8 reps (keep 2–3 reps in reserve)
- Progression work (incline or knees): 2–4 sets × 6–12 reps (smooth tempo)
Progression rule: Increase your incline height down over time (or move from knees to full), then add reps. Only add volume when finger joints feel good during and after training.
Setup / Starting Position
- Choose your level: Start on an incline (bench/box) or knees if needed.
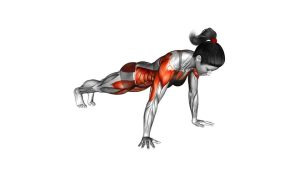
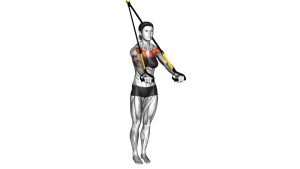
- Hand placement: Fingertips on the floor, fingers spread. Make a stable “tripod” with fingers + thumb.
- Stack shoulders: Hands under shoulders (or slightly wider), shoulders directly over fingertips.
- Brace: Squeeze glutes, brace abs, ribs down—body forms a straight line from head to heels (or knees).
- Neutral wrist: Avoid collapsing into extreme wrist extension; keep pressure evenly distributed.
Tip: A mat can reduce discomfort, but avoid surfaces so soft that your fingertips sink and lose stability.
Execution (Step-by-Step)
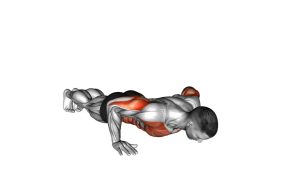
- Start in a strong plank: Neck neutral, eyes slightly forward, shoulders stable, core tight.
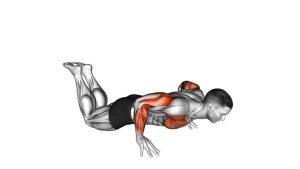
- Lower with control: Bend elbows and descend slowly. Keep elbows about 30–45° from the torso.
- Stay rigid: Chest and hips descend together—no sagging, no piking.
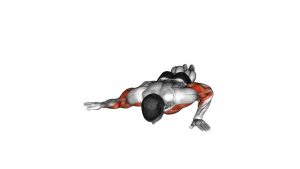
- Bottom position: Stop before finger pain or form breakdown. Chest gets close to floor without collapsing.
- Press up smoothly: Drive through fingertips, lock the body as one unit, and return to full plank.
Pro Tips & Common Mistakes
Pro Tips
- Spread the load: Use all fingers + thumb; avoid “index finger overload.”
- Go slower than normal push-ups: Controlled eccentrics protect joints and build stability.
- Use progressions: Incline → knees → partial range → full range → tempo/pauses.
- Pair wisely: Combine with standard push-ups or pressing work after fingertip sets (not before if fatigue ruins form).
Common Mistakes
- Collapsing knuckles: Fingers flattening or bending awkwardly—regress immediately.
- Elbows flaring hard: Increases shoulder stress and reduces chest focus.
- Rushing reps: Bouncing increases tendon strain and reduces control.
- Ignoring warning signs: Finger joint pain is not a “push through it” signal.
FAQ
Where should I feel finger push-ups?
You’ll feel typical push-up work in the chest and triceps, plus strong activation in the forearms and finger flexors. Discomfort in finger joints means you should regress and reduce load.
Are finger push-ups safe for beginners?
Usually not. Most beginners should start with incline fingertip planks or kneeling fingertip push-ups to build joint tolerance. The limiting factor is often fingers/wrists—not chest strength.
How do I progress without hurting my fingers?
Progress by reducing incline or moving from knees to full plank before chasing high reps. Keep reps submax (leave 2–3 reps in reserve) and stop if joints feel irritated after training.
Can I do these for chest hypertrophy?
They can contribute, but they are primarily limited by hand/finger tolerance. For pure chest growth, consider using this as a skill/strength accessory and rely on standard push-ups, dips, or presses for volume.
What if my wrists hurt?
Regress to an incline, reduce range, and consider push-up handles or a neutral-grip option for pressing volume. Persistent wrist pain should be assessed by a qualified professional.
Recommended Equipment (Optional)
- Finger Strengthener / Hand Grip Trainer — helps build progressive finger and forearm strength off the floor
- Therapy Putty (Hand & Finger Training) — low-impact way to condition fingers and tendons
- Doorway Pull-Up Bar — useful for grip training and balancing pushing with pulling work
- Exercise Mat (Firm) — adds comfort without making the fingertips unstable
- Wrist Wraps (Light Support) — optional support if wrists feel stressed during push variations
Tip: Equipment should support progression, not mask pain. If a tool increases symptoms, stop and regress the movement.