Alternate Sprinter Lunge: Proper Form, Muscles Worked & Tips
Learn how to perform the Alternate Sprinter Lunge with proper form. Discover muscles worked, step-by-step instructions, sets, reps, and common mistakes.
Alternate Sprinter Lunge
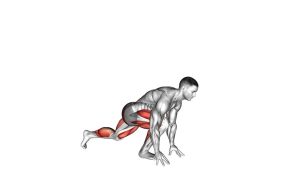
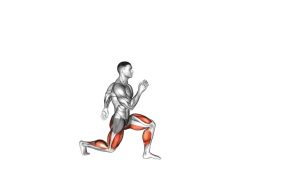
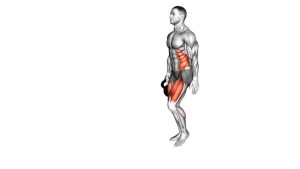
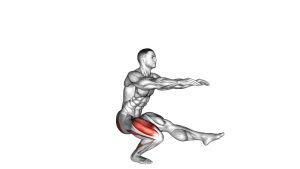
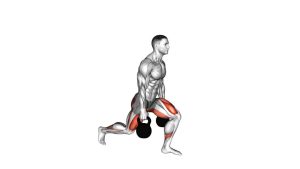
The Alternate Sprinter Lunge combines unilateral leg strengthening with dynamic balance training. During the descending phase, the front leg controls most of the body’s weight while the opposite leg extends backward. Meanwhile, the torso inclines forward and the hands approach the floor beside the supporting foot. This positioning increases the demand on the quadriceps, gluteus maximus, and hip stabilizers.
During the upward phase, the front leg generates the primary force needed to return the body to standing. Additionally, the abdominal muscles and spinal stabilizers help maintain controlled torso positioning. Because the exercise alternates the supporting leg, it can help develop balanced lower-body coordination. However, beginners should first master the movement slowly before increasing repetition speed.
Quick Overview
| Body Part | Legs |
|---|---|
| Primary Muscle | Quadriceps (Rectus Femoris, Vastus Lateralis, Vastus Medialis, Vastus Intermedius); Gluteus Maximus |
| Secondary Muscle | Hamstrings, Gluteus Medius, Adductors, Gastrocnemius, Soleus, Abdominal Stabilizers, and Erector Spinae |
| Equipment | None required (optional: exercise mat, supportive training shoes, yoga blocks, resistance bands, or dumbbells for advanced progression) |
| Difficulty | Intermediate (requires unilateral balance, hip mobility, and controlled lower-body strength) |
Sets & Reps (By Goal)
Training volume should match your experience, movement quality, and primary fitness objective. Since the Alternate Sprinter Lunge requires balance and coordination, begin with manageable repetitions. Additionally, allow sufficient recovery between sets to maintain consistent technique.
Strength Development
- Sets: 3–4
- Repetitions: 6–10 per leg
- Rest: 60–90 seconds
- Tempo: 3 seconds lowering, brief pause, 1–2 seconds rising
Focus on a deliberate descent and powerful, controlled return to standing. Once bodyweight repetitions become comfortable, light external resistance may increase difficulty.
Muscle Hypertrophy
- Sets: 3–4
- Repetitions: 10–15 per leg
- Rest: 45–75 seconds
- Tempo: Controlled lowering with a steady upward drive
Maintain consistent muscular tension throughout the movement. Furthermore, avoid bouncing from the bottom or rushing between repetitions.
Muscular Endurance and Conditioning
- Sets: 2–4
- Repetitions: 15–20 per leg
- Rest: 30–60 seconds
- Tempo: Smooth and continuous without sacrificing control
This approach emphasizes repeated lower-body effort and coordinated movement. However, reduce the repetition count if fatigue causes unstable foot placement or excessive trunk movement.
Mobility and Movement Control
- Sets: 2–3
- Repetitions: 6–10 per leg
- Rest: 30–60 seconds
- Tempo: Slow and deliberate with a brief comfortable pause
Use a manageable range of motion to improve hip control, balance, and positional awareness. In addition, focus on smooth transitions between standing and the lunge position.
Rehabilitation-Style Progression
- Sets: 1–3
- Repetitions: 5–8 per leg
- Rest: 60–90 seconds
- Tempo: Slow and supported when necessary
This is an advanced balance challenge for some individuals recovering from lower-body injuries. Therefore, use it for rehabilitation only when appropriate and cleared by a qualified professional.
Progression rule: First improve balance, depth consistency, and repetition quality. Next, gradually increase repetitions or sets. Finally, consider external resistance only after both legs demonstrate stable, pain-free control.
Setup / Starting Position
Proper setup establishes a stable foundation for the entire movement. Before beginning, choose a flat, non-slip surface with sufficient space behind your body. Additionally, make sure your footwear provides reliable traction.
Establish Your Standing Position
- Stand upright: Position your feet approximately hip-width apart with your weight distributed evenly.
- Align your torso: Maintain a neutral spine, relaxed shoulders, and a naturally upright chest.
- Engage your core: Lightly brace the abdominal muscles without holding your breath.
- Position your arms: Allow both arms to rest naturally beside the body.
- Choose the first leg: Decide which leg will remain forward and which leg will step backward.
Prepare for the Backward Step
Shift your weight gradually toward the supporting leg. Meanwhile, keep the front foot planted and maintain control through the ankle. As the opposite leg begins moving backward, allow the hips and knees to bend naturally.
The torso should begin leaning forward as the body lowers. However, this forward inclination should come primarily from the hips rather than uncontrolled rounding of the lower back.
Check Your Balance and Alignment
Keep the front knee generally aligned with the direction of the toes. In addition, maintain enough space between the feet to prevent excessive side-to-side wobbling. Your rear foot should contact the floor through the ball of the foot. Consequently, the back heel can remain lifted while the front leg supports most of the movement.
Setup tip: Start with a shorter backward step if you struggle to reach the floor. As mobility and balance improve, gradually increase the depth without forcing it.
Execution (Step-by-Step)
The Alternate Sprinter Lunge involves a controlled descent into a forward-leaning lunge followed by a return to standing. Unlike a stationary split squat, the trailing leg moves backward and then returns. Therefore, each repetition combines dynamic stepping with unilateral strength and balance.
Phase 1: Initiate the Backward Step
- Begin standing: Stand tall with both feet grounded, your arms relaxed, and your eyes forward.
- Shift your weight: Transfer most of your bodyweight onto the leg that will remain forward.
- Step backward: Move the opposite foot behind your body while bending the supporting knee.
- Hinge at the hips: Allow the torso to incline forward as the hips move backward and downward.
During this phase, keep the movement smooth and avoid dropping suddenly. Additionally, maintain a stable front foot as the rear leg moves into position.
Phase 2: Lower Into the Sprinter Position
- Continue lowering: Bend the front knee further while extending the trailing leg backward.
- Reach toward the floor: Bring both hands downward near the front foot, keeping the movement comfortable.
- Maintain rear-foot support: Keep the ball of the rear foot in contact with the floor.
- Stabilize the torso: Maintain abdominal engagement and avoid excessive lumbar rounding.
At the lowest comfortable position, the front knee remains bent while the rear leg extends behind the body. Meanwhile, the torso stays inclined forward, creating the characteristic sprinter-style stance. Both hands may approach or lightly touch the floor, depending on individual mobility.
Phase 3: Drive Back to Standing
- Press through the front foot: Generate force through the supporting leg to begin rising.
- Extend the hip and knee: Straighten the front leg progressively while maintaining balance.
- Bring the rear leg forward: Return the trailing foot toward the original standing position.
- Lift the torso: Gradually return the chest to its upright starting alignment.
Exhale naturally as you drive upward. At the same time, avoid pushing excessively from the rear foot. Instead, allow the front leg to perform most of the work during the return.
Phase 4: Alternate Legs and Repeat
- Reset your stance: Establish an upright position with both feet stable.
- Switch supporting legs: Step backward with the opposite leg during the next repetition.
- Repeat the same movement: Lower into the sprinter-style position, reach toward the floor, and rise again.
- Complete both sides: Continue alternating until you finish the prescribed repetitions.
Maintain a consistent rhythm between sides. Furthermore, keep the range of motion similar for both legs whenever possible. If one side feels less stable, reduce the depth rather than forcing symmetry.
Pro Tips & Common Mistakes
Small technique adjustments can significantly improve balance, muscle engagement, and movement efficiency. Because this exercise combines several joint actions, prioritize control before speed. The following recommendations help maintain consistent form throughout your sets.
Pro Tips for Better Performance
- Keep the front foot planted: Maintain steady contact through the heel and forefoot throughout the repetition. This provides a reliable base for lowering and rising.
- Control the backward step: Move the rear leg deliberately rather than throwing it backward. As a result, your supporting hip can remain more stable.
- Use a natural forward lean: Hinge through the hips while maintaining a controlled spine. Consequently, the glutes contribute effectively to the upward movement.
- Reach only as far as comfortable: The hands do not need to touch the floor during every repetition. Instead, prioritize a stable and repeatable movement pattern.
- Drive through the front leg: Focus on extending the supporting hip and knee to return upright. Meanwhile, use the rear foot primarily for balance assistance.
- Coordinate your breathing: Inhale during the descent and exhale during the upward drive. This can help maintain a comfortable rhythm.
- Train both sides evenly: Perform a similar number of repetitions on each leg. Additionally, monitor differences in balance and range of motion.
Common Mistakes to Avoid
- Rounding the lower back excessively: Reaching aggressively toward the floor can compromise spinal positioning. Correction: Hinge through the hips and shorten the reach when necessary.
- Allowing the front knee to collapse inward: Poor knee control can reduce stability. Correction: Keep the knee generally aligned with the toes throughout the movement.
- Taking an excessively long backward step: Overreaching can make the bottom position difficult to control. Correction: Use a comfortable step length that allows stable foot placement.
- Dropping too quickly: An uncontrolled descent may create unnecessary stress and instability. Correction: Lower gradually and maintain consistent muscular tension.
- Pushing excessively from the rear foot: Overusing the trailing leg can reduce the intended front-leg emphasis. Correction: Drive upward primarily through the supporting leg.
- Turning the movement into a jump: Adding an airborne phase changes the exercise into a different variation. Correction: Return to standing without jumping unless performing a specifically programmed progression.
- Rushing the alternating pattern: Switching legs too quickly may cause unstable foot placement. Correction: Briefly establish balance before beginning the next repetition.
Progression and Regression Tips
Beginners can reduce the backward step length and perform a shallower lunge. Additionally, placing the hands on yoga blocks can make the reaching portion more accessible. If balance remains difficult, use a stable support beside the body.
More experienced athletes can increase the range of motion or repetition count. Furthermore, light dumbbells may provide additional resistance once technique is consistent. However, adding weight should never come at the expense of knee control or balance.
Training reminder: Prioritize controlled movement, symmetrical practice, and gradual progression. Consistent technique is more valuable than completing additional unstable repetitions.
FAQ
Exercise Technique and Muscle Activation
What muscles does the Alternate Sprinter Lunge work?
The Alternate Sprinter Lunge primarily targets the quadriceps and gluteus maximus. Additionally, the hamstrings, hip stabilizers, calves, and abdominal muscles contribute to movement control. Because the exercise emphasizes one leg at a time, it also challenges unilateral stability.
How is the Alternate Sprinter Lunge different from a regular reverse lunge?
A conventional reverse lunge usually maintains a more upright torso. In contrast, the sprinter variation includes a greater forward hip hinge and a reach toward the floor. Consequently, it creates a different balance challenge and movement emphasis.
Should my hands touch the floor?
Floor contact is optional. Although the demonstrated variation brings the hands close to the ground, mobility and limb proportions affect reach. Therefore, lower the hands only as far as you can while maintaining stable alignment.
Training Benefits and Programming
Is the Alternate Sprinter Lunge good for building leg muscles?
Yes, the movement can help strengthen the quadriceps and glutes when performed with sufficient training volume. However, bodyweight resistance may eventually become too easy for experienced athletes. At that stage, additional resistance or more challenging variations may support progression.
Can beginners perform Alternate Sprinter Lunges?
Beginners may perform a modified version with a shorter backward step and reduced range of motion. Additionally, using stable external support can improve confidence and balance. Nevertheless, mastering a basic reverse lunge first may make this variation easier to learn.
How many Alternate Sprinter Lunges should I perform?
Most general fitness routines can begin with 2–3 sets of 8–12 repetitions per leg. Subsequently, adjust the volume according to your strength, endurance, and recovery. Always prioritize controlled repetitions over completing a predetermined number.
Safety, Balance, and Exercise Modifications
Why do I lose balance during this exercise?
Balance difficulties may result from insufficient hip stability, narrow foot placement, or an excessively long backward step. Furthermore, moving too quickly can make the transition harder to control. Try slowing the movement and widening your stance slightly for better stability.
Is the Alternate Sprinter Lunge safe for my knees?
Many people can perform this exercise comfortably when the movement matches their current abilities. However, existing knee pain or limited mobility may require a shorter range of motion. If discomfort persists, stop the exercise and seek guidance from a qualified professional.
Can I perform this exercise every day?
Light technique practice may be suitable on consecutive days for some individuals. However, demanding strength or conditioning sessions generally require appropriate recovery. Therefore, adjust training frequency according to soreness, intensity, and overall workload.
Equipment and Advanced Variations
Do I need equipment for Alternate Sprinter Lunges?
No equipment is required for the standard bodyweight variation. Nevertheless, supportive training shoes and a non-slip exercise surface may improve comfort. Yoga blocks can also help when reaching toward the floor.
Can I add dumbbells to the exercise?
Yes, dumbbells can increase resistance once you have developed reliable balance and consistent bodyweight technique. However, holding weights changes the arm positioning and reaching mechanics. Therefore, treat the loaded version as an advanced progression rather than an exact reproduction of the demonstrated movement.
Does this exercise improve athletic performance?
The Alternate Sprinter Lunge can contribute to unilateral strength, coordination, and lower-body movement control. Additionally, its forward-leaning position resembles certain athletic starting postures. However, improvements in sprint speed also require specific sprint training, appropriate strength development, and practice.
Recommended Equipment (Optional)
The Alternate Sprinter Lunge requires no equipment for its standard variation. However, a few optional accessories may improve comfort, support modifications, or provide additional training resistance. The following five equipment categories are relevant to this movement.
- 1. Non-Slip Exercise Mat — Provides a defined exercise area and may improve comfort during floor-reaching movements. Choose a mat that stays firmly in place and does not create an unstable surface.
- 2. Cross-Training Shoes — Support stable foot placement during backward steps and repeated lunges. Look for reliable traction, a secure fit, and a stable sole.
- 3. High-Density Yoga Blocks — Provide an elevated surface for the hands when floor contact is difficult. Consequently, they can help reduce the reaching distance while preserving a controlled hip hinge.
- 4. Mini Resistance Loop Bands — Useful for supplementary glute activation and hip-stability exercises. For example, lateral band walks can complement unilateral lunge training. They are not required during the standard movement.
- 5. Adjustable Dumbbells Set — Allows progressive resistance for advanced lunge variations. Start with light weights and maintain stable knee alignment. Additionally, modify the arm position appropriately when holding dumbbells.
Equipment tip: Begin with the bodyweight variation before purchasing additional training accessories. Furthermore, select equipment according to your current abilities, available space, and training goals. Affiliate disclosure: Some Amazon links may be affiliate links. Qualifying purchases may generate a commission without increasing your purchase price.