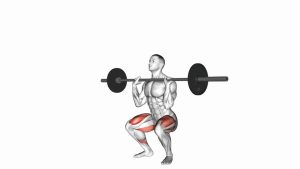
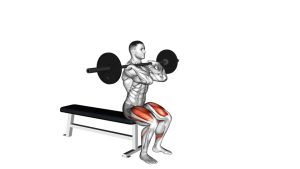
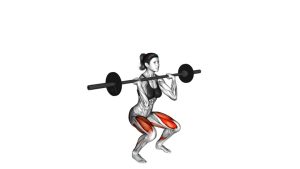
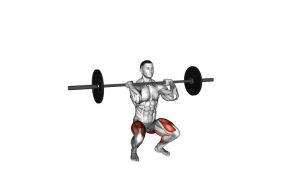
Barbell Pin Front Squat: Proper Form, Muscles & Sets
Master the Barbell Pin Front Squat with safe rack setup, controlled dead-stop reps, quad-focused technique, sets by goal, common mistakes, and FAQs.
Barbell Pin Front Squat
The Barbell Pin Front Squat is particularly valuable for lifters who want to improve quadriceps strength, bottom-position control, and concentric force production. Because the barbell rests across the front shoulders, the exercise demands consistent abdominal bracing and upper-back stability. Additionally, the safety pins create a repeatable depth target, which can help lifters identify weaknesses in specific portions of their squat.
However, this exercise requires more preparation than a standard barbell squat. The rack must be adjusted correctly, and the lifter must maintain tension when the bar reaches the pins. Therefore, start with a manageable load and prioritize precise technique over heavier weights.
Quick Overview
| Body Part | Legs |
|---|---|
| Primary Muscle | Quadriceps (rectus femoris, vastus lateralis, vastus medialis, and vastus intermedius) |
| Secondary Muscle | Gluteus maximus, adductor magnus, hamstrings, spinal erectors, abdominal muscles, and upper-back stabilizers |
| Equipment | Olympic barbell, weight plates, power rack, adjustable safety pins or straps, and barbell collars |
| Difficulty | Advanced; suitable for experienced lifters with established front squat technique |
Sets & Reps (By Goal)
- Maximum strength: 4–5 sets × 2–4 reps using a challenging but controlled weight, with 2–4 minutes of rest between sets.
- Muscle hypertrophy: 3–4 sets × 6–8 reps using moderate resistance, with 90–150 seconds of rest. Maintain a controlled descent and strong upward drive.
- Explosive strength: 4–6 sets × 2–3 reps with light-to-moderate resistance. Additionally, focus on accelerating upward from the pins without bouncing.
- Squat technique and positioning: 3–4 sets × 3–5 reps using a light barbell. Prioritize stable bracing, consistent depth, and smooth movement.
- General lower-body strength: 2–3 sets × 5–6 controlled reps with manageable resistance. Rest approximately 90–180 seconds between sets.
Progression rule: First master the front-rack position and repeatable pin contact. Next, improve your ability to generate force without bouncing. Only then should you increase the weight gradually. Furthermore, keep pin height consistent when comparing strength improvements between workouts.
Training note: These recommendations are general starting ranges rather than fixed prescriptions. Because dead-stop repetitions can be demanding, adjust volume according to your experience, recovery, and training program.
Setup / Starting Position
- Prepare the power rack: Select a stable power rack with correctly fitted safety pins or straps. Before loading the bar, check that both supports are securely locked at identical heights.
- Adjust the safety-pin height: Position the supports so the barbell reaches them at your intended squat depth. Ideally, choose a position you can reach while maintaining a stable spine, planted heels, and upright torso.
- Position the barbell: Set the bar on the rack’s J-hooks at an appropriate unracking height. Alternatively, experienced lifters can begin with the bar resting directly on the pins for a bottom-up variation.
- Establish the front-rack position: Place the bar across the front deltoids and upper chest. Raise your elbows forward to create a secure shelf. Meanwhile, keep the bar supported mainly by your shoulders rather than your wrists.
- Choose a comfortable grip: Use a clean-style front-rack grip when mobility allows. If necessary, a properly practiced strap-assisted or cross-arm grip may provide an alternative. However, the bar must remain secure throughout.
- Set your foot position: Stand approximately shoulder-width apart with the toes turned slightly outward as needed. Keep the entire foot grounded and distribute pressure across the midfoot.
- Brace your core: Take a controlled breath and tighten your abdominal muscles before moving. Additionally, maintain a neutral spine and keep the chest facing forward.
- Check the starting alignment: Position your shoulders above the hips while keeping the bar balanced over the midfoot. Finally, make sure the rack supports will not interfere with your hands or elbows.
Preparing for the First Repetition
Before adding working weight, test the intended movement with an empty barbell. Lower slowly and confirm that both ends of the bar contact their supports evenly. Additionally, verify that you can maintain the front-rack position at the selected depth.
Setup tip: If the chosen pin height forces excessive forward leaning, heel lifting, or spinal rounding, raise the supports. Therefore, establish a comfortable and repeatable position before progressing to heavier loads.
Execution (Step-by-Step)
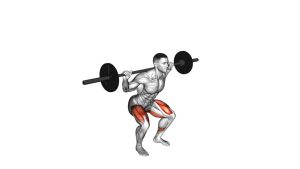
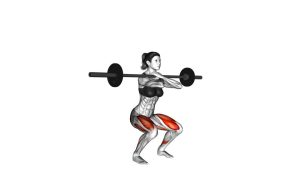
- Establish a strong starting position: Stand upright with the barbell resting across your front shoulders. Keep your elbows lifted, chest tall, and abdominal muscles braced. Additionally, maintain balanced pressure through both feet.
- Begin the controlled descent: Bend your knees and hips together while lowering your body between your legs. Meanwhile, allow the knees to travel forward naturally without losing heel contact.
- Maintain front-rack alignment: Keep the elbows pointing forward and the upper back firm as you descend. Avoid allowing the chest to collapse or the barbell to roll away from your shoulders.
- Lower toward the safety pins: Continue descending until the bar approaches the predetermined support height. As you reach the bottom, reduce your speed so the bar contacts the pins gently.
- Establish the dead-stop position: Allow the barbell to settle fully onto both safety supports for approximately 1–2 seconds. However, keep your feet planted and maintain your braced body position. Do not collapse your torso or bounce the bar.
- Initiate the upward drive: Reestablish firm tension against the bar. Next, push the floor away through your midfoot while extending the knees and hips. Drive upward decisively without jerking your spine or losing balance.
- Keep the chest and hips rising together: Maintain high elbows as the bar leaves the safety pins. Consequently, your torso remains more upright, allowing the quadriceps and glutes to generate force through the ascent.
- Finish in a stable standing position: Continue extending the knees and hips until you stand upright. Avoid leaning backward or excessively arching the lower back.
- Reset for the next repetition: Take another controlled breath and brace. Then repeat the descent toward the safety pins, allowing the bar to settle before each new upward drive.
Understanding the Dead-Stop Phase
The stationary bottom position distinguishes a true pin front squat from a conventional front squat. Because the bar comes to rest on the supports, the lifter cannot rely on an immediate rebound. Instead, each upward movement requires renewed muscular tension and force production.
Additionally, the pins provide a consistent reference for squat depth. However, they should never be used as a surface against which to bounce or deliberately crash the barbell.
Pro Tips & Common Mistakes
- Keep your elbows high: Dropping the elbows can cause the upper back to round and the barbell to shift forward. Therefore, maintain a strong front-rack position throughout every repetition.
- Avoid bouncing off the pins: The safety supports are designed to establish a stationary position, not create momentum. Instead, lower gently, pause, and generate upward force from a controlled stop.
- Maintain even foot pressure: Keep the weight balanced across the entire foot. Excessive forward pressure may lift the heels, while leaning too far backward can disrupt balance.
- Keep the knees aligned: Allow the knees to follow the direction of the toes during the descent and ascent. Additionally, avoid uncontrolled inward knee collapse under heavy resistance.
- Control the lowering phase: Do not drop rapidly toward the supports. Instead, lower with muscular control so the barbell reaches the pins without a sudden impact.
- Do not let your hips rise first: If the hips shoot upward while the chest remains low, the movement becomes excessively forward-leaning. Consequently, the bar may move away from its ideal path.
- Choose the correct pin height: Supports that are too low may force uncomfortable positions at the bottom. Meanwhile, excessively high supports can reduce the intended training range.
- Brace before every upward drive: Reestablish trunk tension while maintaining your position at the pins. As a result, you can transfer force through the legs without excessive spinal movement.
- Use appropriate resistance: Dead-stop repetitions may feel more demanding than standard front squats. Therefore, begin lighter than your usual front squat working weight and increase resistance gradually.
- Avoid relying on wrist strength: The bar should sit securely across the shoulders rather than hang from the hands. If wrist discomfort occurs, review your front-rack mobility and grip selection.
Practical Coaching Cues
Think “elbows up, chest tall, and push the floor away” during the upward phase. Additionally, imagine lifting your shoulders and hips together instead of raising the hips first.
For better consistency, use the same pin height, stance, and pause duration across working sets. Consequently, you can evaluate strength improvements without changing the movement mechanics.
FAQ
Exercise Technique and Muscle Activation
What muscles does the Barbell Pin Front Squat work?
The Barbell Pin Front Squat primarily targets the quadriceps, which extend the knees during the upward movement. Additionally, the gluteus maximus and adductor magnus contribute to hip extension.
Meanwhile, the abdominal muscles, spinal erectors, and upper back stabilize the torso and front-rack position. Therefore, the exercise develops lower-body strength while placing considerable demands on trunk stability.
How is the Barbell Pin Front Squat different from a regular front squat?
A regular front squat typically involves a continuous descent followed by an immediate upward movement. In contrast, the pin front squat uses rack supports to establish a defined bottom position.
When the bar fully settles onto the pins, the lifter must generate force from a dead stop. Consequently, this variation can help develop strength in specific portions of the squat and reduce reliance on the rebound.
Should the barbell rest completely on the safety pins?
Yes, when performing the dead-stop variation, the bar should settle onto both safety supports before the next upward drive. However, the lifter should remain braced and balanced throughout the pause.
A controlled pause of approximately 1–2 seconds is a practical starting point. Furthermore, avoid dropping the weight, bouncing off the supports, or relaxing into an unstable bottom position.
Rack Setup, Squat Depth, and Loading
What height should I set the safety pins for front squats?
Set the supports according to the squat depth you intend to train. For example, many lifters choose a position near parallel or slightly above their deepest controlled front squat.
However, the appropriate setting depends on individual mobility, proportions, and training objectives. Therefore, test the depth with an empty barbell before adding resistance.
Both supports must be level and securely installed. Additionally, use compatible rack components with an appropriate load rating.
Is the Barbell Pin Front Squat suitable for beginners?
The movement is generally better suited to intermediate and advanced lifters who already understand barbell front squats. Beginners may find the front-rack position, bracing requirements, and bottom-position strength challenging.
Instead, start with bodyweight squats, goblet squats, or light conventional front squats. Once those movements become consistent, introduce pin front squats with an empty or lightly loaded barbell.
How heavy should I lift during Barbell Pin Front Squats?
Begin with a weight you can control through the entire movement. Because the dead-stop position reduces assistance from momentum, the exercise may require a lighter load than your regular front squat.
Additionally, the chosen pin height affects the difficulty of the movement. Therefore, increase resistance only when the bar leaves the pins smoothly and your posture remains stable.
Common Problems, Training Frequency, and Safety
Why do my elbows drop during the upward phase?
Dropping elbows often results from excessive loading, limited front-rack mobility, or insufficient upper-back stability. As a result, the torso may lean forward and the barbell can shift away from the shoulders.
First, reduce the weight and practice maintaining lifted elbows. Additionally, improve your wrist, shoulder, and upper-back mobility. If necessary, use a suitable strap-assisted front-rack grip.
Can Barbell Pin Front Squats improve my regular front squat?
Yes, they may help strengthen difficult positions in your regular front squat. For example, a dead-stop variation can challenge force production near a sticking point.
Additionally, the fixed pin height encourages consistent depth and bracing. However, regular front squats should remain part of your training if improving full-range squat performance is your primary objective.
How often should I perform Barbell Pin Front Squats?
Most experienced lifters can begin with one dedicated session per week. However, suitable frequency depends on training intensity, recovery, and overall lower-body workload.
For example, you might alternate regular front squats and pin front squats across separate training sessions. Furthermore, allow sufficient recovery before repeating demanding quadriceps-focused workouts.
What should I do if my lower back rounds or knees collapse inward?
Stop the set when you can no longer maintain a stable squat position. Next, reduce the load and check whether the safety pins are set too low for your current mobility.
Additionally, practice controlled squats with lighter resistance while focusing on bracing and knee alignment. If discomfort persists, consult a qualified strength coach or healthcare professional.
Recommended Equipment
- Power Rack with Adjustable Safety Pins — provides a stable lifting station and adjustable support height for dead-stop front squat repetitions. Choose a rack with appropriately rated safety supports.
- Olympic Barbell — provides the primary resistance for the exercise. A suitable Olympic barbell offers secure plate loading and a consistent front-rack position.
- Olympic Bumper Weight Plates — allow gradual resistance progression as lower-body strength improves. Select compatible plates and increase weight in manageable increments.
- Olympic Barbell Collars — help secure the weight plates during the descent and upward drive. Properly fitted collars reduce unwanted plate movement and improve loading consistency.
- Weightlifting Shoes with Raised Heels — provide a firm lifting platform and may help some lifters maintain a more upright squat position. They can be particularly useful when ankle mobility limits comfortable depth.
Equipment tip: Prioritize a reliable power rack, compatible safety supports, a suitable barbell, and secure collars before investing in optional accessories. Additionally, inspect the rack and safety pins regularly for damage or improper installation. Remember that quality equipment supports safer training, but controlled technique remains essential.