Barbell Front Squat: Proper Form, Muscles Worked, Sets, Tips & FAQ
Learn the Barbell Front Squat for stronger quads, glutes, core stability, and upright squat mechanics with form tips, sets, mistakes, and gear.
Barbell Front Squat
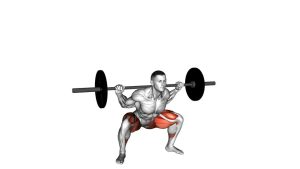
The Barbell Front Squat is best performed with clean posture, controlled depth, and strong bracing. Because the load sits in front of the body, the exercise naturally encourages a more upright squat pattern and increases demand on the quads. It is especially useful for athletes, bodybuilders, Olympic lifting preparation, and anyone who wants to build strong legs without relying heavily on forward torso lean.
Quick Overview
| Body Part | Legs |
|---|---|
| Primary Muscle | Quadriceps |
| Secondary Muscle | Glutes, hamstrings, calves, core, upper back, spinal erectors |
| Equipment | Barbell, weight plates, squat rack |
| Difficulty | Intermediate |
Sets & Reps (By Goal)
- Strength: 4–6 sets × 3–6 reps using heavy but controlled loading.
- Muscle growth: 3–5 sets × 6–10 reps with a steady descent and strong drive upward.
- Technique practice: 3–4 sets × 5–8 reps using lighter weight and perfect posture.
- Athletic power: 3–5 sets × 3–5 reps with explosive upward intent and clean form.
- Conditioning accessory work: 2–4 sets × 10–15 reps using moderate load and consistent tempo.
Progression rule: Add weight only when you can keep the elbows high, torso upright, knees tracking correctly, and heels planted for every rep.
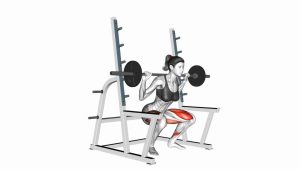
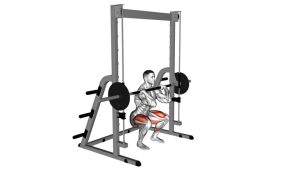
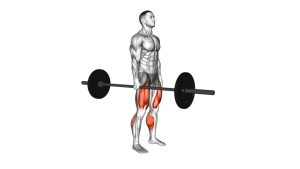
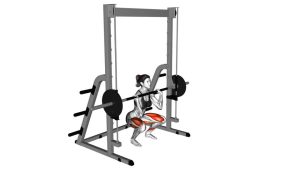
Setup / Starting Position
- Set the bar height: Place the barbell in a squat rack at upper chest or shoulder height.
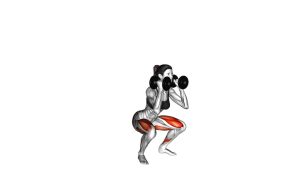
- Step under the bar: Position the bar across the front deltoids, close to the throat but not pressing into it.
- Choose your grip: Use a clean grip, cross-arm grip, or strap-assisted grip depending on wrist and shoulder mobility.
- Lift the elbows: Point the elbows forward and upward so the upper arms stay nearly parallel to the floor.
- Brace the core: Take a deep breath, tighten the midsection, and keep the ribs stacked over the pelvis.
- Set the feet: Stand about shoulder-width apart with the toes slightly turned out.
- Unrack carefully: Stand tall, step back with control, and allow the bar to settle securely on the shoulders.
The bar should feel supported by the shoulders and upper torso. Your hands should guide the bar, not carry the full weight.
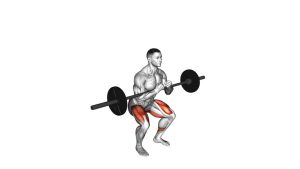
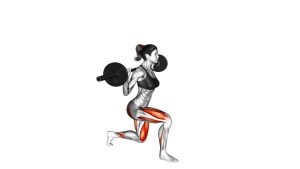
Execution (Step-by-Step)
- Brace before moving: Inhale, tighten your core, and keep your chest tall.
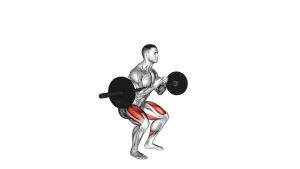
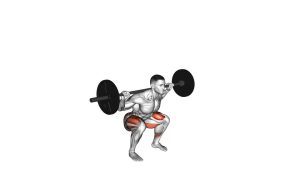
- Start the descent: Bend the knees and hips together while keeping the torso upright.
- Track the knees: Let the knees move forward naturally while staying in line with the toes.
- Control the depth: Lower until your thighs reach at least parallel, or slightly below parallel if mobility allows.
- Keep the bar stacked: Maintain the bar over the mid-foot throughout the full rep.
- Drive upward: Push through the mid-foot and heel while keeping the elbows high.
- Finish tall: Extend the hips and knees fully without leaning back or losing core tension.
Pro Tips & Common Mistakes
- Keep the elbows high: Low elbows usually cause the bar to roll forward and the upper back to collapse.
- Stay upright: Think about dropping straight down between the heels instead of sitting far back.
- Brace hard: A strong core keeps the torso rigid and protects the lower back.
- Use a controlled descent: Do not dive into the bottom position without tension.
- Do not grip too tightly: The bar should rest on the shoulders, not hang from the hands.
- Keep heels planted: If the heels lift, work on ankle mobility or adjust your stance.
- Avoid knee collapse: Push the knees in the same direction as the toes.
- Do not overextend at the top: Finish tall without leaning backward.
FAQ
What muscles does the Barbell Front Squat work?
The Barbell Front Squat primarily works the quadriceps. It also trains the glutes, hamstrings, calves, core, upper back, and spinal erectors as stabilizing muscles.
Is the front squat better than the back squat?
The front squat is not automatically better, but it is more quad-focused and usually requires a more upright torso. The back squat often allows heavier loading, while the front squat demands more core, upper-back, and front rack control.
Why do my wrists hurt during front squats?
Wrist discomfort often happens when the lifter tries to hold the weight with the hands instead of supporting it on the shoulders. Try improving front rack mobility, using a lighter grip, or practicing with lifting straps.
How deep should I squat?
Squat as deep as you can while keeping the heels down, knees tracking well, spine neutral, and elbows high. For most lifters, parallel or slightly below parallel is a good target.
Can beginners do the Barbell Front Squat?
Beginners can learn it, but they should start with bodyweight squats, goblet squats, or empty-bar front squats first. The front rack position and bracing demand make it more technical than many beginner leg exercises.
Why does the bar keep rolling forward?
The bar usually rolls forward when the elbows drop, the upper back rounds, or the torso leans too far forward. Keep the elbows high, brace the core, and reduce the weight until the bar path stays vertical.
Recommended Equipment
- Olympic Barbell — essential for performing loaded front squats safely and consistently.
- Squat Rack — helps set the bar at the correct height and improves setup safety.
- Barbell Weight Plates — allows progressive overload for strength and muscle growth.
- Weightlifting Shoes — raised heels can improve squat depth, ankle positioning, and upright posture.
- Front Squat Straps — useful for lifters with limited wrist, shoulder, or front rack mobility.
Choose equipment based on your training level, available space, and safety needs. For heavy front squats, a stable rack and secure plates are strongly recommended.