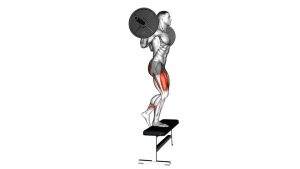
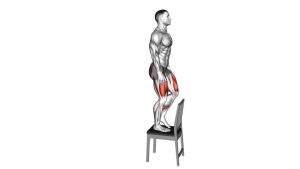
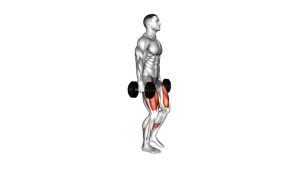
Single-Leg Low Box Squat: Proper Form, Muscles, Sets & Tips
Learn the Single-Leg Low Box Squat with proper form, muscles worked, sets, balance tips, and safe progressions to build stronger quads and glutes.
Single-Leg Low Box Squat
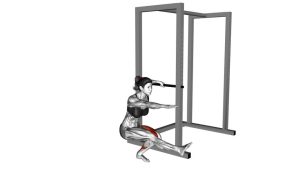
The goal is to lower the hips backward and downward toward a stable low box, establish a controlled seated position, and return to standing through the working leg. Throughout the movement, the arms extend forward to assist balance, while the elevated leg remains clear of the floor. As a result, the exercise challenges strength, coordination, stability, and controlled hip and knee movement.
The Single-Leg Low Box Squat combines the strength demands of a pistol squat with the defined bottom position of a box squat. Because only one leg supports the body during the working phases, the movement challenges each side independently. Furthermore, the low box encourages controlled knee and hip flexion while providing a seated reference point. Consequently, this exercise can help develop unilateral strength, balance, and confidence through a demanding squat range.
However, the movement requires sufficient ankle mobility, knee control, and hip stability. Therefore, beginners should first develop strength with higher box squats or assisted single-leg variations. For the full low-box version, prioritize smooth lowering, a stable seated pause, and a controlled return to standing rather than maximum repetitions.
Quick Overview
| Body Part | Legs |
|---|---|
| Primary Muscle | Quadriceps (rectus femoris, vastus lateralis, vastus medialis, vastus intermedius) and gluteus maximus |
| Secondary Muscle | Hamstrings, gluteus medius, gluteus minimus, hip adductors, calves, hip flexors, and core stabilizers |
| Equipment | Low, sturdy exercise box or stable flat-topped bench; bodyweight resistance |
| Difficulty | Intermediate to Advanced, depending on box height, strength, balance, and available joint mobility |
Sets & Reps (By Goal)
Choose Your Training Goal
- Strength development: Perform 3–5 sets of 3–6 controlled repetitions per leg, resting 90–150 seconds between sets. Focus on generating force through the supporting foot without using momentum.
- Muscle hypertrophy: Complete 3–4 sets of 6–10 repetitions per leg, resting 60–120 seconds. Additionally, use a slow lowering phase to increase muscular tension while maintaining stable knee and hip alignment.
- Muscular endurance: Perform 2–3 sets of 10–15 repetitions per leg, resting 45–75 seconds. However, choose a higher box or supported variation if fatigue compromises balance or movement quality.
- Balance and mobility control: Complete 2–3 sets of 4–8 repetitions per leg with a controlled descent and brief seated pause. Meanwhile, maintain a comfortable range and avoid forcing excessive knee flexion.
- Rehab-style progression: Under appropriate professional guidance, begin with 2–3 sets of 4–6 supported repetitions per leg using a higher box. As control improves, gradually reduce assistance before attempting a lower sitting position.
Tempo, Rest, and Progression
A useful starting tempo is 3 seconds lowering, 1–2 seconds seated, and 1–2 seconds rising. Therefore, every repetition should remain deliberate rather than rushed. Rest sufficiently between legs to preserve balance and consistent technique.
Progression rule: First master an appropriate box height with smooth, pain-free repetitions. Next, increase repetitions or reduce external support while preserving control. Finally, progress toward a lower box or carefully introduce external resistance. Do not reduce box height if doing so causes knee collapse, uncontrolled sitting, or difficulty standing.
Setup / Starting Position
Prepare the Box and Body Position
- Choose a stable low box: Position a sturdy, flat-topped exercise box on a firm, non-slip floor. Initially, select a height that allows you to sit and stand without losing control.
- Stand directly in front: Face away from the box with your back toward its sitting surface. Keep enough distance for your hips to travel backward onto the box safely.
- Establish your stance: Begin standing upright with both feet approximately hip-width apart. Meanwhile, distribute your weight evenly before selecting the working leg.
- Extend both arms forward: Raise your arms to approximately shoulder height with the elbows comfortably straight. This counterbalance helps manage the body’s center of mass during the squat.
Establish Single-Leg Support
- Transfer weight to one foot: Shift your weight gradually onto the supporting leg while keeping its entire foot in contact with the ground. Avoid leaning excessively toward either side.
- Lift the non-working leg: Extend the opposite leg forward until its foot clears the floor. Additionally, keep this leg elevated throughout the main squat movement.
- Brace your trunk: Gently engage your abdominal muscles while keeping the spine neutral. However, allow a natural forward torso inclination as you descend.
- Align the supporting knee: Keep the knee tracking generally in the same direction as the toes. Meanwhile, maintain balanced pressure through the heel, big-toe base, and little-toe base.
Setup tip: Practice standing on one leg near a secure support before attempting the full movement. If your balance is inconsistent, use a higher box or hold a stable support lightly. The free leg should remain elevated without forcing an uncomfortable position.
Execution (Step-by-Step)
Phase 1: Controlled Single-Leg Descent
- Begin from upright standing: Stand on the working leg with your opposite leg extended forward. Keep both arms reaching ahead for balance. Before moving, establish steady foot pressure and gentle core tension.
- Initiate hip and knee flexion: Slowly bend the supporting knee while moving the hips backward. As the body descends, allow the torso to lean forward naturally. Avoid rounding the lower back excessively.
- Keep the free leg elevated: Maintain the non-supporting leg in front without allowing its foot to touch the ground. Meanwhile, keep the arms extended to help maintain balance.
- Lower toward the box: Continue bending the supporting hip and knee until the buttocks approach the sitting surface. Throughout the descent, control your speed using the quadriceps and glutes. Do not collapse onto the box.
Phase 2: Seated Pause and Standing Ascent
- Make controlled box contact: Gently sit onto the low box while maintaining the elevated leg forward. As demonstrated in the movement, establish a brief, stable seated pause. Avoid falling backward or rocking to generate momentum.
- Prepare to rise: Keep the working foot planted and position your torso slightly forward over the supporting leg. Then brace the trunk and prepare to extend the working hip and knee.
- Drive upward through one leg: Press firmly through the supporting foot and lift your hips away from the box. Simultaneously, extend the working knee and hip until your body approaches an upright standing position. The elevated leg should not push against the floor.
- Finish and reset: Return to an upright position without leaning backward or twisting. Next, lower the free foot to the floor when the repetition is complete. Reset your balance before repeating on the same leg or switching sides.
Pro Tips & Common Mistakes
Pro Tips for Better Strength and Stability
- Control the lowering phase: Descend over approximately 2–4 seconds instead of dropping onto the box. Consequently, the quadriceps and glutes must actively control the movement.
- Keep the working foot grounded: Maintain contact through the heel and both sides of the forefoot. Additionally, avoid shifting entirely onto the toes during the ascent.
- Use the arms as counterbalance: Extend both arms forward to help maintain stability. As a result, you can better manage the backward movement of the hips.
- Choose the correct box height: Use a box that allows controlled sitting and standing on one leg. For beginners, a higher box often provides a more manageable progression than immediately attempting deep squats.
- Train both sides consistently: Complete balanced training volume for each leg while respecting individual strength differences. However, prioritize repetition quality rather than forcing identical performance.
Common Mistakes and How to Correct Them
- Dropping onto the box: Falling quickly into the seated position removes muscular control. Instead, slow the descent and maintain tension until your hips contact the surface.
- Allowing the knee to collapse inward: Excessive uncontrolled inward movement can indicate a loss of stability. Therefore, reduce difficulty and keep the knee aligned with the foot.
- Using the free leg for assistance: Touching the elevated foot down changes the intended unilateral movement. Instead, keep it off the floor or deliberately use a supported variation.
- Rocking backward before standing: Excessive backward movement can create momentum and reduce controlled force production. Consequently, maintain a stable seated position before driving upward through the working leg.
- Raising the heel excessively: Losing stable foot contact can make the movement more difficult to control. If necessary, adjust your stance, use a higher box, or improve ankle mobility.
- Progressing before mastering balance: Attempting a lower box too early may compromise knee alignment and standing mechanics. Therefore, first master controlled repetitions at a comfortable height.
Professional training tip: Treat the Single-Leg Low Box Squat as a controlled strength exercise, not a speed challenge. Although a lower box increases the range of motion, effective repetitions depend on balance, muscular control, and an appropriate difficulty level.
FAQ
Muscles Worked and Exercise Technique
What muscles does the Single-Leg Low Box Squat work?
The Single-Leg Low Box Squat primarily strengthens the quadriceps and gluteus maximus. Additionally, the hamstrings, calves, gluteus medius, hip adductors, and core contribute to stability and movement control. Because the exercise is unilateral, the supporting leg must manage both strength and balance demands.
Is the Single-Leg Low Box Squat the same as a Pistol Squat?
Not exactly. Both exercises involve squatting primarily on one leg while the opposite leg remains elevated. However, the Single-Leg Low Box Squat uses a box to establish the bottom position. In contrast, a traditional pistol squat generally involves lowering and rising without sitting on a supporting surface. Therefore, the box variation provides a different balance and strength challenge.
Should I lean forward during a Single-Leg Low Box Squat?
Yes, some forward torso inclination is normal and often necessary for balance. As the hips move backward, the torso naturally shifts forward to help keep the body’s center of mass over the supporting foot. However, avoid excessive spinal rounding, twisting, or uncontrolled forward collapse. Maintain a stable trunk throughout the repetition.
Difficulty, Box Height, and Progression
Is the Single-Leg Low Box Squat suitable for beginners?
The full low-box variation is generally better suited to intermediate or advanced exercisers. However, beginners can develop the required strength with higher box squats, assisted single-leg squats, and supported sit-to-stand exercises. As balance and control improve, gradually reduce the box height. Avoid progressing until the movement feels stable and manageable.
How low should the box be for this exercise?
The appropriate height depends on your strength, mobility, leg proportions, and ability to rise safely. Although a lower box increases the required squat depth, it also increases the challenge. Therefore, choose a height that allows smooth sitting and standing without knee collapse or bouncing. A higher box is preferable when learning the movement.
How can I make the Single-Leg Low Box Squat harder?
First, improve balance and repetition quality at your current box height. Next, gradually increase repetitions or extend the lowering phase. Once you can perform controlled repetitions consistently, consider using a slightly lower box or adding light external resistance. However, never sacrifice knee alignment, stability, or controlled movement simply to increase difficulty.
Balance, Safety, and Training Frequency
Why do I lose balance during Single-Leg Box Squats?
Balance difficulties may result from limited ankle mobility, insufficient hip stability, excessive box depth, or poor weight distribution. Additionally, moving too quickly can make the exercise harder to control. Therefore, practice with a higher box, maintain full foot contact, and use secure hand support when necessary.
Can I perform Single-Leg Low Box Squats if I have knee pain?
Knee pain should not be ignored during this exercise. Because the movement requires substantial knee flexion and single-leg loading, it may be inappropriate for certain injuries or painful conditions. Therefore, avoid forcing the movement through pain and seek guidance from a qualified healthcare professional. A supported, shallower variation may be more appropriate.
How often should I train Single-Leg Low Box Squats?
For strength development, performing the exercise approximately 2–3 times per week may be suitable when recovery allows. However, training frequency depends on your experience, total lower-body workload, and exercise intensity. Additionally, allow sufficient recovery when combining this movement with lunges, squats, or other demanding unilateral exercises.
Recommended Equipment
- Low Plyometric Exercise Box — provides a dedicated sitting surface for controlled single-leg box squats. Choose a sturdy, non-slip design with a suitable height and weight rating.
- Adjustable Aerobic Step Platform — offers adjustable heights for squat progressions when its stability, top dimensions, and load rating are appropriate for seated use.
- Suspension Trainer Straps — provide optional hand assistance during supported single-leg squat progressions when attached to a properly rated, secure anchor.
- Mini Loop Resistance Bands — useful for complementary glute activation and hip-stability exercises before unilateral lower-body training.
- Adjustable Weighted Vest — adds progressive resistance while leaving the hands available for balance once bodyweight repetitions are fully controlled.
Equipment tip: Prioritize a sturdy box and stable footwear before adding resistance. Additionally, verify that the box supports your body weight and remains stable during seated contact. For beginners, assistance and appropriate box height are more valuable than extra loading. Consequently, introduce weighted equipment only after mastering smooth single-leg repetitions.