Barbell Standing Military Press (Without Rack): Proper Form, Sets, Tips & FAQ
Learn how to perform the Barbell Standing Military Press without a rack using strict form. Includes setup, execution, sets by goal, common mistakes, FAQs, and recommended Amazon equipment.
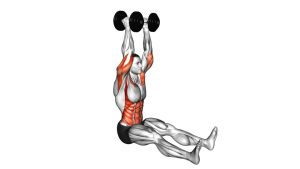
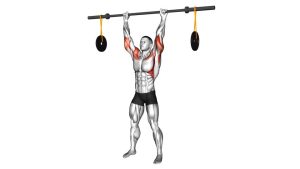
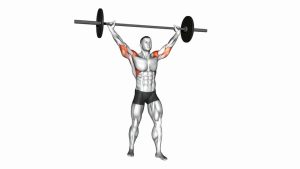
Barbell Standing Military Press (Without Rack)
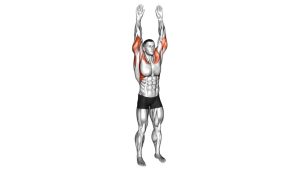
This exercise is best performed with a controlled setup, a braced torso, and a strict pressing pattern. From the standing position, the bar begins at upper-chest level and travels overhead until the elbows are fully extended. Because the bar is not unracked from supports, the lift places additional demands on total-body tension, shoulder control, and safe loading strategy.
Quick Overview
| Body Part | Front Shoulders |
|---|---|
| Primary Muscle | Anterior deltoids |
| Secondary Muscle | Triceps, lateral deltoids, upper chest, upper traps, serratus anterior |
| Equipment | Barbell, weight plates, collars, flat training space |
| Difficulty | Intermediate (higher technical demand when performed without a rack) |
Sets & Reps (By Goal)
- Strength: 4–6 sets × 3–6 reps, 2–3 minutes rest
- Muscle growth: 3–5 sets × 6–10 reps, 75–120 seconds rest
- Technique practice: 3–4 sets × 5–8 reps, light-to-moderate load, smooth tempo
- Shoulder endurance: 2–4 sets × 10–15 reps, lighter load, controlled form
Progression rule: Increase the load only when you can clean the bar into position safely, keep the torso braced, and finish every rep with a stable overhead lockout.
Setup / Starting Position
- Load the bar evenly: Secure the plates with collars and make sure the bar is centered.
- Bring the bar into position safely: Deadlift and clean the bar to the upper chest if the load allows, or use a safe method appropriate to your skill level.
- Set your stance: Stand with feet about shoulder-width apart and weight balanced through the mid-foot.
- Grip the bar: Hands slightly wider than shoulder-width, wrists stacked, and forearms vertical from the front view.
- Brace the torso: Tighten the core and glutes, keep the chest tall, and let the elbows sit slightly in front of the bar.
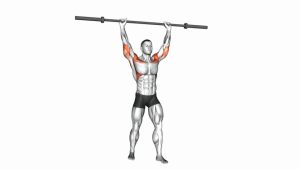
- Start at upper-chest level: The bar should rest near the collarbone/upper chest area before the press begins.
Tip: Before pressing, take a breath and lock your body into a stable pillar from the floor through the hands.
Execution (Step-by-Step)
- Brace before the rep: Inhale, tighten your abs and glutes, and keep the ribcage stacked over the hips.
- Move your head slightly back: As the bar leaves the shoulders, clear the path so the bar can travel upward efficiently.
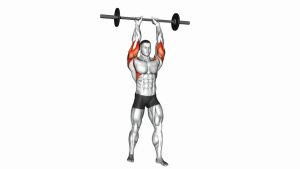
- Press the bar overhead: Drive the bar straight up using shoulder and triceps strength without using leg drive.
- Bring the head through: Once the bar passes the forehead, bring the head back under the bar.
- Lock out overhead: Finish with elbows straight, shoulders active, and the bar stacked above the shoulders and mid-foot.
- Lower with control: Bring the bar back down to the upper chest without dropping, bouncing, or losing posture.
- Reset each rep: Re-brace and repeat with the same vertical bar path and tight torso position.
Pro Tips & Common Mistakes
- Keep glutes tight: This helps prevent excessive leaning back during the press.
- Press in a straight line: A clean vertical bar path improves efficiency and shoulder positioning.
- Don’t flare the elbows too early: Keep them slightly forward at the bottom for a stronger pressing position.
- Avoid leg drive: If the knees dip and extend, it becomes a push press instead of a strict military press.
- Control the lowering phase: Don’t let the bar crash onto the upper chest.
- Don’t overarch the spine: Excessive lumbar extension usually means the load is too heavy or the core is not braced well.
- Use reasonable loading: Since the bar is lifted without a rack, setup fatigue matters as much as pressing strength.
FAQ
What is the difference between a military press and a push press?
A military press is performed with strict upper-body pressing mechanics and no leg drive. A push press uses a small dip-and-drive from the legs to help move the bar overhead.
Is doing the military press without a rack harder?
Yes. Without a rack, you need to bring the bar into position safely before the first rep, which adds extra demand on setup, energy, and technical control.
Where should I feel this exercise most?
You should mainly feel it in the front shoulders and triceps, with the core working hard to keep the body stable.
Can beginners do this variation?
Most beginners are better off learning with lighter overhead press variations first. The no-rack setup adds complexity, so it is usually better for lifters with basic barbell control already developed.
What is the biggest technical mistake to avoid?
The most common mistake is pressing with an exaggerated backward lean. That turns the lift into a poor-angle incline press and places unnecessary stress on the lower back.
Recommended Equipment
- Olympic Barbell — the main tool for performing standing military presses and other compound barbell lifts
- Barbell Collars — helps keep weight plates secure and stable during pressing sets
- Wrist Wraps — useful for additional wrist support during heavier overhead pressing
- Fractional Plates — great for making small load increases when overhead strength progresses slowly
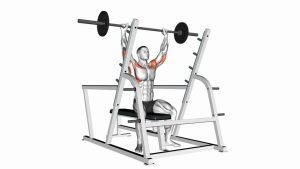
- Adjustable Squat Stand — optional upgrade if you want a safer start position than lifting the bar without a rack
Tip: For heavier pressing work, secure collars and stable wrist support can make setup feel more confident and controlled.