Cross Mountain Climber Against Wall: Form, Benefits, Sets & Tips
Learn the Cross Mountain Climber Against Wall for core strength, oblique activation, hip control, low-impact cardio, proper form, sets, and tips.
Cross Mountain Climber Against Wall
This exercise is useful for beginners who need a safer mountain climber variation and for advanced users who want a fast core-cardio warm-up. Because the wall supports part of your body weight, it is easier to control posture, reduce lower-back stress, and focus on clean cross-body knee drives.
Quick Overview
| Body Part | Core |
|---|---|
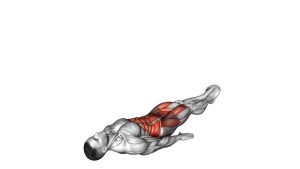
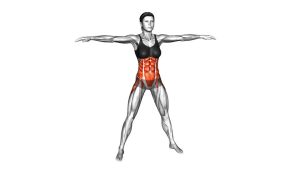
| Primary Muscle | Rectus abdominis and obliques |
| Secondary Muscle | Hip flexors, transverse abdominis, shoulders, chest, triceps, calves, and glutes |
| Equipment | Wall only; optional exercise mat, training shoes, timer, or resistance band |
| Difficulty | Beginner to intermediate |
Sets & Reps (By Goal)
- Beginner core control: 2–3 sets × 8–12 reps per side with a slow tempo.
- Low-impact cardio: 3–5 rounds × 20–40 seconds with 30–60 seconds rest.
- Oblique activation: 3–4 sets × 10–15 cross-body knee drives per side.
- Warm-up use: 1–3 rounds × 20–30 seconds before bodyweight, core, or cardio training.
- Conditioning finisher: 4–6 rounds × 30 seconds work / 30 seconds rest.
Progression rule: First improve posture and control, then increase speed. Do not rush the movement if your hips drop, your lower back arches, or your shoulders shrug.
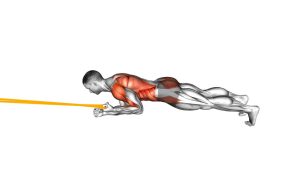
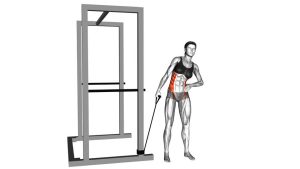
Setup / Starting Position
- Stand facing a wall: Place your hands flat on the wall around shoulder height or slightly below shoulder height.
- Step your feet back: Create a gentle forward lean so your body forms an angled plank line from head to heels.
- Set your hands: Keep hands about shoulder-width apart with fingers spread for stable contact.
- Brace your core: Pull your ribs down slightly and keep your pelvis controlled to avoid lower-back arching.
- Lift your heels slightly: Stay light on the balls of your feet so you can alternate knee drives smoothly.
- Keep your neck neutral: Look at the wall without dropping the head or craning the neck forward.
Execution (Step-by-Step)
- Start in a wall plank: Press your hands into the wall and keep your body long, stable, and slightly angled.
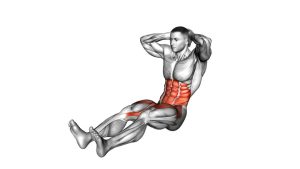
- Drive one knee upward: Lift one knee toward your torso while keeping the supporting foot planted.
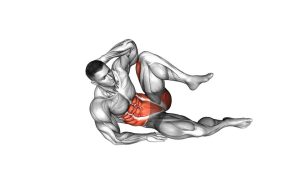
- Cross the knee inward: Guide the lifted knee toward the opposite side of your body to target the obliques.
- Pause briefly at the top: Keep the abs tight and avoid twisting the shoulders excessively.
- Return the foot down: Place the foot back under control without stomping or losing posture.
- Repeat on the opposite side: Alternate legs in a smooth left-right rhythm.
- Control the tempo: Move faster only when the torso remains stable and the cross-body path stays clean.
Pro Tips & Common Mistakes
Pro Tips
- Keep pressure through both hands: This helps stabilize the shoulders and prevents twisting.
- Use the abs before speed: A controlled knee drive is better than a fast sloppy rep.
- Exhale during the knee drive: Breathing out helps the abs contract and improves control.
- Stay tall through the crown of the head: Keep the neck long and avoid collapsing into the shoulders.
- Adjust your foot distance: Step farther back for more challenge or closer to the wall for easier control.
Common Mistakes
- Letting the hips drop: This can increase lower-back stress and reduce core engagement.
- Twisting too much: The knee crosses the body, but the torso should stay mostly stable.
- Rushing the reps: Fast reps only work well when posture remains clean.
- Shrugging the shoulders: Keep the shoulders down and away from the ears.
- Standing too close to the wall: This reduces the plank angle and makes the movement less effective.
- Stomping the feet: Place each foot down softly to protect the knees and maintain rhythm.
FAQ
What muscles does the Cross Mountain Climber Against Wall work?
It mainly works the abs and obliques. It also involves the hip flexors, shoulders, chest, triceps, calves, and glutes for support and rhythm.
Is the wall version easier than a floor mountain climber?
Yes. The wall version reduces bodyweight load, wrist stress, and floor impact. It is a good option for beginners, warm-ups, and low-impact cardio sessions.
Should I perform it slowly or fast?
Start slow to learn the cross-body path and core control. Once your posture is stable, you can increase speed for cardio conditioning.
Where should I feel this exercise?
You should feel your abs, obliques, and hip flexors working. You may also feel light effort in the shoulders and calves because they help stabilize the position.
Can beginners do Cross Mountain Climbers Against Wall?
Yes. This is one of the most beginner-friendly mountain climber variations because the wall provides support and makes the movement easier to control.
How can I make the exercise harder?
Step farther away from the wall, increase the tempo, add longer work intervals, or wear a light resistance band around the feet or thighs if your form stays controlled.
Recommended Equipment (Optional)
- Exercise Mat — useful for warm-ups, floor core work, and stretching after this movement
- Training Shoes — improves foot grip and support during quick alternating knee drives
- Interval Timer — helpful for cardio rounds, HIIT intervals, and timed core circuits
- Mini Resistance Bands — optional progression for hip and core control when form is strong
- Non-Slip Workout Gloves — improves hand comfort and grip when pressing against the wall
Tip: Equipment is optional. The most important tools are a stable wall, controlled breathing, clean knee direction, and consistent posture.