Seated In-Out Leg Raise on Floor: Form, Core Benefits, Sets & Tips
Learn the seated in-out leg raise on floor to train abs and hip flexors with controlled leg tucks, proper setup, form tips, sets, FAQs, and gear.
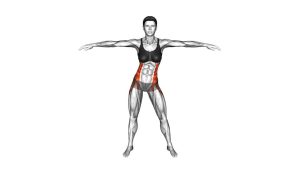
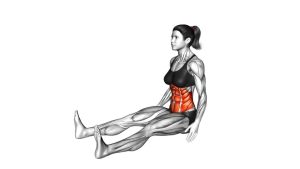
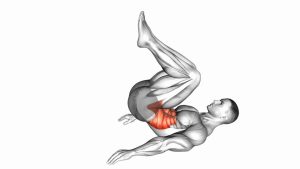
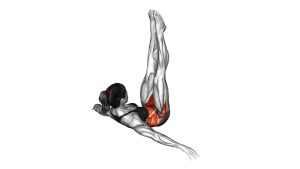
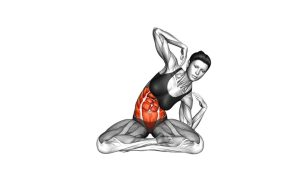
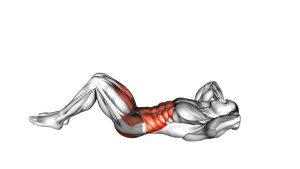
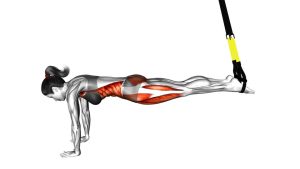
Seated In-Out Leg Raise on Floor
This exercise works best when the torso remains steady and the legs move with control. Although the hands support the body, they should not become the main driver of the movement. Instead, the core should keep the trunk stable while the knees tuck in and the legs extend forward. As a result, this movement is useful for home ab training, core conditioning, and improving control through the lower-body lever.
Quick Overview
| Body Part | Core |
|---|---|
| Primary Muscle | Rectus abdominis |
| Secondary Muscle | Hip flexors, lower abdominals, obliques, deep core stabilizers |
| Equipment | No equipment required; optional exercise mat for floor comfort |
| Difficulty | Beginner to intermediate, depending on leg extension range and control |
Sets & Reps (By Goal)
- Beginner core control: 2–3 sets × 8–10 reps, using a short leg extension range.
- Muscular endurance: 3–4 sets × 12–20 reps, keeping each repetition smooth and steady.
- Ab workout finisher: 2–3 sets × 20–30 seconds, resting 30–45 seconds between sets.
- Core strength progression: 3–4 sets × 8–12 slow reps, extending the legs farther without losing posture.
Progression rule: First improve control and range. Then, add reps or longer time under tension. Avoid progressing by swinging the legs or rushing the tuck.
Setup / Starting Position
- Sit on the floor: Place your hips on the floor with your legs extended forward.
- Place your hands behind you: Set both palms on the floor behind your hips for support.
- Lean back slightly: Keep your chest lifted while creating a stable reclined torso angle.
- Brace your core: Tighten the midsection lightly before lifting or moving the legs.
- Start with control: Keep the legs extended forward and hovering if possible, without forcing the lower back to arch.
If the full extended position feels too difficult, begin with the knees slightly bent. This keeps tension on the abs while reducing stress on the lower back.
Execution (Step-by-Step)
- Set your support: Press your hands lightly into the floor and keep your shoulders away from your ears.
- Brace before moving: Engage your abs so the torso does not collapse backward or round excessively.
- Pull the knees in: Bend the knees and bring them toward the torso in a controlled tuck.
- Pause briefly: Hold the compact position for a moment while keeping the chest lifted.
- Extend the legs out: Straighten the legs forward again without dropping them heavily to the floor.
- Repeat smoothly: Continue the in-and-out pattern while maintaining a steady torso angle.
Pro Tips & Common Mistakes
- Keep the torso stable: A small recline is fine, but do not rock aggressively forward and backward.
- Control the extension: Extend the legs only as far as you can without losing abdominal tension.
- Avoid lower-back arching: If your back arches, shorten the range or keep the knees more bent.
- Do not shrug the shoulders: Keep the neck relaxed and the shoulders down while the hands support you.
- Use a smooth tempo: Pull in for 1–2 seconds, pause briefly, then extend out for 1–2 seconds.
- Do not slam the feet down: Maintain control at the end of each extension instead of resting completely.
- Breathe consistently: Exhale as the knees come in, then inhale or reset as the legs extend.
FAQ
What muscles does the seated in-out leg raise on floor work?
It mainly works the rectus abdominis and hip flexors. Additionally, the obliques and deep core muscles help stabilize the torso during the in-and-out leg motion.
Is this exercise good for beginners?
Yes, it can be beginner-friendly when performed with a smaller range of motion. However, beginners should keep the knees slightly bent and focus on control before extending the legs farther.
Should my feet touch the floor between reps?
They can lightly touch if needed for control. However, keeping the feet hovering increases core tension and makes the exercise more challenging.
Why do I feel this exercise in my hip flexors?
The hip flexors help move the thighs during the tuck and extension. Even so, your abs should stay active to stabilize the torso and prevent excessive lower-back arching.
How can I make the seated in-out leg raise harder?
Extend the legs farther, slow down the tempo, reduce hand support slightly, or increase time under tension. Still, only progress when your lower back remains controlled.
How can I make it easier?
Keep the knees bent, use a shorter range, let the feet touch down lightly between reps, or sit more upright. These adjustments reduce the lever length and make the exercise easier to control.
Recommended Equipment (Optional)
- Exercise Mat — adds comfort for seated floor core exercises.
- Thick Yoga Mat — useful if the tailbone or wrists feel uncomfortable on hard floors.
- Core Sliders — helpful for related core progressions and controlled leg movements.
- Mini Resistance Bands — useful for adding hip and core activation drills around this movement.
- Adjustable Ankle Weights — optional advanced progression once bodyweight reps are easy and controlled.
Tip: Start with a mat only. Add resistance or ankle weights later, because this exercise becomes much harder when the leg lever is loaded.