Lying Windshield Wiper: Core Rotation Form, Sets, Tips & FAQ
Learn the Lying Windshield Wiper to train obliques, abs, and rotational core control with step-by-step form, sets, mistakes, FAQs, and gear.
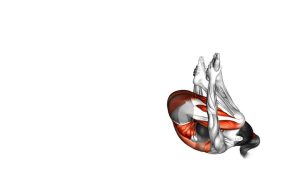
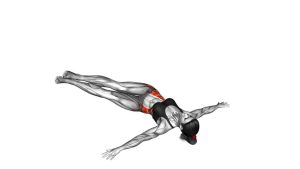
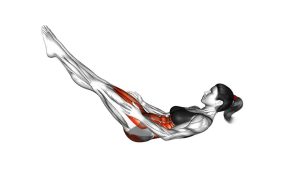
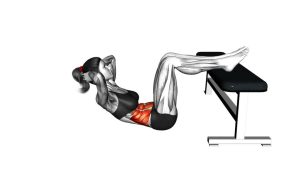
Lying Windshield Wiper
This exercise works best when the legs move as one unit and the shoulders stay heavy on the floor. Because the movement creates strong rotational demand, every rep should feel smooth, braced, and controlled. In addition, the lower back should not aggressively arch as the legs move away from the center line.
Quick Overview
| Body Part | Core |
|---|---|
| Primary Muscle | Obliques |
| Secondary Muscle | Rectus abdominis, transverse abdominis, hip flexors, lower back stabilizers |
| Equipment | No equipment required; optional exercise mat |
| Difficulty | Intermediate because the legs create a long lever and strong rotational core demand |
Sets & Reps (By Goal)
- Core control: 2–3 sets × 6–8 reps per side with a slow tempo
- Oblique strength: 3–4 sets × 8–10 reps per side with controlled pauses
- Endurance: 2–3 sets × 10–14 reps per side using a moderate range
- Beginner progression: 2–3 sets × 5–8 reps per side with bent knees
Progression rule: First increase control, then increase range. After that, progress by straightening the legs more fully or slowing the lowering phase.
Setup / Starting Position
- Lie on your back: Position yourself flat on the floor with your spine supported.
- Open your arms: Extend both arms out to the sides in a wide “T” position for stability.
- Raise your legs: Bring both legs up together so they point toward the ceiling.
- Brace your core: Pull the ribs down slightly and keep your midsection firm before moving.
- Set your shoulders: Keep the shoulders and upper back connected to the floor.
Tip: If the straight-leg version feels too hard, slightly bend your knees. This reduces the lever length and makes the exercise easier to control.
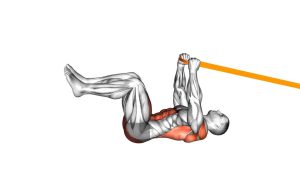
Execution (Step-by-Step)
- Start from center: Keep both legs together above your hips and maintain a steady brace.
- Lower to one side: Slowly rotate your legs toward one side while keeping your shoulders anchored.
- Control the bottom: Stop before your lower back loses position or before your legs touch the floor.
- Return to center: Use your obliques to pull the legs back to the starting position without swinging.
- Switch sides: Lower the legs to the opposite side with the same slow, controlled pattern.
- Repeat evenly: Continue alternating sides while keeping the movement smooth and balanced.
Pro Tips & Common Mistakes
- Move slowly: Fast reps usually turn this into a momentum drill instead of a core exercise.
- Keep the legs together: A tight leg position improves control and keeps the movement cleaner.
- Do not force floor contact: Stop at the lowest point you can control with your abs engaged.
- Anchor the shoulders: If the shoulders lift, the rotation is too large or too fast.
- Control the return: The hardest part is often pulling the legs back to center without swinging.
- Use bent knees when needed: This is the best modification for beginners or sensitive lower backs.
- Breathe with control: Exhale as the legs return to center, then inhale before lowering to the next side.
FAQ
What muscles does the lying windshield wiper work?
The lying windshield wiper mainly works the obliques. It also trains the rectus abdominis, transverse abdominis, hip flexors, and spinal stabilizers because your trunk must control rotation from side to side.
Is the lying windshield wiper good for abs?
Yes. It is a strong abs exercise because your core must stabilize the pelvis while the legs move laterally. However, it is especially effective for the obliques because the movement includes controlled trunk rotation.
Should my legs touch the floor?
No. Your legs do not need to touch the floor. In fact, stopping slightly above the floor usually keeps tension on the core and helps prevent uncontrolled twisting through the lower back.
Why does my lower back lift during this exercise?
Your lower back may lift because the range is too large, the legs are too straight, or the core brace is not strong enough. Therefore, bend your knees, reduce the side-to-side distance, and move more slowly.
Is this exercise beginner-friendly?
The straight-leg version is usually intermediate. Beginners can still use the pattern by bending the knees, lowering only halfway, and focusing on smooth control instead of maximum range.
How do I make lying windshield wipers harder?
You can make the exercise harder by straightening the legs more, slowing the lowering phase, pausing near the bottom, or holding a light medicine ball between the feet only after you can control the bodyweight version.
Recommended Equipment
- Exercise Mat — adds cushioning and grip for floor-based core exercises
- Thick Yoga Mat — useful if your spine or hips need more floor comfort
- Mini Pilates Ball — can be placed between the knees to improve leg connection and control
- Light Medicine Ball — optional advanced tool for added resistance once form is consistent
- Core Sliders — useful for complementary core stability and anti-rotation training
Tip: Start with a comfortable mat before adding resistance. The lying windshield wiper rewards control, not heavy loading.