Crunch with Leg Lift: Form, Core Benefits, Sets, Tips & FAQ
Learn the Crunch with Leg Lift for stronger abs and better core control. Get proper form, sets, mistakes, FAQs, and useful equipment tips.
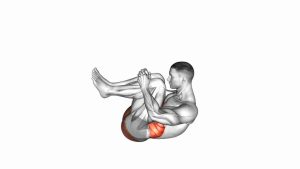
Crunch with Leg Lift
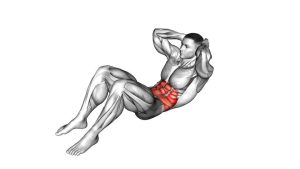
This exercise is useful for building abdominal strength, improving core control, and practicing a smooth crunch pattern without equipment. Additionally, the raised-leg position makes the movement more challenging than a basic floor crunch because the torso and legs both demand abdominal stability. For best results, move slowly, keep the legs stable, and focus on lifting the shoulder blades rather than yanking the head forward.
Quick Overview
| Body Part | Core |
|---|---|
| Primary Muscle | Rectus abdominis |
| Secondary Muscle | Hip flexors, transverse abdominis, obliques |
| Equipment | None; optional exercise mat |
| Difficulty | Beginner to Intermediate |
Sets & Reps (By Goal)
- Core endurance: 2–3 sets × 12–20 reps with a smooth, steady tempo.
- Strength control: 3–4 sets × 8–12 reps with a short pause at the top.
- Beginner practice: 2 sets × 6–10 reps with a smaller crunch range.
- Ab finisher: 2–3 sets × 15–25 reps, only if form stays clean.
Progression rule: First improve control, then add reps. After that, increase the top pause or slow the lowering phase before making the exercise harder.
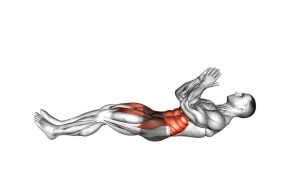
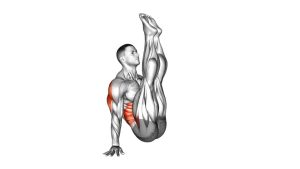
Setup / Starting Position
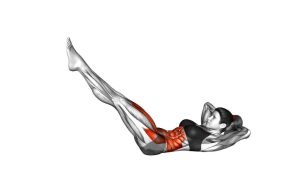
- Lie on your back: Set up on the floor or on an exercise mat with your head, shoulders, and back supported.
- Raise your legs: Lift both legs off the floor with the knees slightly bent, keeping the thighs angled upward.
- Brace lightly: Tighten your abs enough to keep your lower back controlled without holding your breath.
- Place the hands carefully: Keep the arms near the head or lightly beside it, but do not pull the neck forward.
- Start with control: Keep the legs steady and prepare to lift the head and shoulders using the abs.
Tip: If the lower back lifts too much from the floor, bring the knees slightly closer or reduce the leg angle until the core can stay controlled.
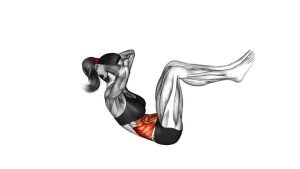
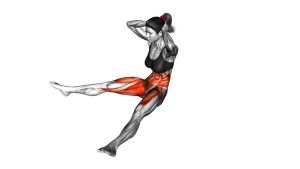
Execution (Step-by-Step)
- Exhale and begin the crunch: Lift the head first, then curl the shoulders upward from the floor.
- Keep the legs lifted: Maintain the raised-leg position without kicking, swinging, or dropping the feet.
- Shorten the abs: Bring the ribs slightly toward the pelvis while keeping the movement compact and controlled.
- Pause briefly: Hold the top position for a moment when the shoulder blades are lifted.
- Lower slowly: Return the shoulders and head toward the floor without relaxing the legs completely.
- Repeat smoothly: Continue each rep with the same rhythm, avoiding bounce or momentum.
Pro Tips & Common Mistakes
- Lift with your abs, not your neck: The head follows the torso, but the hands should not pull the head forward.
- Keep the legs steady: Swinging the legs reduces abdominal tension and makes the exercise less precise.
- Use a controlled tempo: Lift smoothly, pause briefly, then lower slowly for better core engagement.
- Avoid dropping the feet: Keep the legs elevated throughout the set unless you need to reset safely.
- Do not over-crunch: A small, strong lift of the shoulder blades is enough when the abs stay active.
- Control the lower back: If the back arches, bend the knees more or reduce the leg height.
- Breathe consistently: Exhale during the crunch and inhale as you lower with control.
FAQ
What muscles does the Crunch with Leg Lift work?
The main muscle worked is the rectus abdominis. Additionally, the hip flexors and deeper core muscles help keep the legs lifted and stable during the movement.
Is the Crunch with Leg Lift good for beginners?
Yes, it can work for beginners when the range is controlled. However, it is harder than a basic crunch because the legs stay raised. Therefore, start with fewer reps and bend the knees more if needed.
Should my legs move during the exercise?
The legs should remain mostly stable. A small amount of natural movement may happen, but excessive swinging means you should slow down and focus on core control.
Why do I feel this in my hip flexors?
Because the legs stay lifted, the hip flexors assist with the position. Still, your abs should remain the main focus. If the hip flexors dominate, bend the knees more and shorten the set.
Can I do this exercise every day?
You can practice it often at low volume, but hard sets should be managed like other strength work. For most people, 2–4 sessions per week is enough for progress.
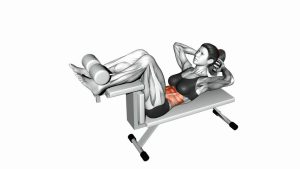
Recommended Equipment (Optional)
- Exercise Mat — adds comfort and support for floor-based crunch variations.
- Thick Yoga Mat — helpful if your spine or hips feel uncomfortable on a hard floor.
- Core Sliders — useful for other ab movements and core-control progressions.
- Ab Exercise Ball — supports additional crunch variations and controlled core training.
- Adjustable Ankle Weights — advanced option only after bodyweight reps are fully controlled.
Tip: Equipment is optional for this exercise. However, a comfortable mat can improve setup quality and make floor-based ab training easier to repeat consistently.