Front Plank Toe Tap: Core Stability, Form, Sets, Tips & FAQ
Learn the Front Plank Toe Tap for stronger abs, better plank stability, and controlled hip movement. Includes form, sets, tips, FAQs, and equipment.
Front Plank Toe Tap
This exercise trains the core to stay firm while the legs move. Because each toe tap shifts your balance, your abs, obliques, shoulders, and glutes must work together to control rotation. Moreover, the movement is useful for building better plank endurance without needing weights or machines.
Quick Overview
| Body Part | Core |
|---|---|
| Primary Muscle | Rectus abdominis and deep core stabilizers |
| Secondary Muscle | Obliques, shoulders, glutes, hip abductors, and quadriceps |
| Equipment | No equipment required; optional exercise mat |
| Difficulty | Beginner to intermediate, depending on tempo and plank control |
Sets & Reps (By Goal)
- Core control: 2–3 sets × 8–12 taps per side with slow, clean reps.
- Plank endurance: 3–4 sets × 20–40 seconds while keeping the hips stable.
- Warm-up activation: 1–2 sets × 6–10 taps per side before a core or full-body workout.
- Conditioning finisher: 3 rounds × 30–45 seconds with controlled alternating taps.
Progression rule: First improve stability. Then add time, reps, or a slower tempo. Do not increase speed if your hips sway or your lower back drops.
Setup / Starting Position
- Start in a high plank: Place your hands on the floor under your shoulders with your arms extended.
- Set your feet close: Keep both feet behind you with your toes on the floor.
- Brace your core: Tighten your abs gently as if preparing to resist movement through your trunk.
- Align your body: Keep your head, shoulders, hips, knees, and heels in one long line.
- Keep your gaze down: Look toward the floor so your neck stays neutral.
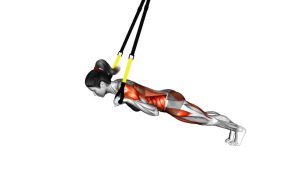
A slightly wider hand position may feel more stable, but the video shows the main focus clearly: hands planted, torso controlled, and feet tapping side to side.
Execution (Step-by-Step)
- Hold the plank: Begin with both feet on the floor and your body straight.
- Move one foot outward: Lift one foot slightly and tap it laterally to the side.
- Keep the upper body quiet: Maintain steady shoulders and avoid shifting your chest side to side.
- Return to center: Bring the tapping foot back beside the other foot with control.
- Switch sides: Tap the opposite foot out to the side, then return it to the start.
- Continue alternating: Repeat left and right while keeping your hips level and your core tight.
Pro Tips & Common Mistakes
- Keep the hips steady: The main challenge is resisting rotation while each foot moves.
- Do not rush the taps: A slower tempo usually creates better core tension and cleaner form.
- Avoid sagging: If your lower back drops, shorten the set or raise your hands onto a bench.
- Control the return: Bring the foot back smoothly instead of snapping it into place.
- Press the floor away: Keep your shoulders strong and avoid collapsing between your shoulder blades.
- Use a small tap first: A shorter lateral step is better than a wide step with poor alignment.
FAQ
What muscles does the Front Plank Toe Tap work?
It mainly works the abs and deep core stabilizers. In addition, the obliques, shoulders, glutes, hip abductors, and legs assist because the body must stay stable while each foot taps outward.
Is the Front Plank Toe Tap good for beginners?
Yes, it can be beginner-friendly when performed slowly with a short tap distance. However, beginners should stop the set when the hips start swaying or the lower back begins to drop.
Should I do this exercise fast or slow?
Slow and controlled is better for learning. Although faster reps can be used for conditioning, the video shows a controlled alternating pattern, so stability should remain the priority.
Why do my hips move during plank toe taps?
Your hips may move because your core is losing anti-rotation control. To fix this, reduce the tap distance, slow down, widen your feet slightly before starting, or perform fewer reps.
Can I make the Front Plank Toe Tap easier?
Yes. Place your hands on a bench or elevated surface. This reduces bodyweight pressure and makes it easier to keep your shoulders, hips, and spine aligned.
Recommended Equipment
- Exercise Mat — adds comfort and grip for floor-based plank training.
- Non-Slip Workout Mat — helps prevent hand or foot sliding during alternating toe taps.
- Push-Up Handles — optional tool for a more comfortable wrist position in high plank.
- Resistance Loop Bands — useful for advanced hip and glute activation variations.
- Core Sliders — advanced option for controlled plank movement progressions.
Tip: Start with no equipment first. Then add tools only when your plank line stays stable and your taps remain controlled.