L-Sit Exercise: Core Strength, Form, Sets, Tips & FAQ
Learn the L-Sit exercise for stronger abs, hip flexors, shoulders, and core control. Includes setup, execution, sets, mistakes, FAQs, and equipment.
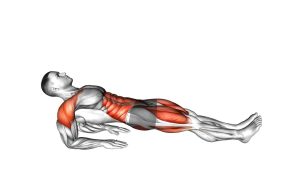
L-Sit
This movement is not just a leg raise. It is an isometric strength hold that demands compression, balance, and shoulder stability. During the exercise, the arms stay straight, the shoulders push down, and the legs remain extended in front of the body. A clean L-Sit should look quiet and controlled, without swinging, knee bending, or collapsing through the shoulders.
Quick Overview
| Body Part | Core |
|---|---|
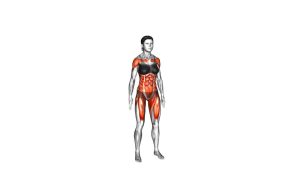
| Primary Muscle | Rectus abdominis, hip flexors |
| Secondary Muscle | Quadriceps, triceps, shoulders, serratus anterior, forearms |
| Equipment | Parallel bars, dip bars, parallettes, or sturdy push-up bars |
| Difficulty | Advanced |
Sets & Reps (By Goal)
- Skill learning: 4–6 sets × 5–10 second holds, resting 60–90 seconds between sets.
- Core strength: 3–5 sets × 10–20 second holds, resting 90–120 seconds between sets.
- Calisthenics endurance: 3–4 sets × 20–30 second holds, resting 2 minutes between sets.
- Progression practice: 5–8 short sets of tuck, one-leg, or full L-Sit holds with perfect control.
Progression rule: Build time slowly. Add 2–5 seconds only when your legs stay straight, your torso stays tall, and your shoulders do not shrug.
Setup / Starting Position
- Place your hands on the bars: Grip the parallel bars firmly with your palms facing inward and wrists stacked under your shoulders.
- Lock your elbows: Press through the bars until your arms are straight and your body is suspended between them.
- Depress your shoulders: Push your shoulders down away from your ears. This creates space around the neck and improves stability.
- Keep your chest lifted: Maintain a tall torso instead of rounding forward or sinking between the bars.
- Set your legs together: Start with both legs hanging straight below you. Keep your knees extended and your toes pointed slightly forward.
Before lifting the legs, make sure the support position feels strong. If your shoulders collapse at the start, the L-Sit will become much harder to control.
Execution (Step-by-Step)
- Brace your core: Tighten your abs as if you are preparing to hold a hollow body position.
- Begin the leg raise: Lift both straight legs forward from the hips while keeping your knees locked.
- Reach the L position: Continue raising the legs until they are close to parallel with the floor.
- Hold the shape: Keep the torso vertical, elbows straight, shoulders pressed down, and legs fully extended.
- Breathe with control: Take short, calm breaths without relaxing your brace or letting the legs drop.
- Lower slowly: Bring the legs back down under control. Avoid dropping them quickly or swinging backward.
- Reset before repeating: Regain your support position before starting the next hold.
Pro Tips & Common Mistakes
- Push the bars down: Think about driving the bars toward the floor. This keeps your shoulders active and prevents sinking.
- Point your toes: A pointed foot position improves full-leg tension and makes the hold look cleaner.
- Do not lean too far back: A small lean may happen, but the torso should stay mostly upright.
- Avoid soft knees: Bent knees reduce the challenge and change the exercise into an easier variation.
- Control the descent: Lowering with control builds strength and prevents momentum from taking over.
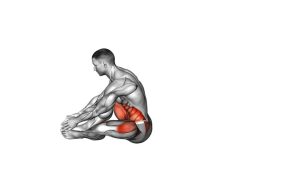
- Use progressions: Tuck L-Sits, one-leg L-Sits, and bent-knee holds are excellent steps before the full version.
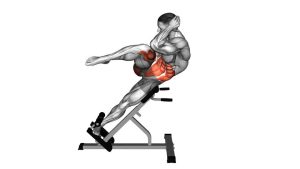
- Train compression separately: Seated leg lifts and hollow holds can improve the strength needed to keep the legs high.
- Keep the neck neutral: Look forward or slightly down without jutting the chin or shrugging the shoulders.
FAQ
What muscles does the L-Sit work?
The L-Sit mainly targets the rectus abdominis and hip flexors. It also trains the quads, shoulders, triceps, serratus anterior, forearms, and deep core stabilizers because the entire body must stay tight during the hold.
Is the L-Sit good for abs?
Yes. The L-Sit is one of the best bodyweight exercises for building strong abs because the core must resist spinal collapse while the legs stay lifted. It is especially useful for calisthenics athletes who need core compression strength.
Why can’t I keep my legs straight during an L-Sit?
Straight legs require strong hip flexors, active quads, hamstring flexibility, and core compression. If your knees bend, start with a tuck L-Sit or one-leg L-Sit until you can hold the position without losing control.
How long should I hold an L-Sit?
Beginners working toward the full version can start with 5–10 second holds. Stronger athletes can aim for 15–30 seconds. Quality matters more than duration, so stop the set before your shoulders sink or your knees bend.
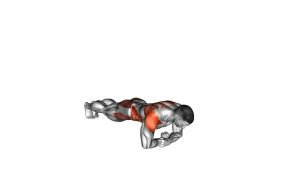
Can I do the L-Sit on the floor?
Yes, but the floor L-Sit is usually harder because you need more compression strength and arm length clearance. Parallel bars or parallettes make the exercise easier to learn because they give your legs more room to lift.
What is the best progression before the full L-Sit?
Start with support holds, then move to tuck L-Sits, advanced tuck holds, one-leg L-Sits, and finally the full L-Sit. Each step should be controlled before moving to the next variation.
Recommended Equipment (Optional)
- Parallettes Bars — ideal for practicing L-Sits, tuck holds, and calisthenics core progressions.
- Dip Station — provides a higher support position for full L-Sits and advanced bodyweight training.
- Push-Up Bars — a simple option for increasing hand height during beginner L-Sit practice.
- Thick Exercise Mat — useful for seated compression drills, warm-ups, and safer progression work.
- Wrist Wraps — helpful for extra wrist support during longer support holds and bar-based training.
Tip: Equipment should support better form, not hide weak positions. Choose stable bars first, then build strength through clean progressions.