Crunch (Straight Leg Up): Proper Form, Benefits, Sets, Tips & FAQ
Learn how to do the Crunch (Straight Leg Up) with proper form to target your abs, improve core control, and build stronger abdominal contraction. Includes setup, execution, sets, mistakes, FAQs, and recommended equipment.
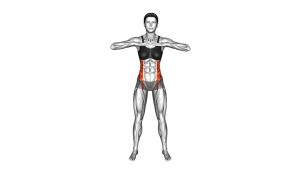
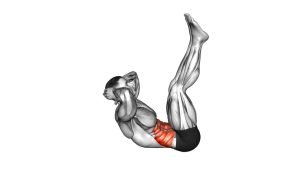
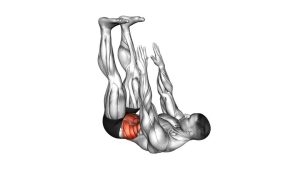
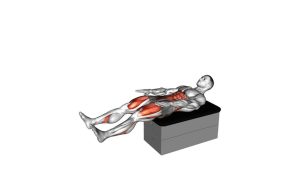
Crunch (Straight Leg Up)
This crunch variation is excellent for training the rectus abdominis, especially when your goal is better abdominal contraction and cleaner core control. Because the legs stay raised, your body must resist unwanted movement through the hips and lower back. As a result, the exercise feels more demanding than a standard floor crunch.
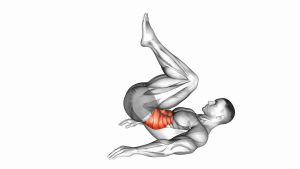
For best results, move slowly and avoid using momentum. The upper back should peel away from the floor in a small, controlled curl. Meanwhile, the legs should remain vertical and steady. This simple rule keeps the focus on your abs instead of shifting stress into your neck, hip flexors, or lower back.
Quick Overview
| Body Part | Abs |
|---|---|
| Primary Muscle | Rectus abdominis |
| Secondary Muscle | Hip flexors, transverse abdominis, obliques, deep core stabilizers |
| Equipment | No equipment required; exercise mat optional |
| Difficulty | Beginner to intermediate |
Sets & Reps (By Goal)
- Beginner core control: 2–3 sets of 8–12 reps with a slow tempo and short pauses.
- Muscle endurance: 3–4 sets of 12–20 reps while keeping every rep smooth and controlled.
- Abdominal strength focus: 3–4 sets of 8–15 reps with a 1–2 second squeeze at the top.
- Home workout finisher: 2–3 rounds of 15–25 reps after your main core exercises.
- Technique practice: 2 sets of 6–10 slow reps to improve rib control and reduce neck pulling.
Progression rule: First improve control, then add reps. After that, increase the hold at the top. Avoid adding speed because faster reps usually reduce abdominal tension and increase compensation.
Setup / Starting Position
- Lie on your back: Start on a comfortable mat with your spine neutral and your head resting gently on the floor.
- Raise both legs: Extend your legs upward until they are close to vertical. Keep your knees straight or slightly soft if your hamstrings feel tight.
- Set your pelvis: Lightly press your lower back toward the floor by bracing your abs. Do not force the spine flat with aggressive tension.
- Position your arms: Place your fingertips lightly near your temples, cross your arms over your chest, or reach toward your feet.
- Relax your neck: Keep your chin slightly tucked and leave space between your chin and chest. Your hands should not pull your head forward.
A strong setup makes the movement safer and more effective. Before the first rep, check that your legs are still, your ribs are controlled, and your neck is relaxed.
Execution (Step-by-Step)
- Brace gently: Take a small breath in, then tighten your abs as if you are preparing for a controlled curl.
- Lift the upper back: Curl your shoulders off the floor by bringing your ribs toward your pelvis.
- Keep the legs vertical: Hold your legs steady above your hips. Do not let them swing forward or drift backward.
- Squeeze at the top: Pause briefly when your shoulder blades are lifted and your abs feel fully contracted.
- Lower with control: Return your upper back to the floor slowly. Do not drop your shoulders suddenly.
- Reset without relaxing completely: Keep light abdominal tension before starting the next rep.
Pro Tips & Common Mistakes
Pro Tips
- Think ribs to pelvis: This cue helps you crunch with your abs instead of lifting with your neck.
- Keep the rep compact: A high lift is not required. A clean shoulder-blade lift is enough.
- Use a slow tempo: Try 2 seconds up, 1 second squeeze, and 2–3 seconds down.
- Breathe with control: Exhale as you crunch upward, then inhale lightly as you lower.
- Stabilize the legs: Your legs should act like a fixed point, not a swinging counterweight.
Common Mistakes
- Pulling the head: This shifts tension into the neck and reduces abdominal focus.
- Swinging the legs: Movement from the legs often means the core is losing control.
- Arching the lower back: Excessive arching can irritate the lower back and weaken the crunch position.
- Rushing the reps: Fast reps usually rely on momentum instead of abdominal contraction.
- Holding the breath: Breath-holding can create unnecessary pressure and make the movement feel harder than needed.
FAQ
What muscles does the Crunch (Straight Leg Up) work?
The main muscle worked is the rectus abdominis, which runs along the front of your abdomen. Your hip flexors and deep core muscles also assist by helping keep the legs raised and stable.
Is this exercise better than a regular crunch?
It is not automatically better, but it is more challenging for many people. The raised straight-leg position increases the stability demand, so it can be useful when a regular crunch feels too easy.
Should my legs stay completely straight?
Ideally, your legs stay straight or nearly straight. However, a small knee bend is acceptable if your hamstrings are tight or if keeping the legs vertical causes lower-back discomfort.
Why do I feel this in my neck?
Neck tension usually happens when you pull the head forward or lift too high. Keep your chin gently tucked, relax your jaw, and let the abs create the curl.
Can beginners do the Crunch (Straight Leg Up)?
Yes, but beginners should use fewer reps and a smaller range of motion. If the straight-leg position feels too hard, bend the knees slightly or return to a standard crunch first.
How often should I train this exercise?
You can perform it 2–4 times per week depending on your program. Give your abs time to recover if you feel soreness or if your technique becomes weaker.
Recommended Equipment
- Exercise Mat — adds comfort for your spine, hips, and shoulders during floor-based core work.
- Ab Mat — supports better spinal positioning and can make crunch variations feel smoother.
- Ankle Weights — useful for advanced users who want to increase leg stability demand gradually.
- Core Sliders — helpful for adding other core exercises to your abs routine.
- Resistance Bands Set — useful for building a complete home workout with core, glute, and upper-body movements.
Tip: You do not need equipment to perform this exercise correctly. Start with bodyweight first, then use optional tools only when your form stays controlled.