Sit-Up with Arms on Chest: Proper Form, Benefits, Sets, Tips & FAQ
Learn how to do the Sit-Up with Arms on Chest for stronger abs, better trunk control, and clean form. Includes steps, sets, tips, FAQs, and gear.
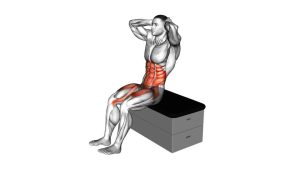
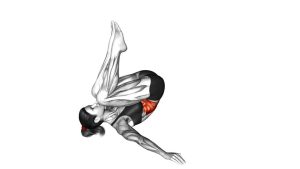
Sit-Up with Arms on Chest
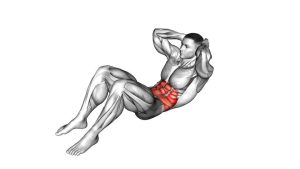
This exercise works best when each repetition is slow, stable, and controlled. First, lie on your back with the knees bent and the feet flat. Then, cross your arms over your chest and lift your torso without throwing the head or swinging the arms. As a result, the abs do more of the work while the body learns better trunk control.
Quick Overview
| Body Part | Abs |
|---|---|
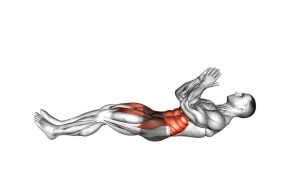
| Primary Muscle | Rectus abdominis |
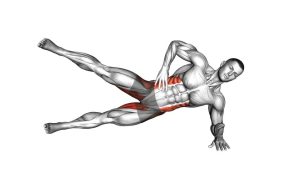
| Secondary Muscle | Hip flexors, obliques, deep core stabilizers |
| Equipment | None; optional exercise mat |
| Difficulty | Beginner to intermediate, depending on control and range |
Sets & Reps (By Goal)
- Core endurance: 2–4 sets × 12–20 reps with a steady tempo.
- Strength control: 3–5 sets × 8–12 reps with a slower lowering phase.
- Beginner practice: 2–3 sets × 6–10 reps with full control and short rest.
- Home abs workout: 3 rounds × 10–15 reps paired with planks or leg raises.
Progression rule: Add reps only when you can lift and lower without neck strain, foot lifting, or momentum. After that, increase tempo control before adding resistance.
Setup / Starting Position
- Lie on your back: Start supine on the floor with your knees bent.
- Plant your feet: Keep both feet flat and stable throughout the movement.
- Cross your arms: Place your hands across your chest instead of behind your head.
- Set your spine: Keep the torso relaxed but ready, with the ribs slightly controlled.
- Prepare to lift: Look forward naturally as the torso rises, without yanking the neck.
Tip: Use a mat if the floor feels uncomfortable. However, avoid overly soft surfaces because they may reduce stability.
Execution (Step-by-Step)
- Brace gently: Exhale slightly and prepare your abs before lifting.
- Lift the head and shoulders: Begin curling the upper torso away from the floor.
- Continue rising: Bring the torso upward until you reach a seated position.
- Keep the arms fixed: Do not swing the elbows or use arm momentum.
- Pause briefly: Hold the top position for a moment while keeping control.
- Lower slowly: Return to the floor with a smooth, controlled descent.
- Reset: Let the upper back return to the floor before starting the next rep.
Pro Tips & Common Mistakes
- Use the abs first: Start the lift by curling the torso, not by throwing the head forward.
- Keep the feet planted: Stable feet help you control the full repetition.
- Control the descent: The lowering phase is just as important as the upward phase.
- Avoid arm swing: Because the arms are crossed, they should stay quiet and fixed.
- Do not rush: Fast reps often turn the exercise into momentum instead of core work.
- Protect the neck: Keep the neck natural and avoid forcing the chin toward the chest.
- Stay consistent: Smooth reps build better abdominal endurance than sloppy high-volume sets.
FAQ
What muscles does the sit-up with arms on chest work?
It mainly works the rectus abdominis, which helps flex the trunk. Additionally, the hip flexors, obliques, and deep core stabilizers assist during the lift and control the lowering phase.
Is the sit-up with arms on chest good for beginners?
Yes, it can be beginner-friendly when performed slowly and with a manageable range. However, beginners should avoid pulling the neck, bouncing, or forcing high reps before they can control the movement.
Should my feet stay on the floor?
Yes. In the version shown, the feet remain planted while the torso rises and lowers. If the feet lift, reduce speed, shorten the range, or practice fewer reps.
Why cross the arms over the chest?
Crossing the arms limits arm swing and helps keep the exercise more controlled. As a result, the torso must do more of the work instead of relying on momentum.
Is this better than putting hands behind the head?
For many people, yes. Hands-behind-head sit-ups can encourage neck pulling. In contrast, the arms-on-chest version helps reduce that risk and keeps the cue simple.
How can I make this exercise harder?
First, slow down the lowering phase. Then, add a longer pause at the top. After your form stays clean, you can hold a light plate or medicine ball against the chest.
Recommended Equipment (Optional)
- Exercise Mat — adds comfort and support during floor-based sit-ups.
- Ab Mat — supports the lower back and helps create a consistent sit-up setup.
- Medicine Ball — useful for advanced weighted sit-up progressions.
- Weight Plate — can be held against the chest once bodyweight reps are controlled.
- Adjustable Sit-Up Bench — provides optional progression for incline or decline core training.
Tip: Start with bodyweight first. Then, add equipment only when every rep stays smooth, controlled, and pain-free.