Stability Ball Wall Squat: Safe Form, Sets, Tips & FAQ
Learn the Stability Ball Wall Squat for quad strength, lower-body control, and beginner-friendly squat form with setup, cues, mistakes, FAQs, and gear.
Stability Ball Wall Squat
This exercise is especially useful for beginners, home workouts, warm-ups, and rehab-style lower-body training because the wall and ball reduce balance demands. The movement is more knee-dominant than a traditional free squat, which means the quadriceps receive strong emphasis while the glutes assist through the bottom and rising phases.
Quick Overview
| Body Part | Legs |
|---|---|
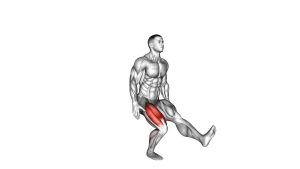
| Primary Muscle | Quadriceps |
| Secondary Muscle | Glutes, hamstrings, calves, adductors, and core stabilizers |
| Equipment | Stability ball / exercise ball and a solid wall |
| Difficulty | Beginner-friendly |
Sets & Reps (By Goal)
- Beginner form practice: 2–3 sets × 8–12 reps with a slow, controlled tempo.
- Muscle endurance: 3–4 sets × 12–20 reps with 45–75 seconds of rest.
- Quad-focused control: 3–4 sets × 10–15 reps with a 2–3 second lowering phase.
- Warm-up activation: 1–2 sets × 10–15 smooth reps before heavier leg training.
- Rehab-style strength: 2–3 sets × 6–10 reps using a comfortable depth and pain-free range.
Progression rule: First improve control, depth, and knee alignment. Then progress by adding reps, slowing the tempo, holding the bottom position briefly, or using light dumbbells only when form stays consistent.
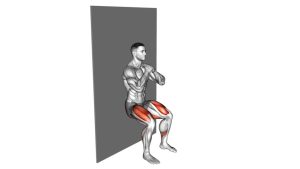
Setup / Starting Position
- Place the ball: Put a stability ball between your lower-to-mid back and a solid wall.
- Set your feet forward: Step your feet slightly in front of your hips so you can squat down without your knees feeling cramped.
- Choose your stance: Stand about shoulder-width apart with toes slightly turned out.
- Brace gently: Keep your ribs stacked, core lightly engaged, and shoulders relaxed.
- Use your arms for balance: Hold your arms forward or across your chest to help maintain control.
- Start tall: Keep your chest lifted and maintain light pressure into the ball without leaning passively into it.
Your feet should not be directly under your hips. A slightly forward foot position allows a smoother descent, better knee tracking, and a more upright torso.
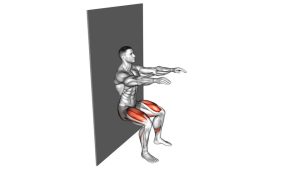
Execution (Step-by-Step)
- Begin from a tall stance: Keep your back lightly supported by the ball and your feet planted firmly.
- Lower with control: Bend your knees and hips together while allowing the ball to roll upward along your back.
- Track your knees: Keep both knees pointing in the same direction as your toes. Do not let them collapse inward.
- Maintain heel contact: Keep your weight balanced through the mid-foot and heel as you descend.
- Reach your working depth: Lower until your thighs are near parallel, or stop earlier if your knees or hips lose control.
- Pause briefly: Hold the bottom position for a short moment without bouncing.
- Drive upward: Push through your feet and extend your knees and hips to return to standing.
- Finish tall: Stand fully upright without locking the knees aggressively or overextending the hips.
Pro Tips & Common Mistakes
- Use the ball as a guide, not a crutch: Stay active through your legs instead of collapsing into the ball.
- Keep the movement vertical: Let your hips travel mostly down and up rather than pushing far backward.
- Do not place your feet too close to the wall: This can crowd the knees and make the movement uncomfortable.
- Avoid bouncing at the bottom: Pause with control and drive up smoothly.
- Do not let the knees cave inward: Keep the thighs aligned with the toes throughout the full rep.
- Keep your chest lifted: The ball supports your back, but your posture should still stay strong.
- Control the descent: A slow lowering phase improves muscle tension and helps teach better squat mechanics.
- Use a pain-free range: Depth is useful only when alignment and comfort remain consistent.
FAQ
What muscles does the Stability Ball Wall Squat work?
The main target is the quadriceps. The glutes, hamstrings, calves, adductors, and core stabilizers also assist during the lowering and rising phases.
Is the Stability Ball Wall Squat good for beginners?
Yes. The ball and wall provide guidance, which makes the movement easier to control than a free-standing squat. It is a useful option for learning squat depth, knee alignment, and lower-body control.
How far should my feet be from the wall?
Your feet should be slightly forward from your hips. At the bottom, your knees should track comfortably over your feet without your heels lifting or your knees feeling jammed.
Should my knees go over my toes?
A small amount of forward knee travel is normal in this exercise. The key is to keep your heels down, control the movement, and keep the knees aligned with the toes.
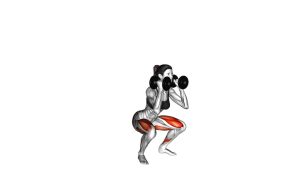
Can I use weights with this exercise?
Yes, but only after you can perform the movement smoothly with bodyweight. You can hold light dumbbells at your sides or a single dumbbell in front of your chest for added resistance.
Why does this feel more like a quad exercise?
Because the wall and ball keep your torso upright and your hips from traveling far backward. This creates a more knee-dominant squat pattern and places more emphasis on the quadriceps.
Recommended Equipment
- Stability Ball / Exercise Ball — the main tool for performing wall-supported squats with smooth rolling support
- Anti-Burst Exercise Ball — a safer, durable option for repeated lower-body training
- Non-Slip Exercise Mat — helps improve foot grip and comfort during home leg workouts
- Light Dumbbell Set — useful for progressing the exercise once bodyweight reps feel easy
- Mini Resistance Bands — useful for encouraging better knee tracking and glute engagement
Tip: Choose a ball size that allows your back to stay supported and your squat path to feel smooth. If the ball is too small or too large, your posture and depth may be harder to control.