Wall Sit: Proper Form, Benefits, Sets, Tips & FAQ
Learn how to do the Wall Sit with proper form to build quad endurance, knee control, and lower-body strength. Includes sets, tips, FAQ, and gear.
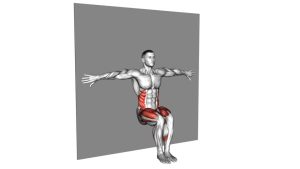
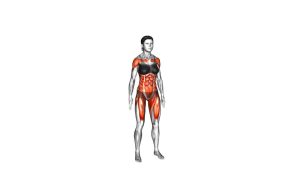
Wall Sit
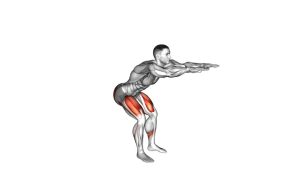
The Wall Sit works best when the body stays still, controlled, and aligned. Your back should remain supported by the wall, your feet should stay planted, and your knees should track in the same direction as your toes. This exercise is often used for beginner leg training, home workouts, athletic conditioning, knee-friendly strength work, and quad endurance finishers.
Quick Overview
| Body Part | Legs |
|---|---|
| Primary Muscle | Quadriceps |
| Secondary Muscle | Glutes, hamstrings, calves, hip stabilizers, and core |
| Equipment | Wall only; optional timer, exercise mat, or weight plate |
| Difficulty | Beginner to intermediate, depending on hold time and load |
Sets & Reps (By Goal)
- Beginner endurance: 2–3 sets × 15–30 seconds, resting 45–90 seconds between holds.
- Quad strength endurance: 3–4 sets × 30–60 seconds, keeping the thighs close to parallel.
- Conditioning finisher: 2–4 rounds × 45–90 seconds after leg training.
- Knee-control practice: 2–3 sets × 20–40 seconds with slow breathing and strict knee tracking.
Progression rule: Add time before adding weight. Once you can hold a clean position for 60 seconds, progress by holding a light dumbbell, kettlebell, or weight plate.
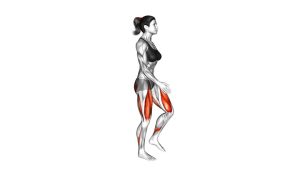
Setup / Starting Position
- Stand against a wall: Place your upper back, mid-back, and lower back comfortably against the wall.
- Step your feet forward: Position your feet about 1.5–2 feet away from the wall, roughly hip-width to shoulder-width apart.
- Set your feet: Keep the heels down, toes slightly turned out if needed, and weight spread evenly through the full foot.
- Brace lightly: Keep the ribs down, core active, and shoulders relaxed.
- Prepare to descend: Look forward and keep the head neutral while sliding down the wall.
Tip: If your knees move too far past your toes or your heels lift, step the feet slightly farther away from the wall.
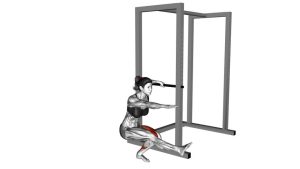
Execution (Step-by-Step)
- Slide down slowly: Bend your knees and hips while keeping your back in contact with the wall.
- Reach the hold position: Lower until your thighs are near parallel to the floor or until you reach a comfortable working depth.
- Check knee alignment: Keep your knees tracking over your toes without letting them collapse inward.
- Hold steady: Keep your torso upright, feet flat, and breathing controlled during the entire hold.
- Finish safely: Push through your feet and slide back up the wall with control instead of dropping or twisting out of position.
Pro Tips & Common Mistakes
- Keep the knees aligned: Do not allow the knees to cave inward as fatigue builds.
- Do not sit too low too soon: A deeper position increases difficulty, but clean alignment matters more than depth.
- Keep the heels down: Press through the full foot instead of shifting onto the toes.
- Avoid arching the lower back: Keep the ribs controlled and the back supported by the wall.
- Use smooth breathing: Do not hold your breath; breathe steadily to maintain control.
- Do not rest on the knees: Keep your hands off your thighs unless using a regression.
- Progress gradually: Increase hold time, then range, then external load.
FAQ
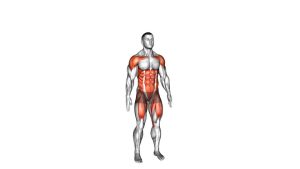
What muscles does the Wall Sit work?
The Wall Sit primarily works the quadriceps. It also supports the glutes, hamstrings, calves, hip stabilizers, and core because the body must hold a strong squat position without movement.
How long should I hold a Wall Sit?
Beginners can start with 15–30 seconds. More advanced trainees can work toward 45–90 seconds or add light resistance once form stays stable.
Should my thighs be parallel to the floor?
Parallel thighs are a common target, but they are not required for every person. Use a depth that allows your knees to stay aligned, your heels to stay down, and your back to remain supported.
Are Wall Sits good for knee stability?
Wall sits can help improve knee control and quadriceps endurance when performed with proper alignment. They should feel challenging in the leg muscles, not painful in the knee joint.
Can I do Wall Sits every day?
Light wall sits can be practiced often, but hard sets should be managed like other strength work. If your quads or knees feel overly sore, reduce the hold time, depth, or weekly volume.
Recommended Equipment (Optional)
- Workout Interval Timer — helps track wall sit hold duration and rest periods accurately
- Exercise Mat — useful for warm-ups, mobility drills, and comfortable lower-body sessions
- Dumbbell Set — can be held at the chest to make wall sits more challenging
- Kettlebell — adds simple front-loaded resistance for advanced wall sit progressions
- Mini Resistance Bands — helpful for improving knee tracking and glute activation during lower-body training
Tip: Equipment is optional. Master a clean bodyweight wall sit first, then add resistance only when your posture and knee alignment remain stable.