Standing Isometric Shoulder External Rotation with Wall: Form, Benefits, Sets & FAQ
Learn how to do the Standing Isometric Shoulder External Rotation with Wall for stronger rotator cuffs and better shoulder stability. Includes form tips, sets and reps by goal, common mistakes, FAQs, and recommended equipment.
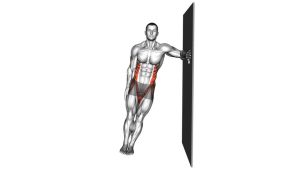
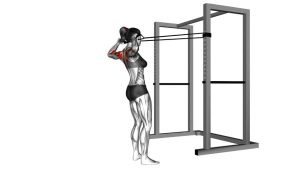
Standing Isometric Shoulder External Rotation with Wall
This exercise targets the shoulder’s external rotators with a controlled, low-risk isometric hold. The goal is to create steady outward pressure while keeping the elbow tucked, the wrist neutral, and the shoulder relaxed. You should feel the back of the shoulder working, not your neck or upper traps taking over.
Quick Overview
| Body Part | Shoulders |
|---|---|
| Primary Muscle | Infraspinatus and teres minor |
| Secondary Muscle | Posterior deltoid, scapular stabilizers |
| Equipment | Wall or sturdy vertical surface |
| Difficulty | Beginner |
Sets & Reps (By Goal)
- Shoulder warm-up: 2–3 sets × 10–20 second holds per side
- Stability and control: 3–4 sets × 15–30 second holds per side
- Rehab-style training: 2–3 sets × 8–12 second holds per side with light-to-moderate effort
- Pre-lifting activation: 1–2 sets × 10–15 second holds per side before pressing or upper-body sessions
Progression rule: First increase hold quality and control, then hold time, then total sets. Do not increase intensity by pushing harder if your shoulder position starts to break down.
Setup / Starting Position
- Stand beside a wall: Position the working side next to the wall with enough space to bend the arm comfortably.
- Bend the elbow to 90 degrees: Keep the elbow tucked close to your torso.
- Set the forearm forward: Bring the forearm across the front of the body so the hand or outer forearm can press into the wall.
- Stand tall: Keep the chest up, ribs stacked, and neck relaxed.
- Brace lightly: Maintain a stable torso without leaning into the wall.
Tip: You can place a small towel between your elbow and torso if you want feedback to keep the upper arm in position.
Execution (Step-by-Step)
- Lock in your posture: Stand tall with the elbow tucked and wrist neutral.
- Press outward into the wall: Try to rotate the arm outward without letting the hand or forearm actually move.
- Hold the contraction: Maintain steady pressure for the target hold time while breathing normally.
- Keep the shoulder down: Avoid shrugging or rolling the shoulder forward as you hold.
- Relax and repeat: Ease off the pressure, reset, and perform the next hold with the same controlled effort.
Pro Tips & Common Mistakes
- Keep the elbow close: Letting the elbow flare changes the angle and reduces clean rotator cuff loading.
- Use moderate pressure: About 50–70% effort is usually enough for quality isometric work.
- Don’t shrug: Keep the upper traps relaxed so the shoulder stays in a stronger position.
- Stay square: Avoid leaning or twisting the torso to create fake force.
- Keep the wrist neutral: Don’t bend the wrist back or twist the hand aggressively into the wall.
- Think “steady hold,” not max push: The goal is clean shoulder tension, not brute force.
FAQ
What muscles does this exercise work?
It mainly targets the infraspinatus and teres minor, which are key rotator cuff muscles responsible for external rotation and shoulder stability.
Should I feel this in the back of my shoulder?
Yes. Most people feel it in the back or back-side of the shoulder. You should not feel most of the work in the neck, upper traps, or wrist.
Is this a good rehab exercise?
Yes, it can be a very useful rehab or prehab drill because it allows you to train the rotator cuff with controlled tension and minimal joint motion.
How hard should I push into the wall?
Use a moderate effort rather than maximal force. The hold should feel strong and controlled, not shaky, painful, or strain-heavy.
Can I do this before upper-body workouts?
Absolutely. It works well before pressing, pulling, or overhead sessions as a shoulder activation and stability drill.
Recommended Equipment (Optional)
- Small Exercise Towel — useful between the elbow and torso to improve positioning feedback
- Resistance Bands Set — a great next step for progressing from isometrics to dynamic external rotation work
- Foam Roller — useful for upper-back mobility work that supports healthier shoulder mechanics
- Massage Ball — helpful for soft-tissue work around the chest, rear shoulder, and upper back
- Light Dumbbells — useful for later-stage rotator cuff and shoulder strengthening exercises
Tip: This drill is effective on its own, but it works even better when combined with smart mobility, light rotator cuff strengthening, and good upper-back training.