Stick Side-to-Front Bend Stretch: Form, Mobility Benefits, Tips & FAQ
Learn the Stick Side-to-Front Bend Stretch for better core mobility, side-body flexibility, posture control, and hamstring-friendly forward bending.
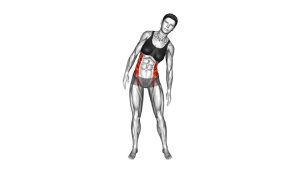
Stick Side-to-Front Bend Stretch
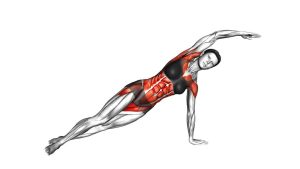
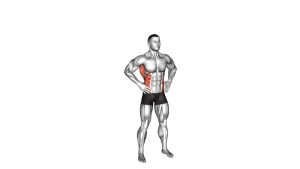
This stretch works best when the movement is slow, clean, and controlled. Rather than forcing a deep range, focus on keeping the arms long, the stick stable, and the torso moving as one unit. As a result, the stretch feels more organized through the ribs, lats, obliques, shoulders, hamstrings, and lower back.
Quick Overview
| Body Part | Core |
|---|---|
| Primary Muscle | Obliques, lats, and spinal erectors |
| Secondary Muscle | Hamstrings, glutes, shoulders, upper back, and intercostals |
| Equipment | Stick, broomstick, PVC pipe, or light mobility bar |
| Difficulty | Beginner-friendly mobility stretch |
Sets & Reps (By Goal)
- General mobility warm-up: 2–3 sets × 5–8 slow reps per side-to-front sequence
- Side-body flexibility: 2–4 sets × 15–30 seconds per side bend
- Hamstring and posterior-chain stretch: 2–3 sets × 15–30 seconds in the forward bend
- Daily posture reset: 1–2 easy sets × 4–6 controlled reps
- Pre-workout preparation: 1–2 sets × 6–10 smooth reps before training
Progression rule: Increase range only after you can keep your feet grounded, arms extended, and spine controlled. In addition, move slower before you move deeper.
Setup / Starting Position
- Stand tall: Place your feet about shoulder-width apart and keep your weight balanced through both feet.
- Hold the stick overhead: Grip the stick with both hands wider than shoulder-width so your arms can stay comfortably straight.
- Set your posture: Keep your chest open, ribs controlled, shoulders relaxed, and head aligned with the spine.
- Brace lightly: Create gentle core tension so the movement comes from controlled torso bending, not collapsing.
- Start neutral: Keep the stick above your head and avoid leaning forward before the first rep begins.
Tip: A wider grip usually makes the overhead position easier, especially if shoulder mobility is limited.
Execution (Step-by-Step)
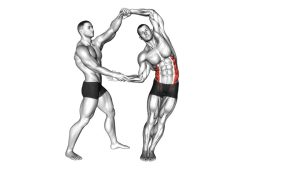
- Begin upright: Stand tall with the stick overhead and both arms extended.
- Bend to one side: Slowly lean your torso sideways while keeping the stick aligned with your arms.
- Reach long: Let the outside of your torso lengthen without twisting your hips or collapsing your chest.
- Pause briefly: Hold the side bend for a short moment while breathing steadily.
- Return to center: Lift your torso back to the upright position with control.
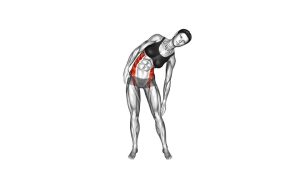
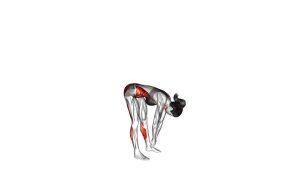
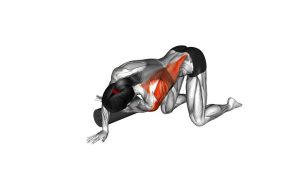
- Hinge forward: From the standing position, bend forward from the hips while keeping the arms extended and the stick moving with the torso.
- Control the bottom: Stop at a comfortable range where your back and hamstrings feel stretched but not strained.
- Stand back up: Drive through your feet, lift the torso smoothly, and return the stick overhead.
Pro Tips & Common Mistakes
- Keep the stick steady: The stick should guide your posture, not pull your shoulders into discomfort.
- Move through the torso: During the side bend, avoid shifting the hips too far to one side.
- Use a hip hinge: During the forward bend, fold from the hips instead of rounding aggressively through the lower back.
- Do not bounce: Bouncing can turn a mobility drill into a strained stretch, especially around the back and hamstrings.
- Keep the arms long: Bent elbows reduce the posture benefit and make the stick less useful as an alignment tool.
- Breathe smoothly: Exhale into the bend, then inhale as you return to center.
- Respect shoulder range: If the overhead position causes pinching, widen your grip or use a lighter stick.
FAQ
What is the Stick Side-to-Front Bend Stretch good for?
It is useful for improving side-body mobility, torso control, shoulder positioning, and forward-bend flexibility. Additionally, it can work well as a warm-up before core, back, leg, or mobility training.
Where should I feel this stretch?
During the side bend, you may feel the stretch through the obliques, lats, ribs, and side waist. During the forward bend, you may feel more length through the hamstrings, glutes, lower back, and posterior chain.
Can beginners do this exercise?
Yes. Beginners can perform it safely when they use a light stick, move slowly, and stay within a comfortable range. However, the movement should never feel forced.
Should my knees stay straight?
Your knees can stay mostly straight, but they do not need to lock. A soft knee position often makes the forward bend smoother and more comfortable.
Can I use a broomstick instead of a mobility bar?
Yes. A broomstick, PVC pipe, wooden dowel, or lightweight mobility bar can all work, as long as the tool is long enough to hold comfortably overhead.
Recommended Equipment
- Mobility Stick — ideal for overhead stretches, posture drills, and controlled mobility work
- Wooden Dowel Exercise Stick — simple, lightweight option for side bends and warm-up drills
- PVC Mobility Bar — comfortable for beginners because it is light and easy to control
- Non-Slip Yoga Mat — helps keep the feet stable during standing flexibility work
- Foam Roller — useful before stretching to relax the back, lats, and hips
Tip: Choose a stick that feels light, straight, and easy to grip. Heavy bars are not necessary for this stretch.