Suspended Squat: Proper Form, Benefits, Sets, Tips & FAQ
Learn the Suspended Squat for beginner-friendly leg strength, squat control, balance, and safer lower-body training using suspension straps.
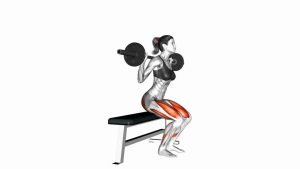
Suspended Squat
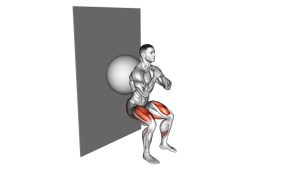
This exercise is ideal for beginners, warm-ups, mobility practice, and anyone learning how to squat with better control. The main goal is not to pull yourself up with the arms. Instead, the straps should act as a guide while your legs do most of the work. A good suspended squat keeps the chest lifted, knees tracking with the toes, heels grounded, and hips moving back and down in a controlled path.
Quick Overview
| Body Part | Legs |
|---|---|
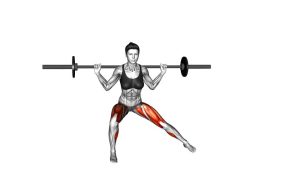
| Primary Muscle | Quadriceps and gluteus maximus |
| Secondary Muscle | Hamstrings, calves, core, upper back, and hip stabilizers |
| Equipment | Suspension trainer / TRX-style straps |
| Difficulty | Beginner-friendly |
Sets & Reps (By Goal)
- Beginner technique practice: 2–3 sets × 8–12 reps with slow controlled movement
- Leg endurance: 3–4 sets × 12–20 reps with light strap assistance
- Warm-up / mobility: 2 sets × 10–15 reps before squats, lunges, or lower-body training
- Rehab-style control: 2–3 sets × 6–10 reps with a comfortable range of motion
Progression rule: First reduce how much you pull on the straps. Then increase depth, reps, or tempo. Progress only when your knees stay controlled and your heels remain grounded.
Setup / Starting Position
- Set the straps: Attach the suspension trainer securely above you and adjust the handles to about waist-to-chest height.
- Face the anchor point: Stand facing the straps and hold one handle in each hand.
- Set your feet: Place your feet about shoulder-width apart with toes slightly turned out if comfortable.
- Create light tension: Lean back slightly until the straps are gently tight, but do not hang from them.
- Brace your posture: Keep your chest lifted, ribs controlled, shoulders relaxed, and spine neutral.
Tip: Start with a small range of motion if your ankles, hips, or knees feel stiff. Depth should improve through control, not by forcing the bottom position.
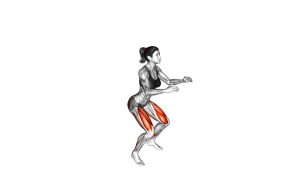
Execution (Step-by-Step)
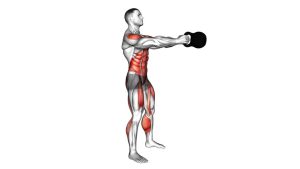
- Begin tall: Stand upright while holding the handles with light strap tension.
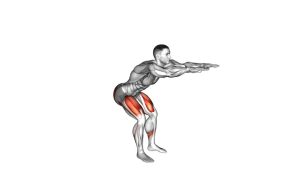
- Sit the hips back: Push your hips slightly backward as your knees begin to bend.
- Lower under control: Descend into a squat while keeping your chest lifted and heels on the floor.
- Track the knees: Let your knees follow the same direction as your toes without collapsing inward.
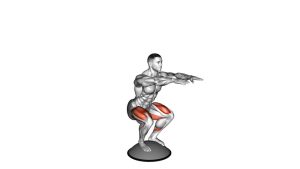
- Reach a comfortable depth: Stop around parallel or slightly below if you can keep clean form.
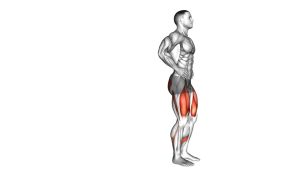
- Drive upward: Push through your mid-foot and heels to stand back up.
- Finish tall: Extend the hips and knees fully without leaning back aggressively or pulling hard with the arms.
Pro Tips & Common Mistakes
- Use the straps lightly: Avoid turning the movement into an arm pull or assisted row.
- Keep heels grounded: If your heels lift, reduce depth or adjust your foot position.
- Control the descent: Do not drop quickly into the bottom position.
- Keep knees aligned: Avoid letting the knees cave inward during the lowering or standing phase.
- Maintain a tall chest: The straps should help you stay upright without over-arching your back.
- Do not bounce: Pause briefly at the bottom if needed, then stand with control.
- Progress gradually: Reduce strap assistance before adding speed or higher volume.
FAQ
What muscles does the Suspended Squat work?
The Suspended Squat mainly works the quadriceps and glutes. It also uses the hamstrings, calves, core, and upper back for balance and posture control.
Is the Suspended Squat good for beginners?
Yes. It is one of the best beginner squat variations because the straps provide balance support. This makes it easier to learn depth, knee tracking, and upright posture.
Should I pull with my arms during the exercise?
Only lightly. The arms should guide and stabilize the movement. If you pull hard with your arms, the legs do less work and the exercise becomes less effective for lower-body strength.
How deep should I squat?
Squat as deep as you can while keeping your heels down, knees controlled, and spine neutral. Parallel or slightly below parallel is a good target, but clean form is more important than depth.
Can this exercise help improve regular squats?
Yes. The Suspended Squat helps improve squat patterning, balance, confidence, and range of motion. It can be used before bodyweight squats, goblet squats, or barbell squats.
Recommended Equipment
- Suspension Trainer Straps — essential equipment for performing suspended squats safely and effectively
- TRX-Style Suspension Trainer — durable strap system for full-body suspension training
- Door Anchor for Suspension Trainer — useful for home workouts when a ceiling or wall anchor is not available
- Non-Slip Exercise Mat — improves foot grip and comfort during lower-body training
- Resistance Bands — useful for warm-ups, glute activation, and squat preparation
Tip: Always check that your suspension trainer and anchor point are secure before starting. A stable setup is essential for safe suspended squat training.