Jump Squat: Proper Form, Benefits, Sets, Tips & FAQ
Learn how to perform the Jump Squat with safe landing mechanics, explosive power cues, sets by goal, common mistakes, FAQs, and equipment tips.
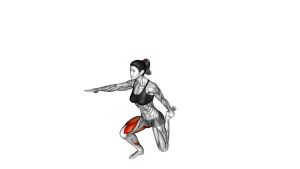
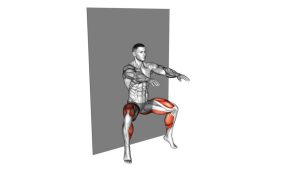
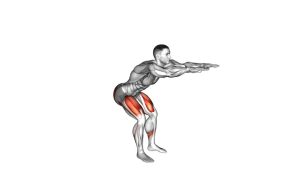
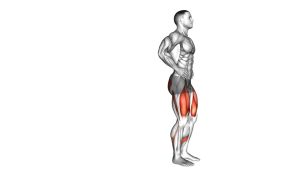
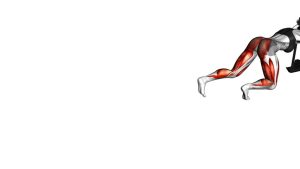
Jump Squat
This exercise is best used when you want to improve athletic power, lower-body explosiveness, and reactive strength. Unlike a normal bodyweight squat, the Jump Squat requires fast force production and controlled impact absorption. Each repetition should feel springy, balanced, and athletic. Focus on a clean squat pattern, full-body tension, and a soft landing before increasing speed or volume.
Quick Overview
| Body Part | Legs |
|---|---|
| Primary Muscle | Quadriceps |
| Secondary Muscle | Glutes, hamstrings, calves, core stabilizers |
| Equipment | Bodyweight only |
| Difficulty | Intermediate because it requires landing control, coordination, and joint stability |
Sets & Reps (By Goal)
- Explosive power: 3–5 sets × 3–6 reps, full rest between sets
- Athletic conditioning: 3–4 sets × 8–12 reps, 45–90 sec rest
- Beginner plyometric practice: 2–3 sets × 4–6 reps, slow reset after every rep
- Fat-loss circuit training: 2–4 rounds × 10–15 reps, only if landing form stays clean
Progression rule: Improve landing quality before adding reps. When every landing is quiet, stable, and balanced, progress by adding small volume or increasing jump intent.
Setup / Starting Position
- Stand tall: Place your feet about shoulder-width apart with the toes slightly turned out.
- Brace lightly: Keep the ribs stacked over the hips and tighten the core without holding your breath.
- Set the arms: Keep the arms in front or allow a natural arm swing to help balance and rhythm.
- Prepare the knees: Keep the knees soft and ready to bend. Do not start from a locked position.
- Focus forward: Keep the chest proud, eyes forward, and spine neutral before starting the descent.
Tip: A good starting position should feel athletic, not stiff. Think of preparing to jump straight upward, not forward or backward.
Execution (Step-by-Step)
- Lower into a squat: Push the hips back and bend the knees while keeping the chest controlled and the feet planted.
- Reach a strong depth: Descend to a comfortable squat depth, usually around parallel, without letting the knees collapse inward.
- Explode upward: Drive through the mid-foot, extend the hips and knees, and push through the toes to leave the ground.
- Stay tall in the air: Keep the core engaged and avoid folding forward during the flight phase.
- Land softly: Contact the floor with the balls of the feet/mid-foot first, then absorb the landing by bending the ankles, knees, and hips.
- Reset or repeat: For power work, reset after each rep. For conditioning, flow into the next rep only if your landing stays controlled.
Pro Tips & Common Mistakes
- Land like a spring: Absorb the floor instead of landing stiff-legged.
- Keep the knees tracking: Knees should follow the same direction as the toes during both the squat and landing.
- Do not rush bad reps: Fast reps with poor landing mechanics increase stress and reduce training quality.
- Use the arms naturally: A controlled arm swing can improve power and rhythm.
- Avoid excessive depth: Drop only as low as you can while staying explosive and stable.
- Do not chase fatigue: Jump Squats are most valuable when each rep is crisp, powerful, and controlled.
- Keep the chest lifted: Avoid folding forward or turning the movement into a low back-dominant jump.
FAQ
What muscles do Jump Squats work?
Jump Squats mainly target the quadriceps, while also training the glutes, hamstrings, calves, and core stabilizers. The exercise is especially useful for lower-body power and athletic explosiveness.
Are Jump Squats good for beginners?
Beginners can use Jump Squats only if they already have a solid bodyweight squat and pain-free landing mechanics. A safer starting point is a controlled bodyweight squat, then a small squat jump, then a full Jump Squat.
How many Jump Squats should I do?
For power, keep reps low, usually 3–6 reps per set. For conditioning, use 8–12 reps only when every landing stays soft and stable. Quality is more important than high volume.
Should I do Jump Squats fast?
The jump should be explosive, but the landing should be controlled. Do not rush the next repetition if your balance, knee position, or landing sound becomes poor.
Why do my knees hurt during Jump Squats?
Knee discomfort may come from hard landings, knees collapsing inward, poor squat mechanics, too much volume, or insufficient ankle and hip control. Reduce reps, land softer, and practice basic squat mechanics first.
Recommended Equipment (Optional)
- Exercise Mat — useful for home workouts and reducing floor impact noise
- Cross-Training Shoes — provides stable support for jumping, landing, and lateral movement
- Resistance Bands Set — helpful for warm-ups, glute activation, and knee-tracking drills
- Plyometric Box — useful for progression work such as box jumps and controlled landing drills
- Ankle Support Brace — optional support for athletes who need extra ankle stability during training
Tip: Equipment should support better movement, not hide poor mechanics. Prioritize soft landings, stable knees, and controlled jump height before increasing intensity.