Wrist Flexor Stretch: Proper Form, Benefits, Sets, Tips & FAQ
Learn how to do the Wrist Flexor Stretch with proper form to improve forearm flexibility, reduce tightness, and support wrist mobility. Includes setup, execution steps, sets by goal, common mistakes, FAQ, and recommended equipment.
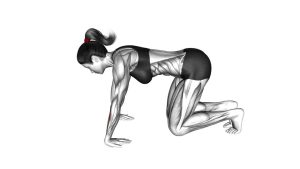
Wrist Flexor Stretch
This stretch works best when performed with gentle tension and steady breathing. You should feel a lengthening sensation through the palm side of the wrist and forearm, especially if those tissues are tight from training, computer work, racket sports, climbing, or frequent gripping. The movement should stay controlled from start to finish, with no bouncing or twisting.
Quick Overview
| Body Part | Forearms |
|---|---|
| Primary Muscle | Forearm flexors |
| Secondary Muscle | Finger flexors, wrist stabilizers, palm-side connective tissue |
| Equipment | None |
| Difficulty | Beginner |
Sets & Reps (By Goal)
- Daily mobility: 2–3 sets × 20–30 second holds per side
- Post-workout recovery: 2–4 sets × 20–40 second holds per side
- Desk-work / typing relief: 1–3 sets × 15–25 second holds throughout the day
- Warm-up preparation: 1–2 light holds × 10–15 seconds per side
- Tight forearms from gripping sports: 2–3 sets × 30–45 second holds per side
Progression rule: Increase the hold time gradually before increasing stretch intensity. Better results come from consistency and clean positioning, not from pulling harder.
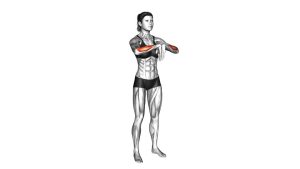
Setup / Starting Position
- Stand or sit tall: Keep your chest up, shoulders relaxed, and spine neutral.
- Extend one arm forward: Raise the arm to about shoulder height with the elbow straight.
- Turn the palm down: The working hand should face the floor.
- Use the opposite hand: Reach across and lightly grasp the fingers of the extended hand.
- Prepare for control: Keep the shoulder down and avoid rotating the body to create fake range.
Tip: Keep the stretching arm straight but not aggressively locked. The goal is to isolate the forearm, not create tension in the shoulder.
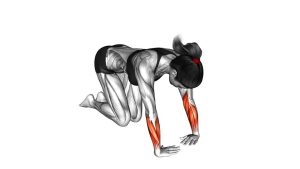
Execution (Step-by-Step)
- Start in position: Extend one arm in front with the palm facing down and fingers pointing forward.
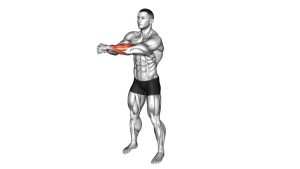
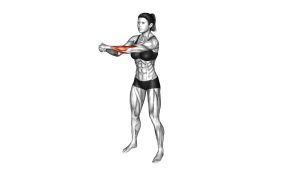
- Pull the fingers back: Use the opposite hand to gently draw the fingers downward and back.
- Create wrist extension: Let the wrist bend back until you feel a stretch along the palm side of the forearm.
- Hold steadily: Maintain the stretch for the desired time while breathing normally and keeping the shoulder relaxed.
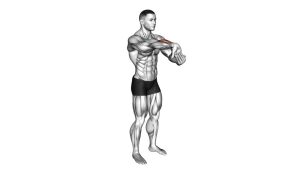
- Release slowly: Ease out of the stretch with control and repeat on the other side.
Pro Tips & Common Mistakes
- Keep the elbow straight: A bent arm often reduces the stretch effect on the forearm flexors.
- Don’t yank the fingers: Use gradual pressure instead of forcing range.
- Relax the shoulder: Avoid shrugging or tensing the upper trap.
- Don’t twist the torso: Keep the body square and let the forearm do the work.
- No bouncing: Static stretching should be smooth and controlled.
- Use moderate intensity: Aim for a strong but tolerable stretch, not pain.
- Pair it intelligently: This stretch works well after grip training, pull workouts, racket sports, climbing, and long typing sessions.
FAQ
Where should I feel the Wrist Flexor Stretch?
You should mainly feel it along the palm side of the forearm, sometimes extending toward the wrist and lower hand. It should feel like muscular tension and tissue lengthening, not sharp pain.
Should my elbow stay straight?
Yes. Keeping the elbow straight usually improves the stretch on the forearm flexors. A small natural softness is fine, but avoid turning it into a bent-arm position.
Is this stretch good for people who type a lot?
Yes. It can be useful for people who spend long hours typing, gripping a mouse, or using handheld devices, especially when combined with regular breaks and overall wrist mobility work.
How hard should I pull?
Gently. The best results usually come from a controlled 5–7/10 stretch intensity. Pulling too hard can irritate the wrist or finger structures.
When should I do this stretch?
It works well after upper-body workouts, grip-heavy sessions, desk work, or anytime the forearms feel stiff. For warm-ups, use shorter and lighter holds.
Who should be cautious with this exercise?
Anyone with an acute wrist injury, recent tendon irritation, nerve symptoms, or significant hand pain should avoid aggressive stretching and seek professional guidance if symptoms are persistent.
Recommended Equipment (Optional)
- Trideer Stretching Strap — useful for assisted mobility work and gentle stretching progressions
- WHATAFIT Resistance Bands Set with Handles — helpful for pairing forearm stretches with light strengthening and upper-body mobility drills
- 5BILLION Peanut Massage Ball — useful for self-myofascial release on tight forearm tissues before or after stretching
- Gaiam Yoga Mat — comfortable surface for mobility sessions, stretching flows, and floor-based recovery work
- Copper Compression Arm Sleeve — optional support for people who want light forearm compression during recovery periods
Tip: Equipment should support recovery and consistency—not replace proper stretching technique, load management, and regular movement breaks.