Assisted Lying Leg Raise With Lateral Throw-Down: Core Form, Sets, Tips & FAQ
Learn how to do the Assisted Lying Leg Raise With Lateral Throw-Down to build lower abs, obliques, hip control, and eccentric core strength with safe step-by-step form.
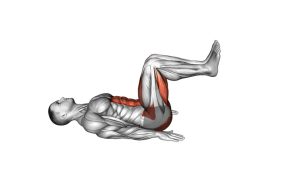
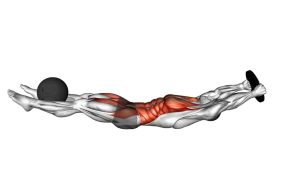
Assisted Lying Leg Raise With Lateral Throw-Down
This exercise is best used when the athlete already has good control with regular lying leg raises, reverse crunches, and basic windshield wiper variations. The partner throw-down adds a reactive element, making the abs work harder during the eccentric phase. Because the legs are moved laterally, the exercise also challenges anti-rotation strength, hip control, and waist stability.
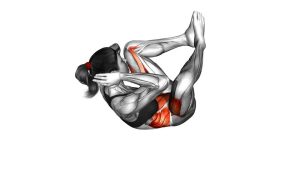
During each rep, the athlete lies on the back, raises both legs toward the partner, and then resists the partner’s controlled throw toward the left or right side. The legs should stop just above the floor, then return to the center with control. A good rep looks powerful but disciplined: the torso stays braced, the lower back stays protected, and the legs move smoothly instead of swinging wildly.
Quick Overview
Sets & Reps (By Goal)
- Core control and technique: 2–3 sets × 5–8 reps per side with a slow, controlled catch.
- Lower-ab strength: 3–4 sets × 8–12 total reps with a strong leg raise and controlled descent.
- Oblique and anti-rotation training: 3 sets × 6–10 reps per side, alternating left and right throw-downs.
- Athletic core conditioning: 3–5 sets × 10–16 total reps with short rest and strict control.
- Advanced eccentric strength: 3–4 sets × 4–6 reps per side using a slower partner throw and longer braking phase.
Progression rule: First improve control, then increase reps. Do not ask your partner to throw harder until you can stop the legs smoothly without arching your lower back or twisting out of position.
Setup / Starting Position
- Lie flat on your back: Use a mat or padded floor. Keep your body long, with legs extended and feet together.
- Anchor your upper body: Hold your partner’s ankles, a stable post, or place your hands on the floor if no anchor is needed.
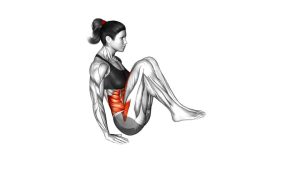
- Set your ribs and pelvis: Brace your abs gently and keep the lower back close to the floor. Avoid starting with an excessive arch.
- Position your partner: The partner stands near your head or upper body, ready to guide or push your legs down to one side.
- Prepare the legs: Keep knees mostly straight, thighs together, toes pointed or neutral, and hips square before the first raise.
- Agree on intensity: The partner should use controlled pressure, not a violent shove. The throw-down should challenge the core without overwhelming control.
Execution (Step-by-Step)
- Brace before moving: Take a small breath in, tighten your abs, and lightly press your lower back toward the floor.
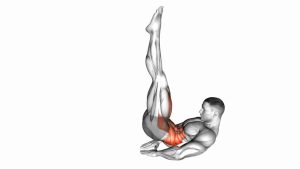
- Raise both legs upward: Lift your legs together toward your partner using controlled hip flexion. Keep the knees mostly straight and avoid swinging.
- Reach the top position: Bring your legs close to vertical. Your hips may lift slightly, but do not roll aggressively onto your upper back.
- Receive the lateral throw-down: Your partner redirects your legs toward one side. Stay braced and prepare to resist the drop.
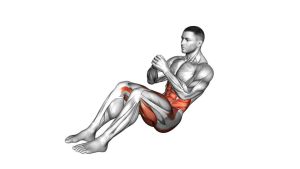
- Brake the motion: Use your lower abs and obliques to slow the legs before they reach the floor. Do not allow the heels to slam down.
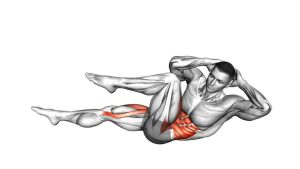
- Hover near the bottom: Stop the legs just above the floor on the side. Keep the torso controlled and avoid twisting through the lower back.
- Return to center: Bring your legs back toward the middle with control, then raise them again for the next throw-down.
- Alternate sides: Repeat the same pattern to the opposite side, keeping each rep clean and balanced.
Pro Tips & Common Mistakes
Pro Tips
- Think “catch the legs,” not “drop the legs”: The value of the exercise comes from resisting and decelerating the throw.
- Keep the ribs down: A flared rib cage usually means the abs are losing control and the lower back is taking over.
- Use the partner as resistance, not punishment: The throw should be challenging, but it should never be reckless.
- Control the bottom range: The closer the legs get to the floor, the harder the abs must work. Stop before form breaks.
- Bend the knees to regress: A small knee bend shortens the lever and makes the exercise safer for learning.
- Alternate sides evenly: Train both left and right oblique control equally to avoid one-sided dominance.
Common Mistakes
- Letting the legs slam down: This removes control and can stress the lower back or hips.
- Arching the lower back: If the low back lifts excessively, reduce range or intensity immediately.
- Using too much partner force: The partner should not overpower the athlete’s ability to control the movement.
- Turning it into momentum reps: Fast, sloppy reps reduce muscle tension and increase injury risk.
- Twisting through the spine: Some hip rotation is natural, but the torso should not collapse or whip side to side.
- Holding the breath too long: Brace strongly, but breathe between reps to avoid unnecessary tension.
FAQ
Is the Assisted Lying Leg Raise With Lateral Throw-Down good for lower abs?
Yes. The lower abs work hard to lift the legs and control the pelvis. However, the exercise becomes even more effective because the throw-down forces the abs to resist the legs during the lowering phase.
What makes the lateral throw-down different from a regular leg raise?
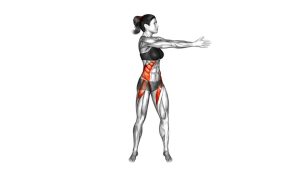
A regular leg raise mainly challenges hip flexion and lower-ab control in a straight line. The lateral throw-down adds side-to-side resistance, which increases oblique activation and anti-rotation demand.
Should my legs touch the floor?
Ideally, no. Stop the legs just above the floor while keeping your abs tight. Touching lightly is acceptable for beginners, but slamming the legs down means the rep is too hard or the partner is using too much force.
Can beginners do this exercise?
Most beginners should first master lying knee raises, reverse crunches, regular lying leg raises, and slow leg-lowering drills. This variation is better for intermediate and advanced trainees.
What should I do if I feel it in my lower back?
Reduce the range of motion, bend your knees, slow the movement, or ask your partner to use less force. If the lower back still dominates, switch to easier core drills until you build better pelvic control.
How should the partner throw the legs?
The partner should guide or push the legs down at a controlled angle toward one side. They should not jerk, slap, or force the legs aggressively. The goal is to challenge the athlete’s control, not overpower them.
Can I do this without a partner?
Yes, but it becomes a different exercise. You can perform lying leg raises, slow leg lowers, or windshield wipers without assistance. The partner version adds unpredictable resistance and stronger eccentric demand.
Recommended Equipment
- Thick Exercise Mat — provides cushioning for the spine, hips, and shoulders during lying core exercises.
- Ab Mat — useful for core training support and controlled abdominal positioning.
- Adjustable Ankle Weights — an advanced progression tool once bodyweight control is excellent.
- Resistance Bands With Door Anchor — helpful for anti-rotation core work, Pallof presses, and controlled trunk stability drills.
- Core Sliders — useful for additional ab, oblique, and hip-control progressions.
Tip: Equipment should support better control, not make the exercise reckless. Master the bodyweight partner version before adding ankle weights or harder progressions.