Floor Crunch: Proper Form, Abs Benefits, Sets, Tips & FAQ
Learn how to do the Floor Crunch with safe form, controlled abs activation, sets by goal, common mistakes, FAQs, and recommended equipment for better core training.
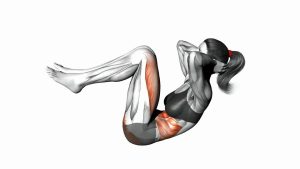
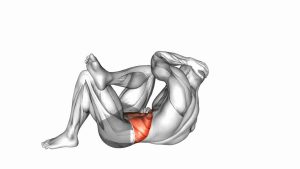
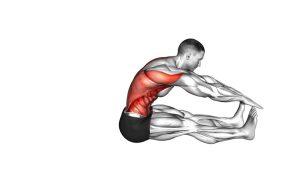
Floor Crunch
This exercise is useful for beginners, home workouts, warm-ups, and focused ab training. Since it requires no equipment, it can fit easily into almost any routine. However, the Floor Crunch should not be rushed. A strong repetition starts with a gentle brace, continues with a smooth upper-body curl, and finishes with a controlled return to the floor.
For best results, keep the feet planted, avoid pulling on the neck, and let the abdominal muscles create the movement. The hips should stay still throughout the set. Meanwhile, the lower back should remain stable against the floor so the exercise stays focused on the waist and front core.
Quick Overview
| Body Part | Abs |
|---|---|
| Primary Muscle | Rectus abdominis |
| Secondary Muscle | Obliques, transverse abdominis, deep core stabilizers |
| Equipment | None required; optional exercise mat |
| Difficulty | Beginner |
Sets & Reps (By Goal)
- Beginner core activation: 2–3 sets of 8–12 reps with slow control.
- Muscle endurance: 3–4 sets of 12–20 reps with steady breathing.
- Abs-focused training: 3–5 sets of 10–15 reps with a 1–2 second squeeze at the top.
- Warm-up or core primer: 1–2 sets of 8–10 reps before larger compound exercises.
- Home workout finisher: 2–4 rounds of 15–25 controlled reps, resting 30–45 seconds between rounds.
Progression rule: Improve control before adding volume. Once every rep feels smooth, increase the hold at the top, slow the lowering phase, or add another set.
Setup / Starting Position
- Lie on your back: Start on the floor with your knees bent and feet flat. Place the feet about hip-width apart for balance.
- Set your lower body: Keep both feet planted and avoid letting the knees collapse inward or drift outward during the movement.
- Position your hands: Place your hands lightly beside your head, across your chest, or near your thighs. Do not pull the head forward.
- Prepare your neck: Keep a small space between the chin and chest. Imagine holding a small object under the chin without crushing it.
- Brace gently: Tighten the abs before lifting. This creates stability and helps prevent jerky movement.
Setup matters because the Floor Crunch is a short-range exercise. A poor starting position can shift the work into the neck or hips before the abs have a chance to engage properly.
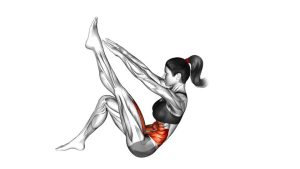
Execution (Step-by-Step)
- Start from a stable position: Keep your feet flat, knees bent, and lower back steady against the floor.
- Exhale and curl upward: Contract your abs to lift your head, upper back, and shoulder blades slightly off the floor.
- Keep the movement compact: Stop once the shoulder blades are lifted. Do not turn the exercise into a full sit-up.
- Squeeze the abs briefly: Pause for 1 second at the top while keeping your neck relaxed.
- Lower with control: Inhale as you slowly return the shoulders and head to the floor.
- Reset without relaxing completely: Maintain light core tension before starting the next rep.
Pro Tips & Common Mistakes
Pro Tips
- Lead with the ribs: Think about bringing the ribs toward the pelvis instead of lifting the head first.
- Use a slow tempo: Lift for 1–2 seconds, pause briefly, then lower for 2–3 seconds.
- Exhale during the curl: Breathing out helps the abs contract more effectively.
- Keep the lower back stable: A grounded lower back keeps the focus on the rectus abdominis.
- Stop before the hips take over: A crunch is not a sit-up. Keep the range short and precise.
Common Mistakes
- Pulling the neck: This reduces ab engagement and can create neck discomfort.
- Using momentum: Fast reps often remove tension from the target muscles.
- Lifting too high: Turning the crunch into a sit-up shifts more work to the hip flexors.
- Holding the breath: Poor breathing makes the movement feel harder and less controlled.
- Relaxing at the bottom: Dropping fully between reps can reduce tension and rhythm.
FAQ
What muscles does the Floor Crunch work?
The Floor Crunch mainly works the rectus abdominis, which is the front abdominal muscle. It also involves the obliques and deep core muscles as stabilizers.
Is the Floor Crunch good for beginners?
Yes. This exercise is beginner-friendly because it uses bodyweight resistance and a small range of motion. Beginners should focus on slow reps, relaxed neck positioning, and steady breathing.
Should my lower back leave the floor?
No. During a standard Floor Crunch, the lower back should stay grounded. Only the head, upper back, and shoulder blades lift slightly.
Why do I feel crunches in my neck?
Neck tension usually happens when you pull with your hands, tuck the chin too hard, or lift the head before the abs engage. Keep the hands light and let the ribs curl toward the pelvis.
How many Floor Crunches should I do?
Most people can start with 2–3 sets of 8–15 controlled reps. Quality is more important than chasing very high numbers.
Can Floor Crunches reduce belly fat?
Floor Crunches strengthen the abdominal muscles, but they do not directly burn belly fat from one specific area. Combine them with full-body training, nutrition control, and consistent activity for fat-loss results.
Recommended Equipment
- Exercise Mat — adds comfort and support for floor-based ab exercises.
- Thick Yoga Mat — useful if your floor is hard or uncomfortable on the spine.
- Ab Crunch Mat — helps support the lower back during controlled crunch variations.
- Core Sliders — useful for progressing into more advanced core and waist exercises.
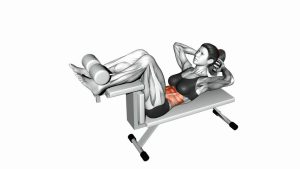
- Adjustable Sit-Up Bench — optional tool for progressing into incline or decline ab training.
Tip: Start with a comfortable mat first. Better support can make the exercise smoother, especially when you perform multiple sets on a hard floor.