Band Standing Twisting Crunch: Form, Benefits, Sets, Tips & FAQ
Learn the Band Standing Twisting Crunch to train abs and obliques with resistance. Includes setup, step-by-step form, tips, mistakes, FAQ, and gear.
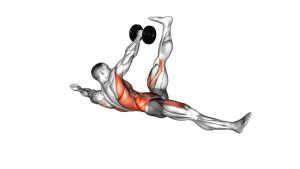
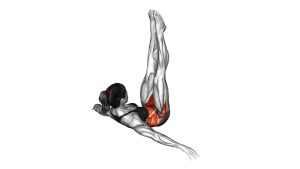
Band Standing Twisting Crunch
This exercise is useful when you want a core movement that feels more dynamic than a regular crunch but does not require lying on the floor. Because the band pulls from above, your abs must work hard to flex the spine against resistance. At the same time, the twisting path increases oblique involvement and teaches you how to control rotation without using momentum. It works especially well for home workouts, band-only core sessions, athletic warm-ups, and accessory abdominal training.
The movement should look smooth and compact. Start tall, brace your midsection, then crunch down and slightly across the body. Keep the hips stable while your ribs rotate toward the opposite side of the pelvis. Return slowly to the upright position, allowing the abs to control the band instead of letting the band pull you back.
Quick Overview
| Body Part | Core |
|---|---|
| Primary Muscle | Rectus abdominis |
| Secondary Muscle | Internal obliques, external obliques, transverse abdominis, hip stabilizers |
| Equipment | Resistance band and high anchor point |
| Difficulty | Beginner to Intermediate |
Sets & Reps (By Goal)
- Core activation: 2–3 sets × 10–12 reps per side using light band tension.
- Muscle control and technique: 3 sets × 10–15 reps per side with a slow return phase.
- Oblique endurance: 3–4 sets × 15–20 reps per side with smooth, continuous reps.
- Strength-focused core work: 3–4 sets × 8–12 reps per side using moderate resistance.
- Workout finisher: 2–3 rounds × 20–30 seconds per side with strict form.
Progression rule: First improve control, range, and breathing. Then increase band tension gradually. Do not choose a band so heavy that your arms pull, your hips rotate, or your lower back twists instead of your abs.
Setup / Starting Position
- Anchor the band high: Secure the resistance band above head height to a stable anchor, rack, door anchor, or pull-up bar attachment.
- Face slightly away from the anchor: Stand where the band pulls from above and behind you. There should be light tension before the first rep begins.
- Grip the band securely: Hold the band handles or band ends close to your upper chest, shoulders, or sides of the neck. Keep the hands fixed instead of pulling them down.
- Set your feet: Stand about shoulder-width apart with soft knees. Keep your weight balanced through the midfoot and heel.
- Brace before moving: Bring the ribs down slightly, tighten the abs, and keep the pelvis steady. Your torso should start tall and controlled.
Tip: If the anchor is too low, the exercise may feel like a row or pull-down. A high anchor gives the best line of resistance for a standing twisting crunch.
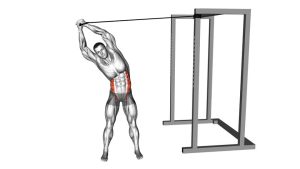
Execution (Step-by-Step)
- Start tall and braced: Keep the chest lifted, shoulders relaxed, and hands close to the upper chest or neck.
- Begin the crunch from the ribs: Pull the ribs downward toward the pelvis. Do not start by bending the hips or pulling the band with your arms.
- Add the twist: As you crunch, rotate slightly so one side of your ribcage moves toward the opposite hip.
- Reach peak contraction: Pause briefly when the abs and obliques are fully squeezed. The torso should be bent forward and slightly across the body.
- Control the return: Slowly rise back to the starting position. Let the spine extend with control instead of snapping upright.
- Repeat on the same side: Complete all reps on one side, then switch direction and repeat with the same technique.
Pro Tips & Common Mistakes
Pro Tips
- Think ribs to opposite hip: This cue helps you combine spinal flexion with controlled oblique rotation.
- Keep the hips quiet: Your pelvis should stay stable while the upper torso crunches and rotates.
- Exhale during the crunch: Breathing out helps the abs contract harder and keeps the ribs from flaring.
- Use a short pause: A one-second squeeze at the bottom improves core tension and reduces momentum.
- Return slowly: The eccentric phase builds control. Do not let the band pull you upright.
Common Mistakes
- Pulling with the arms: If the elbows drive the movement, the exercise becomes less about the abs.
- Turning it into a hip hinge: Folding at the hips reduces abdominal work. Curl the ribs down instead.
- Over-rotating the lower back: Twist through the trunk with control. Avoid forcing the lumbar spine.
- Using too much band tension: Heavy resistance can make the movement sloppy and shoulder-dominant.
- Rushing the return: A fast reset removes tension from the abs and increases the risk of losing posture.
FAQ
What muscles does the Band Standing Twisting Crunch work?
It mainly works the rectus abdominis, which flexes the trunk. It also trains the internal and external obliques because the torso rotates during the crunch. The transverse abdominis and hip stabilizers help keep the body steady.
Is the Band Standing Twisting Crunch good for obliques?
Yes. The twisting path makes it a strong oblique-focused variation. To target the obliques better, keep the hips stable and move the ribs toward the opposite hip instead of swinging the whole body.
Should I use a heavy resistance band?
Start with a light or moderate band. The exercise should feel controlled through the abs. If the band pulls you out of position or makes you use your arms, the resistance is too heavy.
Can beginners do this exercise?
Yes, beginners can use it when the resistance is light and the range of motion is controlled. A regular band standing crunch may be easier at first. Add the twist once you can keep the ribs, pelvis, and shoulders under control.
How is this different from a regular standing band crunch?
A regular standing band crunch moves mostly straight forward and down. The twisting version adds rotation, which increases oblique involvement and makes the exercise more useful for side-waist control.
Why do I feel it in my shoulders or arms?
This usually means you are pulling the band instead of crunching with the abs. Keep your hands fixed near the upper chest or neck. Then focus on curling the ribs down and across.
Can I use this exercise for home workouts?
Yes. You only need a resistance band and a secure high anchor point. A door anchor, pull-up bar, squat rack, or stable overhead attachment can work if it is safe and firmly secured.
Recommended Equipment
- Resistance Bands with Handles — ideal for standing band crunches, twisting crunches, rows, and full-body band training.
- Door Anchor for Resistance Bands — useful for creating a safe high anchor point at home.
- Heavy-Duty Resistance Band Set — gives multiple tension options for progressing core and strength exercises.
- Band Attachment Straps — helps secure bands to racks, bars, or anchor points for better setup control.
- Non-Slip Exercise Mat — improves foot grip and stability during standing core exercises.
Tip: Choose equipment that allows a secure high anchor and smooth band tension. The better the setup, the easier it is to keep the movement controlled and core-focused.