Hanging Oblique Knee Raise: Form, Core Benefits, Sets & Tips
Learn the Hanging Oblique Knee Raise for stronger obliques, abs, and core control. Includes setup, steps, sets, mistakes, FAQs, and gear.
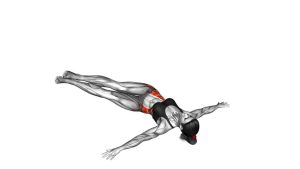
Hanging Oblique Knee Raise
This exercise works best when every repetition starts from a stable hang. First, the shoulders should stay active, the ribs should stay controlled, and the legs should remain quiet before the lift begins. Then, as the knees rise, the hips rotate slightly so the knees travel toward one side of the body. Because the lower body is suspended, even small mistakes can create swinging. Therefore, the goal is not to lift as fast as possible. Instead, aim to raise, twist, pause, and lower with clean control.
The Hanging Oblique Knee Raise is especially useful for athletes and lifters who want stronger side abs, better trunk control, and improved hanging strength. However, it requires enough grip endurance and shoulder stability to hang safely from a bar. If your grip fails early or your body swings too much, start with captain’s chair oblique knee raises, lying oblique knee raises, or bent-knee hanging raises before progressing.
Quick Overview
| Body Part | Core |
|---|---|
| Primary Muscle | Obliques |
| Secondary Muscle | Rectus abdominis, hip flexors, transverse abdominis, forearms, lats, and shoulder stabilizers |
| Equipment | Pull-up bar or hanging station |
| Difficulty | Intermediate |
Sets & Reps (By Goal)
- Core control: 2–3 sets × 6–8 reps per side with a slow, strict tempo.
- Oblique strength: 3–4 sets × 8–12 reps per side with a brief pause at the top.
- Muscle endurance: 2–4 sets × 12–15 total reps while keeping the swing minimal.
- Advanced conditioning: 3–5 sets × 10–20 alternating reps with controlled breathing.
- Beginner progression: 2–3 sets × 5–8 bent-knee reps per side using a smaller range of motion.
Progression rule: Add control before adding reps. Once you can pause at the top without swinging, increase the number of reps, then increase the height of the knee drive. Finally, progress to straighter-leg variations only when your shoulders and grip remain stable.
Setup / Starting Position
- Grip the bar securely: Use an overhand grip around shoulder width. Wrap the thumbs around the bar for better security.
- Create an active hang: Pull the shoulders slightly down away from the ears. This protects the shoulders and improves control.
- Set your ribs and pelvis: Brace the abs gently and avoid letting the lower back arch excessively.
- Keep the legs together: Start with the knees straight or softly bent, depending on your control level.
- Stop the swing first: Before each rep, let the body become still. A quiet start makes the whole movement cleaner.
- Choose your direction: Decide whether you will lift both knees toward the right side, the left side, or alternate sides.
A strong setup makes the exercise much easier to control. Therefore, do not rush the first repetition. Take a breath, brace your core, and begin only when your body is stable under the bar.
Execution (Step-by-Step)
- Begin from a still hang: Keep the arms long, shoulders active, and legs quiet under the body.
- Brace before lifting: Tighten the abs as if preparing for a controlled crunch. This reduces swinging.
- Drive the knees upward: Bend the knees and raise them toward the chest.
- Rotate the hips to one side: As the knees rise, guide them diagonally toward your right or left side.
- Squeeze at the top: Pause briefly when the knees reach their highest point. Focus on the side abs, not the hip flexors only.
- Lower with control: Slowly return the knees to the center as the legs move downward.
- Reset before repeating: Let the body become still again before the next rep or before switching sides.
Pro Tips & Common Mistakes
Pro Tips
- Think “knees to side ribs”: This cue helps you target the obliques instead of performing a straight knee raise.
- Use a slow lowering phase: The descent builds control and prevents the next rep from turning into a swing.
- Keep your shoulders packed: Active shoulders create a stronger base for the core to work from.
- Exhale near the top: Breathing out as the knees rise can help you contract the abs harder.
- Pause between reps: A short reset improves quality, especially when you are learning the movement.
- Train both sides evenly: Match the same number of clean reps on each side to avoid imbalance.
Common Mistakes
- Swinging the legs: Momentum reduces core tension and makes the exercise less effective.
- Pulling only with hip flexors: If the knees lift without a strong abdominal curl, the obliques receive less work.
- Relaxing the shoulders: A passive hang can irritate the shoulders and make the body unstable.
- Twisting too aggressively: Forcing rotation may stress the lower back. Keep the twist controlled and moderate.
- Dropping the legs quickly: A fast descent creates swing and reduces time under tension.
- Rushing alternating reps: Alternating sides too fast often turns the exercise into a momentum drill.
FAQ
What muscles does the Hanging Oblique Knee Raise work?
The main muscles are the obliques. However, the exercise also trains the rectus abdominis, hip flexors, transverse abdominis, forearms, lats, and shoulder stabilizers. Because you are hanging, your grip and upper body must stabilize the movement while your core lifts and rotates the knees.
Is the Hanging Oblique Knee Raise good for abs?
Yes. It is an effective abs exercise because it combines knee lifting, pelvic control, and side-body rotation. In addition, the hanging position increases the stability demand. As a result, it can build strong abs and obliques when performed with strict form.
Should beginners do this exercise?
Beginners can try a smaller range of motion, but the full version is usually better for intermediate trainees. If hanging strength is limited, start with lying oblique knee raises, captain’s chair knee raises, or standard hanging knee raises first. Then, progress to the oblique variation once you can control the swing.
How do I stop swinging during Hanging Oblique Knee Raises?
Start each rep from a still hang, brace before lifting, and lower the legs slowly. Also, avoid kicking the knees upward. If swinging continues, reduce your rep speed and pause for one or two seconds between repetitions.
Should I alternate sides or complete one side first?
Both methods work. Alternating sides is useful for rhythm and conditioning. On the other hand, completing all reps on one side first can improve focus and oblique tension. For strict strength work, one side at a time is often easier to control.
Why do I feel this more in my hip flexors than my obliques?
This usually happens when the knees lift without enough pelvic curl or side crunch. To fix it, exhale as the knees rise, slightly tuck the pelvis, and aim the knees toward the side ribs. Also, reduce the range until you can feel the obliques working.
Recommended Equipment
- Pull-Up Bar — essential for performing hanging oblique knee raises at home or in a gym setup.
- Power Tower / Dip Station — provides a stable station for hanging core exercises, pull-ups, and knee raise variations.
- Hanging Ab Straps — helpful if grip fatigue limits your core training before your abs are fully challenged.
- Liquid Chalk — improves grip security and reduces slipping during hanging exercises.
- Pull-Up Gloves / Grip Gloves — optional hand protection for longer hanging sets or high-volume core sessions.
Choose equipment that feels stable and secure. Most importantly, make sure your bar or station can support your body weight safely before performing any hanging core exercise.