Pull-In on Stability Ball: Core Form, Sets, Tips & FAQ
Learn the Pull-In on Stability Ball for stronger abs, better core control, and plank stability with step-by-step form, sets, tips, FAQs, and gear.
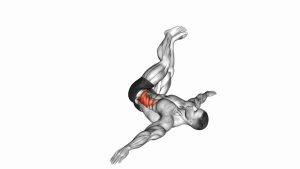
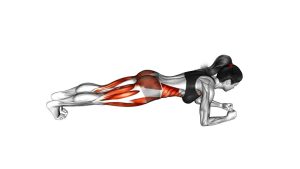
Pull-In on Stability Ball
The Pull-In on Stability Ball is more challenging than a basic floor plank because the ball creates an unstable surface. As a result, your abs must work harder to control the spine, pelvis, and lower body. In addition, your shoulders and arms help keep the upper body steady while your knees travel forward. This makes the exercise useful for athletes, gym trainees, and anyone who wants a stronger, more coordinated core.
However, the movement should stay smooth and controlled. You should feel strong abdominal tension as the knees pull in, but you should not feel sharp lower-back pain, wrist pressure, or shoulder collapse. Therefore, master the plank position first before adding speed, range, or extra repetitions.
Quick Overview
| Body Part | Core |
|---|---|
| Primary Muscle | Rectus abdominis |
| Secondary Muscle | Obliques, transverse abdominis, hip flexors, shoulders, chest, triceps, glutes |
| Equipment | Stability ball / Swiss ball / exercise ball |
| Difficulty | Intermediate |
Sets & Reps (By Goal)
- Core stability: 3 sets × 8–12 controlled reps, resting 45–75 seconds between sets.
- Ab strength: 3–4 sets × 10–15 reps with a slow return to plank.
- Beginner progression: 2–3 sets × 6–8 reps with short range and full control.
- Conditioning finisher: 2–3 rounds × 20–30 seconds, only if form stays clean.
Progression rule: First increase control and range of motion. Then add more reps. Finally, use slower tempo or longer sets once your plank position stays strong.
Setup / Starting Position
- Place the ball behind you: Set a stability ball on a non-slip floor with enough space around you.
- Get into a high plank: Place your hands on the floor about shoulder-width apart.
- Position your legs: Rest your shins or lower legs on top of the stability ball.
- Stack your shoulders: Keep shoulders directly over your wrists to protect your upper body position.
- Brace your core: Tighten your abs as if preparing for a plank hold.
- Set your body line: Keep your head, ribs, hips, knees, and ankles aligned before moving.
Tip: If the exercise feels too unstable, place the ball closer to your knees instead of your feet. This shortens the lever and makes the movement easier to control.
Execution (Step-by-Step)
- Start in a strong plank: Press your hands into the floor and keep your core tight.
- Pull the knees forward: Bend your knees and roll the ball toward your chest.
- Control the hips: Let your hips rise slightly, but do not turn the movement into a high pike.
- Squeeze the abs: Pause briefly when your knees are tucked under your body.
- Extend back slowly: Roll the ball back by straightening your legs under control.
- Return to plank: Finish with a straight body line before starting the next rep.
Pro Tips & Common Mistakes
- Move with control: The ball should roll smoothly, not bounce or shoot forward.
- Keep the core braced: Do not let the lower back sag during the return phase.
- Avoid rushing: Fast reps usually reduce abdominal tension and increase instability.
- Keep your neck neutral: Look slightly ahead of your hands instead of lifting your head high.
- Do not collapse through the shoulders: Push the floor away to keep the upper back active.
- Use the right ball size: A ball that is too large or too small can make your plank harder to control.
- Shorten the range if needed: Pull the knees halfway in until your stability improves.
- Control the return: The eccentric phase builds strength, so do not let your legs snap back.
FAQ
What muscles does the Pull-In on Stability Ball work?
The exercise mainly works the rectus abdominis. However, it also trains the obliques, transverse abdominis, hip flexors, shoulders, chest, triceps, and glutes because your body must stabilize against the moving ball.
Is the Pull-In on Stability Ball good for lower abs?
Yes. The knee-tuck motion strongly challenges the lower portion of the abs, especially when you control the ball and avoid swinging. Still, the whole core works together, so think of it as a full-core stability exercise.
Is this exercise beginner-friendly?
It is better for intermediate trainees because it requires plank strength and balance. Beginners can start with regular planks, mountain climbers, or a short-range stability ball tuck before using the full movement.
Why does my lower back hurt during this exercise?
Lower-back discomfort often happens when the hips sag, the abs relax, or the ball rolls too far back. To fix it, shorten the range, brace harder, and reset your plank after every rep.
How do I make the Pull-In on Stability Ball harder?
You can slow down the return phase, pause longer at the tucked position, place the ball closer to your feet, or progress to stability ball pikes. However, only progress when your plank stays controlled.
Recommended Equipment
- Stability Ball / Swiss Ball — the main tool needed for pull-ins, knee tucks, planks, and core stability drills.
- Anti-Burst Exercise Ball — a safer option for dynamic bodyweight core exercises.
- Non-Slip Exercise Mat — helps protect the hands and keeps your body stable during floor-based core work.
- Push-Up Handles — useful if wrist extension feels uncomfortable during high-plank exercises.
- Core Sliders — a great alternative for practicing knee tucks before progressing to the stability ball.
Tip: Choose a stability ball that allows you to hold a strong plank without excessive wobbling. Better control gives you better abdominal tension and safer reps.