Assisted Side Bent: Form, Benefits, Sets, Tips & FAQ
Learn the Assisted Side Bent stretch for obliques, lats, and side-body mobility. Includes setup, step-by-step form, sets, mistakes, FAQs, and equipment.
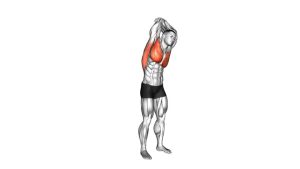
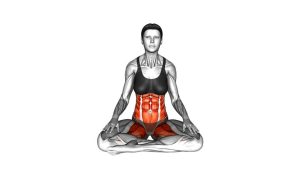
Assisted Side Bent
This exercise is best used as a gentle mobility drill before core training, upper-body workouts, posture sessions, or full-body stretching routines. Because the movement targets the side body, it can help improve rib-cage freedom, trunk control, and comfort during overhead reaching. However, the stretch should always feel spacious and controlled, not sharp or compressed.
Quick Overview
| Body Part | Core |
|---|---|
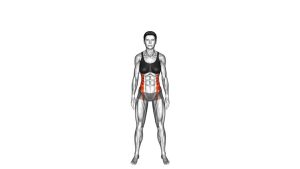
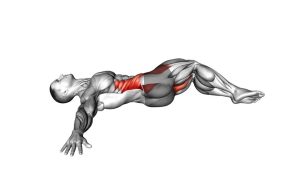
| Primary Muscle | Obliques |
| Secondary Muscle | Latissimus dorsi, intercostals, quadratus lumborum, deep trunk stabilizers |
| Equipment | Bodyweight; optional wall, chair, stretching strap, or support bar |
| Difficulty | Beginner |
Sets & Reps (By Goal)
- General flexibility: 2–3 sets of 20–30 seconds per side.
- Warm-up mobility: 1–2 sets of 6–10 slow reps per side.
- Posture reset: 1–3 sets of 15–25 seconds per side during desk breaks.
- Core recovery: 2 sets of 30–45 seconds per side after training.
- Beginner control practice: 2 sets of 5–8 slow reps per side with a short pause at the end range.
Progression rule: First improve breathing and smooth control. Then, increase hold time gradually. Do not chase a deeper bend if your hips shift, shoulders shrug, or torso twists.
Setup / Starting Position
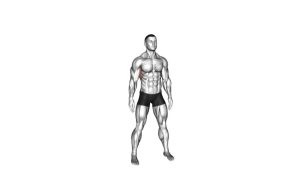
- Stand tall: Place your feet about hip-width to shoulder-width apart. Keep both feet fully grounded.
- Brace lightly: Gently tighten the lower abdomen without holding your breath.
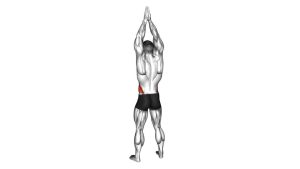
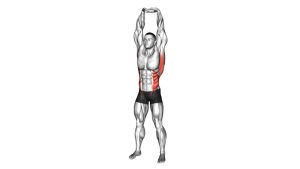
- Raise one arm: Reach one arm overhead while keeping the shoulder relaxed and the elbow softly extended.
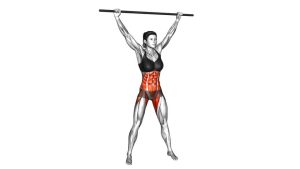
- Use assistance: Place the opposite hand on your hip, thigh, chair, wall, or support bar for balance.
- Stack the body: Keep the chest open, ribs controlled, and head aligned with the spine.
- Prepare to lean: Before bending, inhale slowly and create length through the raised side of the body.
A stable starting position makes the stretch cleaner. If balance feels difficult, perform the exercise beside a wall or hold a secure object lightly.
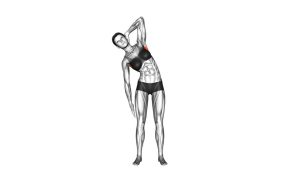
Execution (Step-by-Step)
- Begin from neutral: Stand upright with your spine long and your shoulders relaxed.
- Reach upward first: Lengthen through the raised arm before you move sideways.
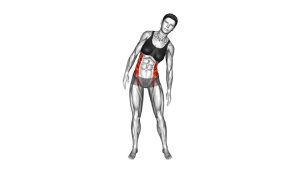
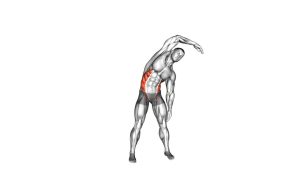
- Bend to the side: Slowly lean away from the raised arm, allowing the side body to lengthen.
- Keep the hips stable: Avoid pushing the hips too far in the opposite direction. A small counter-shift is normal, but it should not dominate the movement.
- Avoid rotation: Keep your chest facing forward. Do not twist toward the floor or open excessively toward the ceiling.
- Pause and breathe: Hold the comfortable end position while taking slow breaths into the ribs.
- Return with control: Use your core to bring the torso back to center without bouncing.
- Reset posture: Lower the arm, relax the shoulders, and repeat on the opposite side.
Pro Tips & Common Mistakes
- Reach before you bend: Lengthening upward first helps create a cleaner side-body stretch.
- Keep the movement slow: A controlled lean improves mobility more safely than a fast drop into range.
- Breathe into the ribs: Slow breathing helps the intercostals and obliques relax into the stretch.
- Do not collapse the waist: The goal is a long arc, not a sharp crunch on one side.
- Avoid shoulder shrugging: Keep the raised shoulder away from the ear as much as possible.
- Limit hip drifting: Excessive hip movement can turn the drill into compensation instead of trunk mobility.
- Stay in one plane: Side bending should not become twisting or leaning forward.
- Use light assistance: Support should improve balance and control, not force the body deeper.
FAQ
What muscles does the Assisted Side Bent stretch?
The Assisted Side Bent mainly stretches the obliques, latissimus dorsi, and intercostals. It may also involve the quadratus lumborum and other deep trunk stabilizers, especially when you control the return to center.
Is the Assisted Side Bent good for beginners?
Yes. This exercise is beginner-friendly because it uses bodyweight and a small range of motion. Beginners should move slowly, keep the bend comfortable, and use a wall or chair for balance when needed.
Should I feel this stretch in my lower back?
You may feel mild lengthening near the side of the lower back. However, sharp pain, pinching, or pressure in the spine means the range is too deep or the position is not controlled. Reduce the bend and reach taller.
Can I do the Assisted Side Bent every day?
Many people can perform it daily at low intensity. For best results, use 1–3 short sets per side and focus on smooth breathing. If soreness or irritation appears, reduce the frequency and range.
Is this exercise a stretch or a core exercise?
It is mainly a mobility and flexibility drill. Still, the core works lightly because the torso must control the side bend and return to the starting position without collapsing.
What is the biggest mistake during the Assisted Side Bent?
The most common mistake is bending too far without control. This often causes the hips to shift too much, the torso to twist, or the lower back to compress. A smaller, cleaner bend is usually more effective.
Recommended Equipment (Optional)
- Yoga Mat — useful for comfortable stretching, warm-ups, and floor-based mobility sessions.
- Stretching Strap — helps with assisted mobility drills and controlled range practice.
- Foam Roller — helpful for warming up the lats, upper back, and side body before stretching.
- Massage Ball Set — supports soft-tissue release around the lats, hips, and back before mobility work.
- Exercise Support Bar — provides balance support for assisted standing stretches and controlled mobility drills.
Choose equipment that improves comfort and control. Avoid any tool that forces the stretch or makes the movement painful.