Half Sit-Up Exercise: Proper Form, Core Benefits, Sets, Tips & FAQ
Learn the Half Sit-Up for stronger abs, better core control, and safer trunk flexion. Includes form steps, sets, mistakes, FAQs, and equipment.
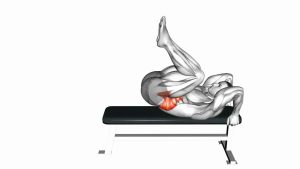
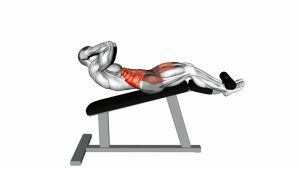
Half Sit-Up
The Half Sit-Up is useful for beginners who need a stronger foundation before full sit-ups. It also works well for lifters who want a simple bodyweight core drill that can be done at home, in the gym, or during a warm-up. Because the range is shorter than a full sit-up, the movement allows you to focus on clean spinal flexion, steady breathing, and controlled abdominal tension. However, the exercise should still feel smooth and deliberate. If your hips pull hard, your lower back arches, or your neck strains, reduce the range and slow the tempo.
Quick Overview
| Body Part | Core |
|---|---|
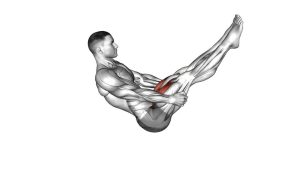
| Primary Muscle | Rectus abdominis |
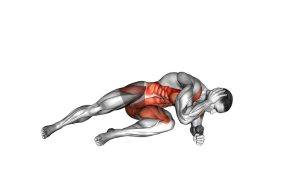
| Secondary Muscle | Obliques, transverse abdominis, hip flexors, deep core stabilizers |
| Equipment | No equipment required; optional exercise mat |
| Difficulty | Beginner to intermediate, depending on tempo and range of motion |
Sets & Reps (By Goal)
- Beginner core control: 2–3 sets of 8–12 reps with a slow, clean tempo.
- Muscle endurance: 3–4 sets of 12–20 reps while keeping each rep controlled.
- Abdominal strength: 3–5 sets of 8–15 reps with a 1–2 second pause near the top.
- Warm-up activation: 1–2 sets of 8–10 reps before lower-body training or core workouts.
- Home workout finisher: 2–4 rounds of 15–25 reps, resting 30–45 seconds between rounds.
Progression rule: First improve control, then add reps. After that, increase the pause time or slow the lowering phase. Avoid rushing into higher volume if your neck, hips, or lower back start taking over.
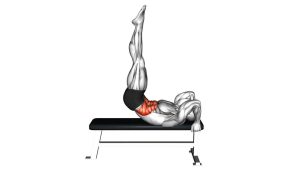
Setup / Starting Position
- Lie on your back: Use a mat if needed. Keep your spine comfortable and your head relaxed.
- Bend your knees: Place both feet flat on the floor about hip-width apart. Keep the feet steady throughout the rep.
- Position your arms: Cross your arms over your chest, reach them forward, or keep your hands lightly near your thighs.
- Set your neck: Slightly tuck the chin, as if holding a small space between your chin and chest.
- Brace your core: Gently tighten your abs before lifting. Your ribs should move down slightly instead of flaring upward.
- Keep the pelvis stable: Avoid excessive lower-back arching. The goal is a controlled curl, not a fast throw upward.
If you are learning the exercise, reaching the arms forward can make the movement easier to coordinate. Once your form improves, crossing the arms over the chest can make the exercise slightly harder.
Execution (Step-by-Step)
- Start with a breath: Inhale gently while lying on your back. Then, brace your core as if preparing for a controlled curl.
- Lift the head and shoulders: Curl your upper body off the floor. Move slowly, and allow the shoulder blades to peel away from the mat.
- Rise halfway: Continue lifting until your torso reaches a partial sit-up position. For most people, this is around a 30–45 degree torso angle.
- Keep the abs tight: Pause briefly near the top. During this pause, keep your feet planted and avoid pulling through the neck.
- Lower with control: Slowly roll your upper back down toward the floor. Do not collapse or drop suddenly.
- Reset softly: Return to the starting position with control. After that, begin the next repetition only when your core is ready.
Pro Tips & Common Mistakes
- Use your abs, not momentum: Avoid swinging the arms or bouncing off the floor. A slower rep creates better core tension and safer control.
- Do not turn it into a full sit-up: Stop at the halfway point. This keeps the exercise focused and prevents the hips from dominating the movement.
- Keep the chin slightly tucked: Your neck should follow the torso naturally. However, do not jam the chin into the chest.
- Control the descent: The lowering phase builds strength too. Therefore, avoid dropping back quickly after the top position.
- Keep the feet grounded: If your feet lift, you may be using too much speed. Reduce the range and focus on a clean curl.
- Avoid excessive hip flexor pull: Some hip flexor activity is normal. Still, the main effort should stay in the abdominal wall.
- Breathe through the movement: Exhale as you lift and inhale as you lower. This helps your ribs stay down and your core stay organized.
- Choose the right hand position: Hands behind the head can cause pulling. For most beginners, arms crossed or reaching forward is safer and easier to control.
FAQ
What is the Half Sit-Up good for?
The Half Sit-Up strengthens the rectus abdominis and improves core control through a partial trunk-flexion range. It is especially useful for beginners, home workouts, and people who want a controlled alternative to full sit-ups.
Is a Half Sit-Up easier than a full sit-up?
Yes, it is usually easier because you do not rise all the way to a seated position. However, it can still feel challenging when performed slowly with a pause at the top.
Where should I feel the Half Sit-Up?
You should mainly feel it in the front of your abdomen. Some hip flexor involvement can happen, but the abs should remain the main working area.
Should I anchor my feet during Half Sit-Ups?
Anchoring the feet can make the movement feel easier, but it may also increase hip flexor involvement. For better abdominal control, start with feet unanchored and planted firmly on the floor.
Can beginners do Half Sit-Ups?
Yes. Beginners can use the Half Sit-Up because the range is shorter than a full sit-up. Even so, beginners should move slowly, avoid neck pulling, and stop before the lower back feels strained.
How is a Half Sit-Up different from a crunch?
A crunch usually lifts only the head, shoulders, and upper back. A Half Sit-Up rises slightly higher, creating more trunk flexion while still stopping before a full seated position.
Can Half Sit-Ups help build visible abs?
They can help strengthen and develop the abdominal muscles. However, visible abs also depend on overall training, nutrition, body-fat levels, and consistency.
Recommended Equipment
- Exercise Mat — adds comfort for your spine, tailbone, and shoulders during floor-based core work.
- Thick Yoga Mat — helpful if regular mats feel too thin during sit-ups and crunch variations.
- Ab Exercise Mat — supports the lower back and can improve comfort during repeated abdominal training.
- Non-Slip Workout Mat — helps keep your body stable when performing controlled floor exercises.
- Core Sliders — useful for pairing Half Sit-Ups with planks, mountain climbers, and other core drills.
Tip: Equipment is optional for this exercise. Still, a comfortable mat can improve consistency because it reduces pressure on the back and makes floor training easier to repeat.