Scissors Exercise: Advanced Core Form, Sets, Tips & FAQ
Learn the advanced Scissors exercise for abs, hip flexors, and core control. Includes setup, steps, sets, mistakes, FAQs, and gear.
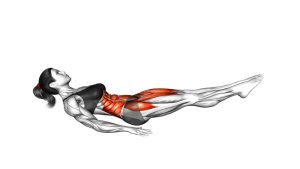
Scissors
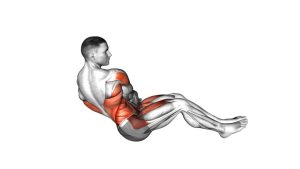
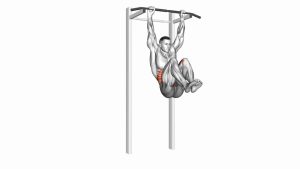
This exercise works best when you control the leg switch without letting your upper body rock. Since the body is slightly reclined and the hands support the position behind you, your core must resist movement while the legs alternate. As a result, the Scissors exercise becomes a strong choice for advanced ab training, lower-core endurance, and hip flexor control.
However, the movement should still feel precise. Keep the legs lifted, move through a moderate range, and avoid rushing the switch. If your lower back takes over or your legs start dropping toward the floor, reduce the range and slow the tempo.
Quick Overview
| Body Part | Abs |
|---|---|
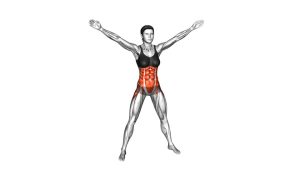
| Primary Muscle | Rectus abdominis, especially lower-ab control |
| Secondary Muscle | Hip flexors, transverse abdominis, obliques, and deep core stabilizers |
| Equipment | No equipment required; exercise mat optional |
| Difficulty | Advanced |
Sets & Reps (By Goal)
- Core endurance: 3–4 sets × 20–40 total switches with controlled breathing.
- Advanced ab strength: 3–5 sets × 12–24 slow switches with a 2–3 second lowering tempo.
- Conditioning finisher: 2–4 rounds × 20–30 seconds with 30–45 seconds rest.
- Form practice: 2–3 sets × 10–16 total switches using a smaller range and slower rhythm.
Progression rule: First improve control and range. Then, increase total switches or time under tension. Do not progress by swinging faster.
Setup / Starting Position
- Sit on the floor: Start seated with your torso slightly reclined and your chest open.
- Place your hands behind you: Keep your palms on the floor for support, with your arms mostly straight.
- Brace your core: Pull the ribs down slightly and keep your spine controlled before lifting the legs.
- Raise both legs: Lift both feet off the floor and extend the knees as much as your flexibility and control allow.
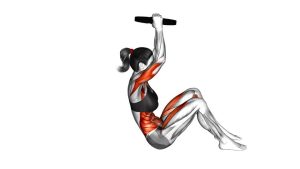
- Create the scissor shape: Position one leg higher and the other leg lower while keeping both feet elevated.
Keep your hands as support, not as the main driver. Your arms help stabilize your torso while your core controls the leg motion.
Execution (Step-by-Step)
- Start with control: Hold the reclined position and keep both legs hovering above the floor.
- Switch the legs: Lower the top leg while raising the bottom leg at the same time.
- Pass through the middle: Let both legs cross through the midpoint smoothly without kicking or jerking.
- Reverse the position: Finish with the opposite leg high and the other leg low.
- Continue alternating: Repeat the scissor pattern while keeping your torso stable and your feet off the ground.
- Control the finish: After the final switch, lower both legs carefully instead of dropping them.
Pro Tips & Common Mistakes
- Keep the legs elevated: The challenge comes from constant tension, so avoid resting the feet on the floor between switches.
- Use a controlled range: A moderate scissor range is better than a large swing that pulls your lower back out of position.
- Do not rush: Faster reps usually reduce ab control. Therefore, use a steady rhythm and smooth transitions.
- Avoid collapsing backward: Keep the chest lifted enough to maintain a strong, supported reclined posture.
- Keep the knees mostly straight: A slight bend is acceptable, but excessive bending changes the movement and reduces tension.
- Brace before switching: Set your core first, then move the legs. This helps prevent lower-back strain.
- Use your hands lightly: Your hands stabilize your body, but they should not push hard enough to replace core control.
- Reduce range when needed: If form breaks, shorten the leg path and rebuild clean control.
FAQ
What muscles do Scissors work?
Scissors mainly work the abs, especially the rectus abdominis during lower-body control. They also train the hip flexors, transverse abdominis, obliques, and other stabilizers that keep the torso steady.
Are Scissors the same as scissor kicks?
They are very similar. However, this advanced version uses a supported reclined position with both legs elevated and alternating vertically. The key point is controlled switching, not fast kicking.
Why do I feel this exercise in my hip flexors?
The hip flexors help lift and control the legs, so some hip-flexor work is normal. However, if your hips dominate completely, reduce the range, brace harder, and move more slowly.
Should my lower back hurt during Scissors?
No. Your abs should work hard, but your lower back should not feel sharp pain or heavy strain. If your back arches or discomfort appears, bend the knees slightly, shorten the range, or choose an easier core exercise.
How can I make Scissors easier?
You can make the exercise easier by bending the knees slightly, raising the lower leg higher from the floor, slowing the tempo, or reducing the number of switches per set.
How can I make Scissors harder?
To make the movement harder, slow the lowering phase, keep the legs straighter, increase time under tension, or perform longer sets without letting the feet touch the floor.
Recommended Equipment (Optional)
- Exercise Mat — provides floor comfort and helps support consistent core training.
- Thick Yoga Mat — adds cushioning for seated and reclined ab exercises.
- Adjustable Ankle Weights — optional advanced progression once form is fully controlled.
- Core Sliders — useful for adding other controlled ab and hip-flexor variations.
- Interval Timer — helps track timed sets, rest periods, and conditioning rounds.
Tip: Add equipment only after you can keep the torso stable, the legs controlled, and the feet elevated throughout the full set.