Standing One-Arm Circling: Shoulder Warm-Up, Mobility, Form, Sets & FAQ
Learn Standing One-Arm Circling (arm circles) to warm up shoulders, improve mobility, and activate the rotator cuff. Step-by-step form, sets by goal, tips, mistakes, FAQs, and recommended gear.
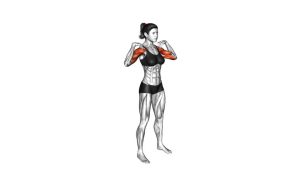
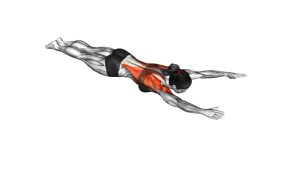
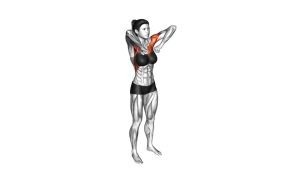
Standing One-Arm Circling (Arm Circles)
This exercise works best with slow tempo and consistent range. You should feel light-to-moderate effort around the shoulder, not pinching in the front of the joint. Keep the torso still and let the shoulder do the work—this is a control drill, not a momentum drill.
Quick Overview
| Body Part | Shoulders |
|---|---|
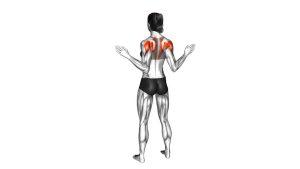
| Primary Muscle | Deltoids (anterior & lateral emphasis) |
| Secondary Muscle | Rotator cuff, serratus anterior, mid/lower traps (stabilizers) |
| Equipment | None (optional: light dumbbell or mini band for progression) |
| Difficulty | Beginner (excellent warm-up, mobility, and prehab) |
Sets & Reps (By Goal)
- Warm-up (before upper body): 1–3 sets × 10–20 circles each direction per arm (easy effort)
- Mobility / shoulder health: 2–4 sets × 15–30 circles each direction (steady tempo, minimal rest)
- Prehab / rotator cuff activation: 2–3 sets × 8–15 circles each direction (slow, controlled, small-to-medium circles)
- Endurance finisher (light): 1–2 sets × 30–45 seconds each direction (only if form stays perfect)
Progression rule: Add reps/time first. Then increase circle size slightly. Only add load (very light) if you can stay smooth and pain-free.
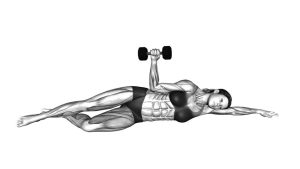
Setup / Starting Position
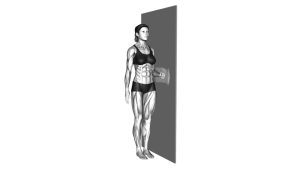
- Stand tall: Feet hip-width, knees soft, glutes lightly engaged.
- Brace gently: Ribs down, core on—avoid low-back arching.
- Set the shoulder: Think “shoulder down and wide,” not shrugged up.
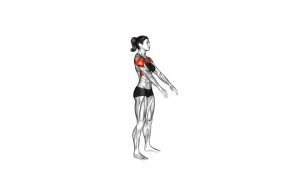
- Arm position: Raise one arm slightly out to the side (about shoulder height) with a soft elbow (not locked).
- Neutral wrist: Keep the hand relaxed—don’t flick the wrist to fake range.
Tip: If you tend to shrug, perform circles in front of a mirror and cue “long neck.”
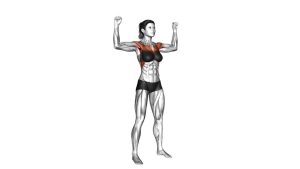
Execution (Step-by-Step)
- Start the circle: Begin moving the arm in a small, smooth circle from the shoulder.
- Control the path: Keep the torso still—no leaning, twisting, or rib flare.
- Maintain shoulder position: Don’t hike the shoulder toward your ear as fatigue builds.
- Breathe: Steady breathing helps keep the neck/jaw relaxed.
- Switch directions: After your reps/time, reverse the circle direction and repeat.
- Swap arms: Repeat the same sequence on the other side.
Pro Tips & Common Mistakes
- Go slow: Fast circles usually turn into swinging and reduce shoulder control.
- Keep the torso quiet: No side bending or twisting to “help” the arm.
- Don’t shrug: Shoulder creeping up is the #1 sign you should reduce range or reps.
- Use the right circle size: Start small; increase only if there’s no pinching.
- Soft elbow, neutral wrist: Avoid bending/straightening the elbow to cheat the circle.
- Match both sides: If one shoulder feels tighter, keep that side smaller and cleaner.
FAQ
Where should I feel standing one-arm circles?
Mostly around the shoulder cap (deltoids) with a mild “warming” sensation through the rotator cuff and shoulder blade stabilizers. You should not feel sharp pinching in the front of the joint.
Should I do large circles or small circles?
Start with small-to-medium circles and perfect control. Larger circles are fine only if they stay smooth and pain-free. When in doubt, smaller circles are safer and often more effective for activation.
How fast should I move?
Use a steady, slow tempo. If you can’t keep your torso still or your shoulder starts shrugging, slow down and reduce range.
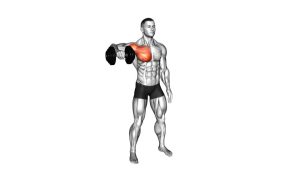
Can I add weight?
Yes, but only very light (often 0.5–2 kg / 1–5 lb) and only if your circles stay controlled with no joint discomfort. Many people get great results with bodyweight only.
What if I feel clicking or popping?
Occasional painless clicking can happen, but if it’s painful or feels like pinching, reduce circle size, slow down, and focus on keeping the shoulder down and stable. If symptoms persist, consider professional guidance.
Recommended Equipment (Optional)
- Light Dumbbells (1–5 lb) — easy way to progress circles without losing control
- Mini Resistance Bands Set — adds gentle shoulder activation and scapular control work
- Resistance Bands with Handles — perfect for pairing with external rotations and face-pull variations
- Foam Roller — useful for upper-back mobility to improve shoulder mechanics
- Massage Ball (Lacrosse Ball Style) — helps release tight pecs/rear shoulder to support smoother circles
Tip: Keep equipment optional—this drill is most effective when it stays smooth, pain-free, and controlled.