Reverse Lunge to Front Kick: Form, Muscles, Sets, Tips & FAQ
Learn the Reverse Lunge to Front Kick for stronger legs, better balance, glute activation, and athletic control with form tips, sets, FAQs, and gear.
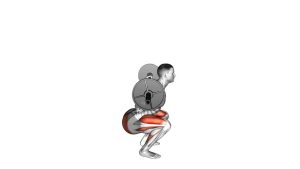
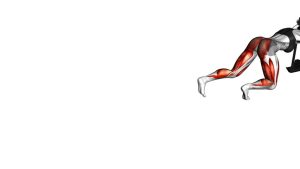
Reverse Lunge to Front Kick
This exercise is useful for building single-leg strength, improving lower-body coordination, and adding a conditioning element to bodyweight workouts. Because the movement changes from a reverse lunge into a front kick, it also challenges core stability, ankle control, and hip flexor activation. Keep the movement clean and controlled before increasing speed.
Quick Overview
| Body Part | Legs |
|---|---|
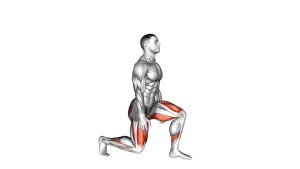
| Primary Muscle | Quadriceps and glutes |
| Secondary Muscle | Hamstrings, hip flexors, calves, core stabilizers |
| Equipment | No equipment required |
| Difficulty | Beginner to Intermediate |
Sets & Reps (By Goal)
- Beginner control: 2–3 sets × 6–8 reps per side with a low kick and slow tempo.
- Strength and balance: 3–4 sets × 8–12 reps per side with a full controlled lunge.
- Conditioning: 3–5 rounds × 30–45 seconds per side with steady rhythm and clean posture.
- Warm-up activation: 1–2 sets × 6–10 reps per side before leg training or athletic drills.
Progression rule: First improve balance and depth. Then increase reps, tempo, or range of motion. Do not increase speed until your knee alignment and landing control are consistent.
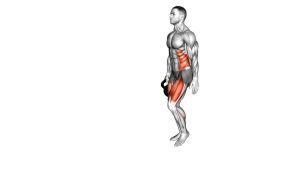
Setup / Starting Position
- Stand tall: Place your feet about hip-width apart with your chest lifted and core lightly braced.
- Set your gaze: Look forward at one fixed point to improve balance during the kick phase.
- Prepare your arms: Keep your hands near your chest or move your arms naturally for balance.
- Load evenly: Keep your weight centered before stepping back into the reverse lunge.
- Create space: Make sure you have enough room behind you for the lunge and in front of you for the kick.
Tip: If balance is difficult, perform the exercise near a wall or stable object and use light fingertip support when needed.
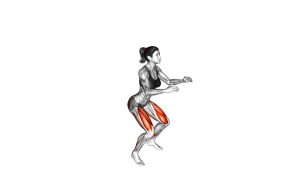
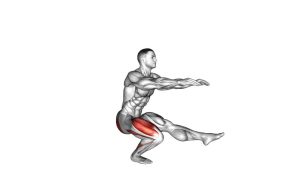
Execution (Step-by-Step)
- Step backward: Move one leg behind you and land softly on the ball of the rear foot.
- Lower into the lunge: Bend both knees and drop your hips down while keeping your torso upright.
- Control the bottom: Keep the front foot flat, the front knee aligned with the toes, and the back knee close to the floor.
- Drive through the front leg: Push into the floor with your front heel and midfoot to return upward.
- Swing the rear leg forward: Bring the back leg forward into a controlled front kick or knee-to-kick motion.
- Brace during the kick: Keep your core tight so the torso does not lean back excessively.
- Return with control: Lower the kicking leg back to the starting position and reset before the next repetition.
Pro Tips & Common Mistakes
- Keep the front knee stable: Do not let it collapse inward as you lower or stand up.
- Do not rush the kick: A fast kick with poor balance reduces training quality.
- Use the front leg to stand: Avoid pushing too much from the back foot.
- Stay tall: Do not fold forward during the lunge or lean far backward during the kick.
- Control the landing: Place the foot down softly after each kick instead of dropping it heavily.
- Start with a low kick: Height is less important than control, posture, and balance.
- Breathe with rhythm: Inhale as you lower, exhale as you drive up and kick.
FAQ
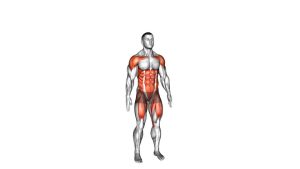
What muscles does the Reverse Lunge to Front Kick work?
It mainly works the quadriceps and glutes. It also trains the hamstrings, hip flexors, calves, and core because you must stabilize your body while moving from a lunge into a kick.
Is the Reverse Lunge to Front Kick good for beginners?
Yes, beginners can use it if they start with a small reverse lunge and a low front kick. The most important goal is smooth control, not kick height or speed.
Should I alternate legs or finish one side first?
Both options work. Alternating legs is better for conditioning and coordination. Finishing one side first is better for strength, balance practice, and muscle focus.
How high should I kick?
Kick only as high as you can while keeping your torso controlled and your standing leg stable. A low, clean kick is better than a high kick with poor posture.
Why do I lose balance during the front kick?
Balance usually breaks when the lunge is rushed, the core is relaxed, or the kick is too high. Slow the movement down, reduce kick height, and focus on driving through the front foot.
Can this exercise help with fat loss?
It can support fat-loss training because it uses large lower-body muscles and raises workout intensity. For best results, combine it with a structured strength plan, conditioning, and proper nutrition.
Recommended Equipment (Optional)
- Exercise Mat — provides comfort and traction for home lower-body training.
- Non-Slip Training Shoes — helps improve foot stability during lunges and kicks.
- Resistance Bands Set — useful for adding glute activation drills before lunges.
- Adjustable Ankle Weights — optional progression for the kick phase when bodyweight control is strong.
- Balance Pad — advanced tool for improving ankle stability and single-leg control.
Tip: Add equipment only after you can perform the bodyweight version with stable knees, smooth balance, and controlled kick height.